How to Add Google Maps Using Elementor? (6 Easy Steps)
Want to know how you can add Google Maps in Elementor to give instant access to your users with just one click? This blog is solely for you!
With rich geospatial data, real-time route optimization, and interactive experience, Google Maps can help your website attract more customers online and as well as offline modes. Google Maps gives your website an engaging yet valuable feature. This is a kind of Google Maps marketing where the function of Google Maps is to make your business easier to find.
Adding a Google map in Elementor is no tough job. Elementor has various advanced features for styling and customizing your website. With just a few clicks, you can increase your engagement and click-up rates. Adding Elementor Google Maps can change the dynamic of your website and can optimize it.
In this blog, we will show you how you can easily add Google Maps to WordPress.
Types of Google Map
1. Road Map
The road map is the most basic version of the map. It is a normal and general map that helps us to see and navigate routes easily. It has features to mark the place, voice navigation, and more. The road map is the simplest and easiest way to find out routes, and locations and even to make your route.
2. Satellite Map
The satellite view gives you an imaginary view of the place from the satellite. These maps are more realistic. They are specific and reliable that show us the best possible view of the location. It gives us a real image of our location which makes it easy for us to find the location.
3. Terrain Map
The terrain map helps us find the terrain and mountains in a specific area. The terrains and mountains are of stone color or brown color which gives them a realistic view and helps them to identify easily. This is useful to almost every individual and supports all the features of Google Maps.

Why You Should Add Google Maps to WordPress?
1. Built Trust With Customers
Adding a Google map is one of the important steps in humanizing your brand. Adding a Google map’s street view helps your brand to put a face on your business. When you put Google Maps on your webpage, you are showing your customers about your existence and not telling them. This can help you open the doors for more engagement.
2. Helps With the Research Process
Most of your customers might have done research online before they visited your offline store. They might want to know your brand inside out. Google Maps on your website help your customer do a virtual tour of your brand before they come and visit. By providing Google Maps, you are demonstrating the quality of your business and showing your customers that your brand does care about their experience.
3. Better Access to the Target Audience
Google Maps help you to establish a better connection with the target audience. Your target audience can easily find you through Google Maps. It also helps your brand to attract local users too. Most of the time when a user searches for something, they tend to find the nearest brand. A Google map on a webpage can help you with SEO and you can make up users’ screens.
4. Helps in Decision Making
When you humanize your brand with Google Maps, you are giving it more credibility. When your customer sees a Google map, they get to know that your brand is legit and it helps them in decision-making that inclines towards your profit. They will be more relaxed about the fact that your brand is legit rather than a scam.
5. Convenient and Comfortable Experience
The feature of Google Maps is helpful when someone is planning to visit your store and wants to check the traffic. This way they can plan their visit and time, helping them with an inconvenient and comfortable experience. With the street view option, your users can see what your store and your surroundings are like.
How to Add Google Maps to WordPress Using Elementor?
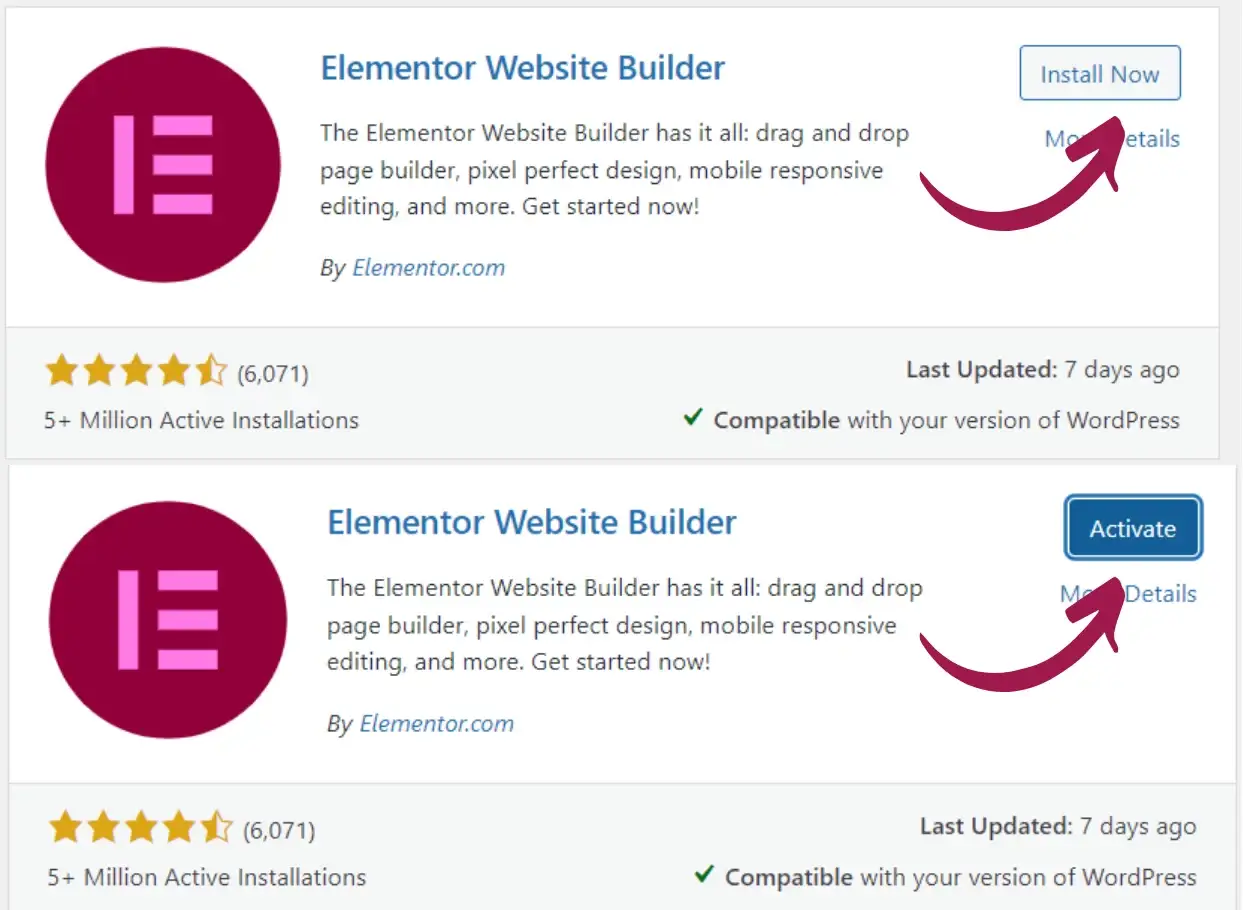
Step 1: Install the Plugin
Go to the “Plugins” option on the WordPress interface and click on “Add New”. Search for the “Elementor” plugin in the search field. Download and install the plugin on your WordPress site.
Step 2: Add Google Maps
To add Google Maps to your webpage, select “Edit with Elementor”. After that, you will land on the Elementor interface. First, let’s change the canvas of the interface. For that, go to the settings icon on the bottom-left of the interface and change the page layout to “Elementor Canvas”.
Select the structure for your page. For that, simply click on the add new section icon and select the structure according to your preferences.
Now, Elementor has a lot of useful widgets to make your work even easier. They also have Google Maps widgets to add Google Maps to your website. To embed the Google Map widget, simply go to the Widgets panel and search “Google Maps”. Drag and drop the Elementor map widget into your structure. And there you will have your Google Maps on your website.
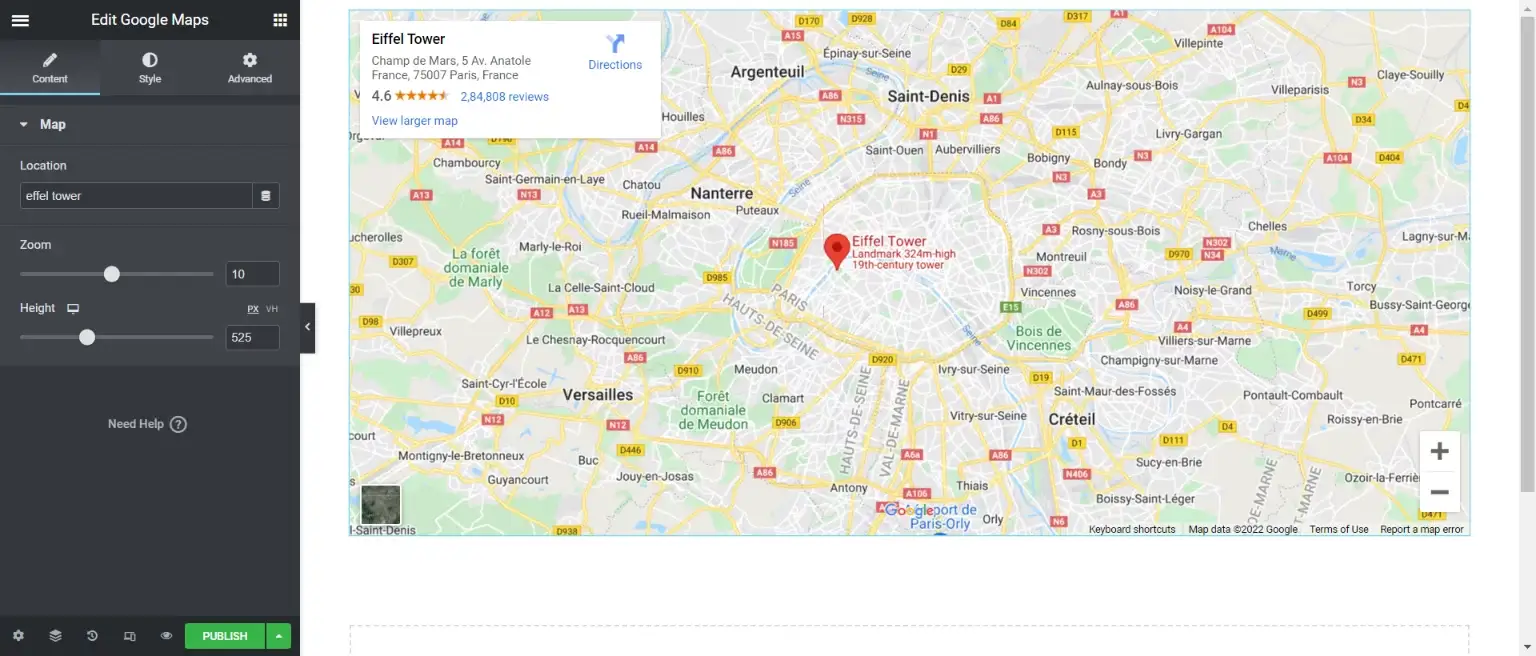
Step 3: Edit the Location
To place the location of the map, go to the “Location” under the “Content” section. Search for the location of your store in the search field. You can also zoom in or out of the map by adjusting the “Zoom” slider. The “Height” slider allows you to make the map longer or shorter.
Step 4: Style the Map
Elementor offers you two options to style your map which are “Normal” and “Hover”. Edit the CSS filter and style the map in a way that inclines toward your website design.

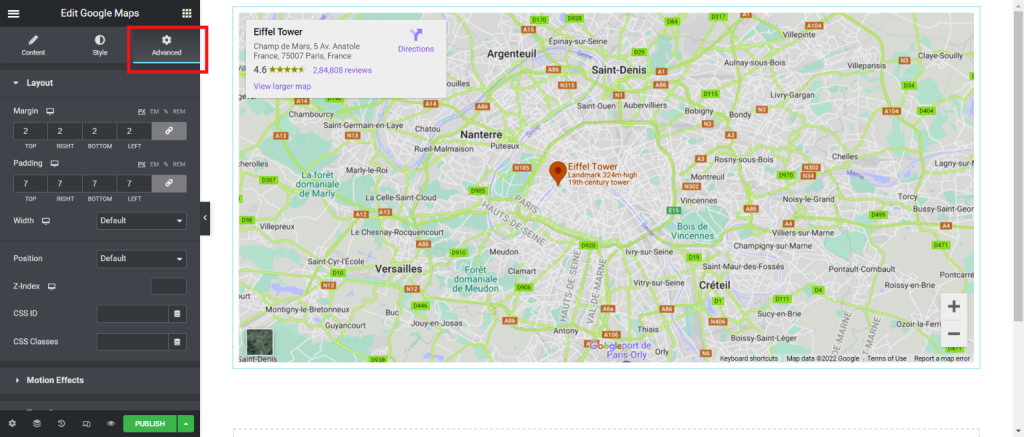
Step 5: Advanced Settings
The “Advanced” tab offers you advanced customization features to level up your Google map on the website. It has features to adjust the layout, add motions, change the background, edit borders, and much more.
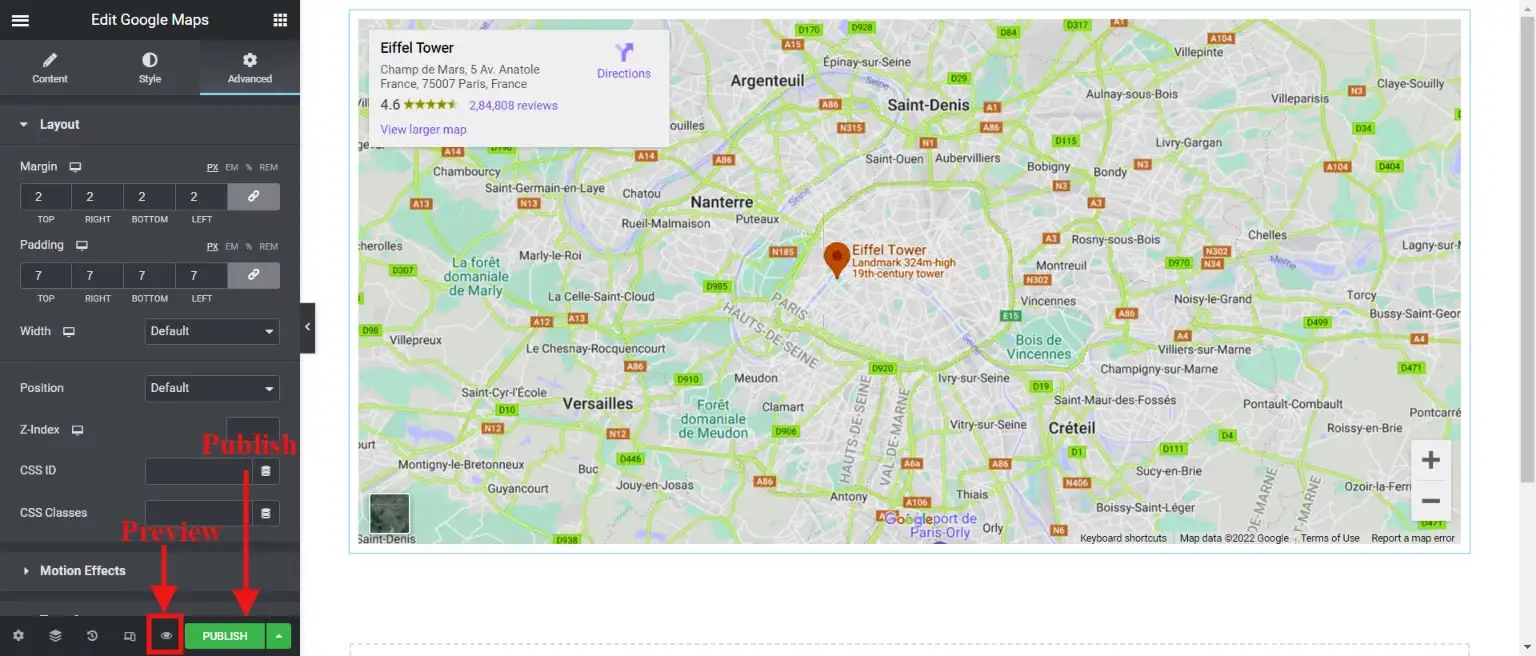
Step 6: Preview and Publish
Once done with all the basic and necessary edits, preview the result. For that, you will find a button on the bottom left side of the interface. Click it and preview the map to know if it has come up just the way you want. If not, you can always go back and make the changes. If satisfied with the preview, click on the “Publish” button to publish your content on the website.
And there your Google map will be live on your website.
Wrapping Up
The core idea behind adding Google Maps to the website and to make your customers feel more comfortable about your brand and to let them know that your brand is legit and not spam. Giving your users a visual representation of your business and activities happening nearby can help in interactive content.
Adding Google Maps in Elementor gives you access to various customizable and advanced features. Level up your Google Maps section by creating Google Maps in Elementor. It has an easy-to-use interface which makes it very simple for users and even new beginners to add Google Maps to Elementor.
Also, try- Just Hyre
If you are facing any issues in plugin installation or SEO or any bug, you can hire WordPress engineers for help. Just Hyre understands your requirements and provides speedy and bug-free delivery. It offers you a wide range of services regarding SEO, design, development, and much more.
If you like this blog, also read, How to Add Mailchimp to WordPress – 2 Simple Ways to Boost Your Email Marketing


Stuck Somewhere?
Connect With JustHyre
Hire WordPress Engineers for custom jobs like Website Customization, SEO Optimization, Clearing a Hacked Website, Installation & Configuration & more.
Connnect with JustHyre
0 Comments