How To Add A Contact Form In WordPress? (9 Easy Steps)
This is a step-by-step guide to adding a contact form in WordPress. You can add a contact form in WordPress in any post, page, or Widget ready area of the site. Contact Forms allow a user to connect or communicate with a visited site. A Contact Form is a pre-formatted page with some fields like visitor’s name, comment box, etc. to edit by a site visitor and this information is sent to the site owner automatically by Email.
By default, WordPress doesn’t provide any pre-loaded or in-built Contact Form. Several Plugins are available in WordPress Plugins Directory to add a Contact Form to WordPress Site. Here we are using a Plugin WPForms to show how to add a Contact Form to a WordPress site.

Add A Contact Form In WordPress Using WPForms Plugin
Step 1: Search The Plugin.
WPForms is a WordPress contact form plugin. Search Result For WPForms Plugin.
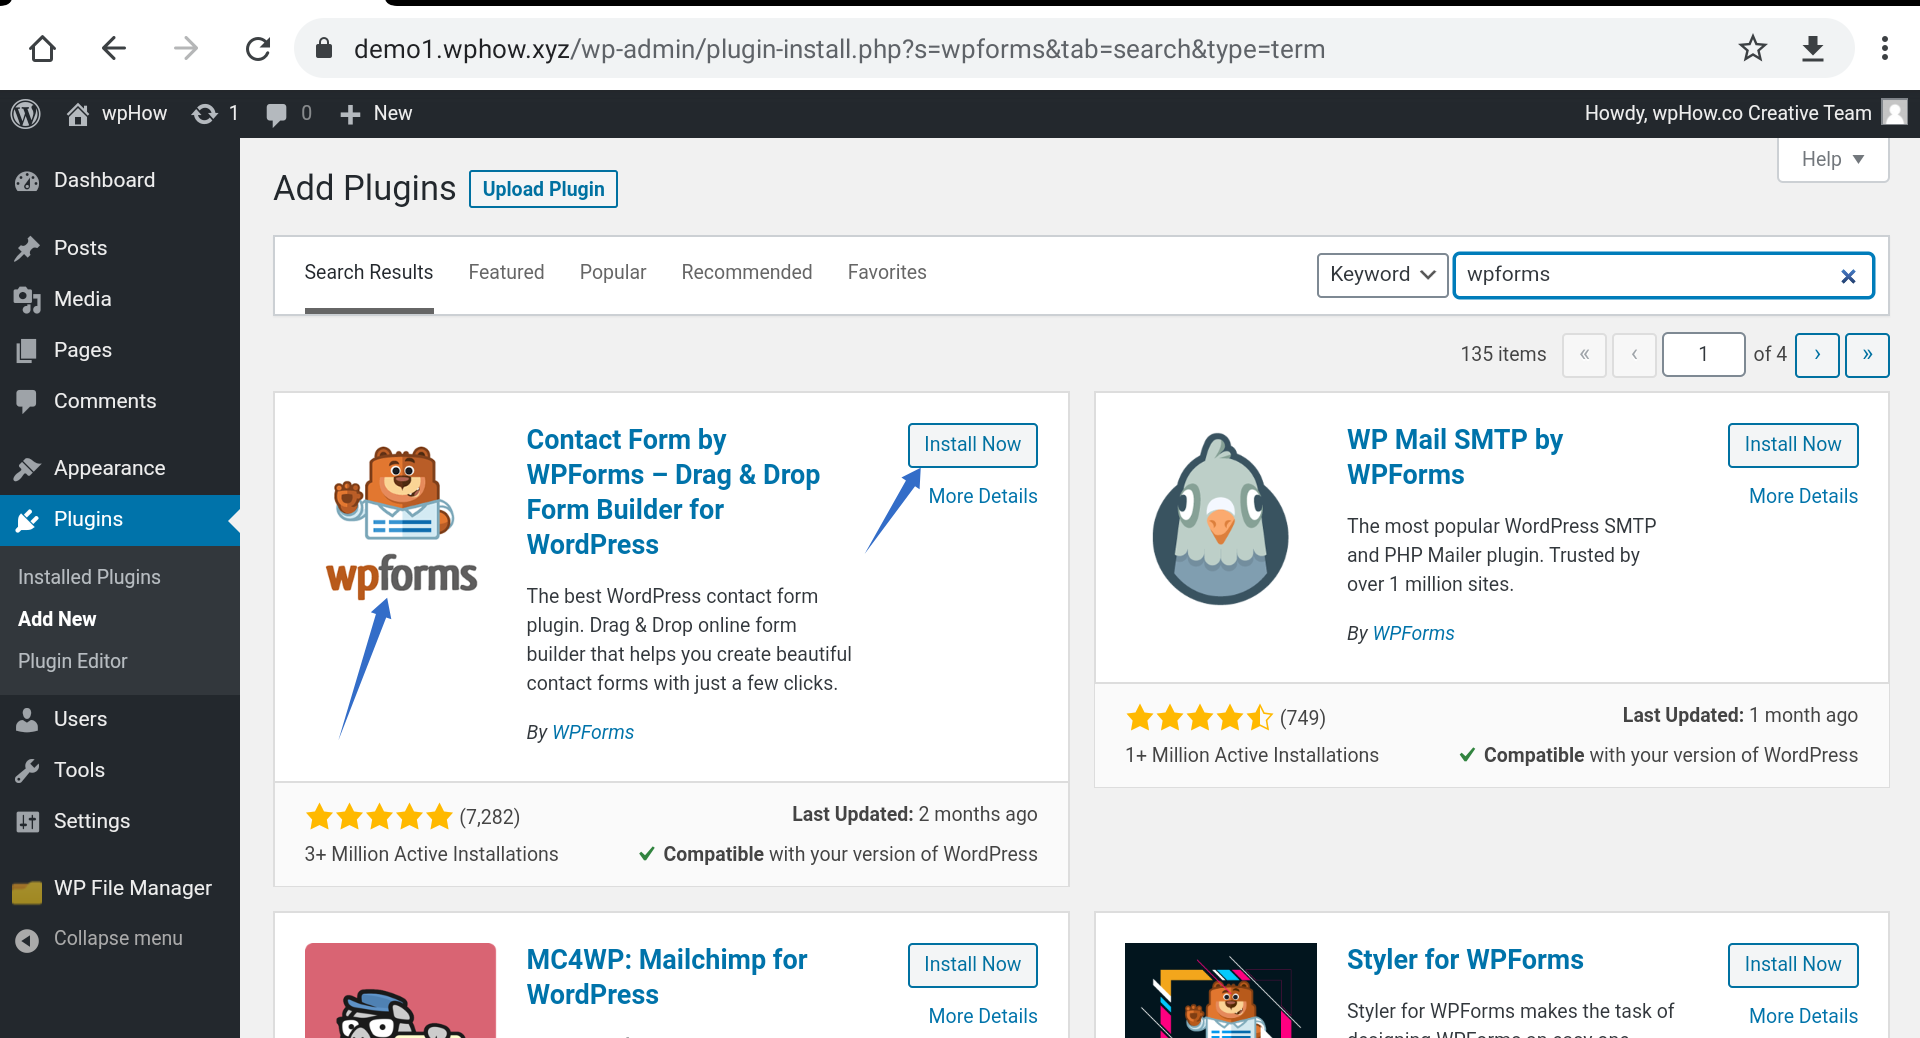
Step 2: Install It.
By clicking on Install Now button, the Plugin will get installed on your WordPress site. Now it’s time to activate the Plugin.
Step 3: Activate the Plugin.
Dashboard >> Plugins >> Installed Plugins.
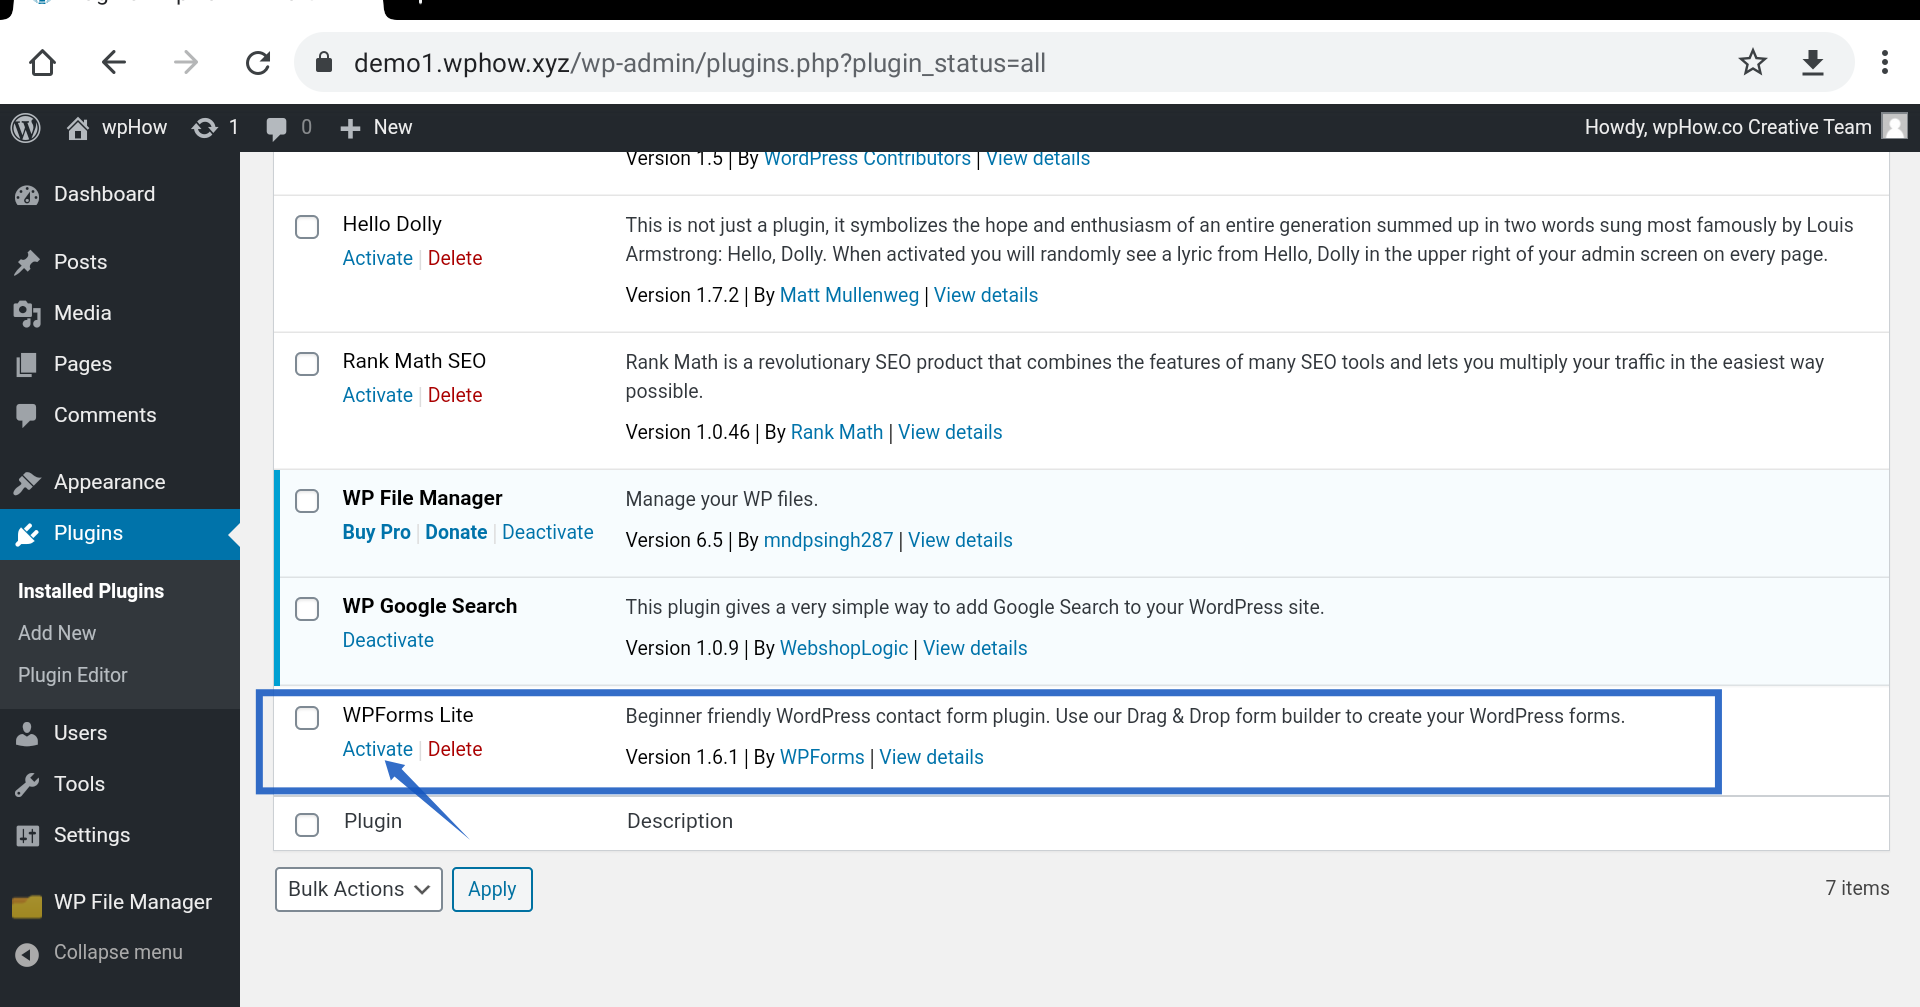
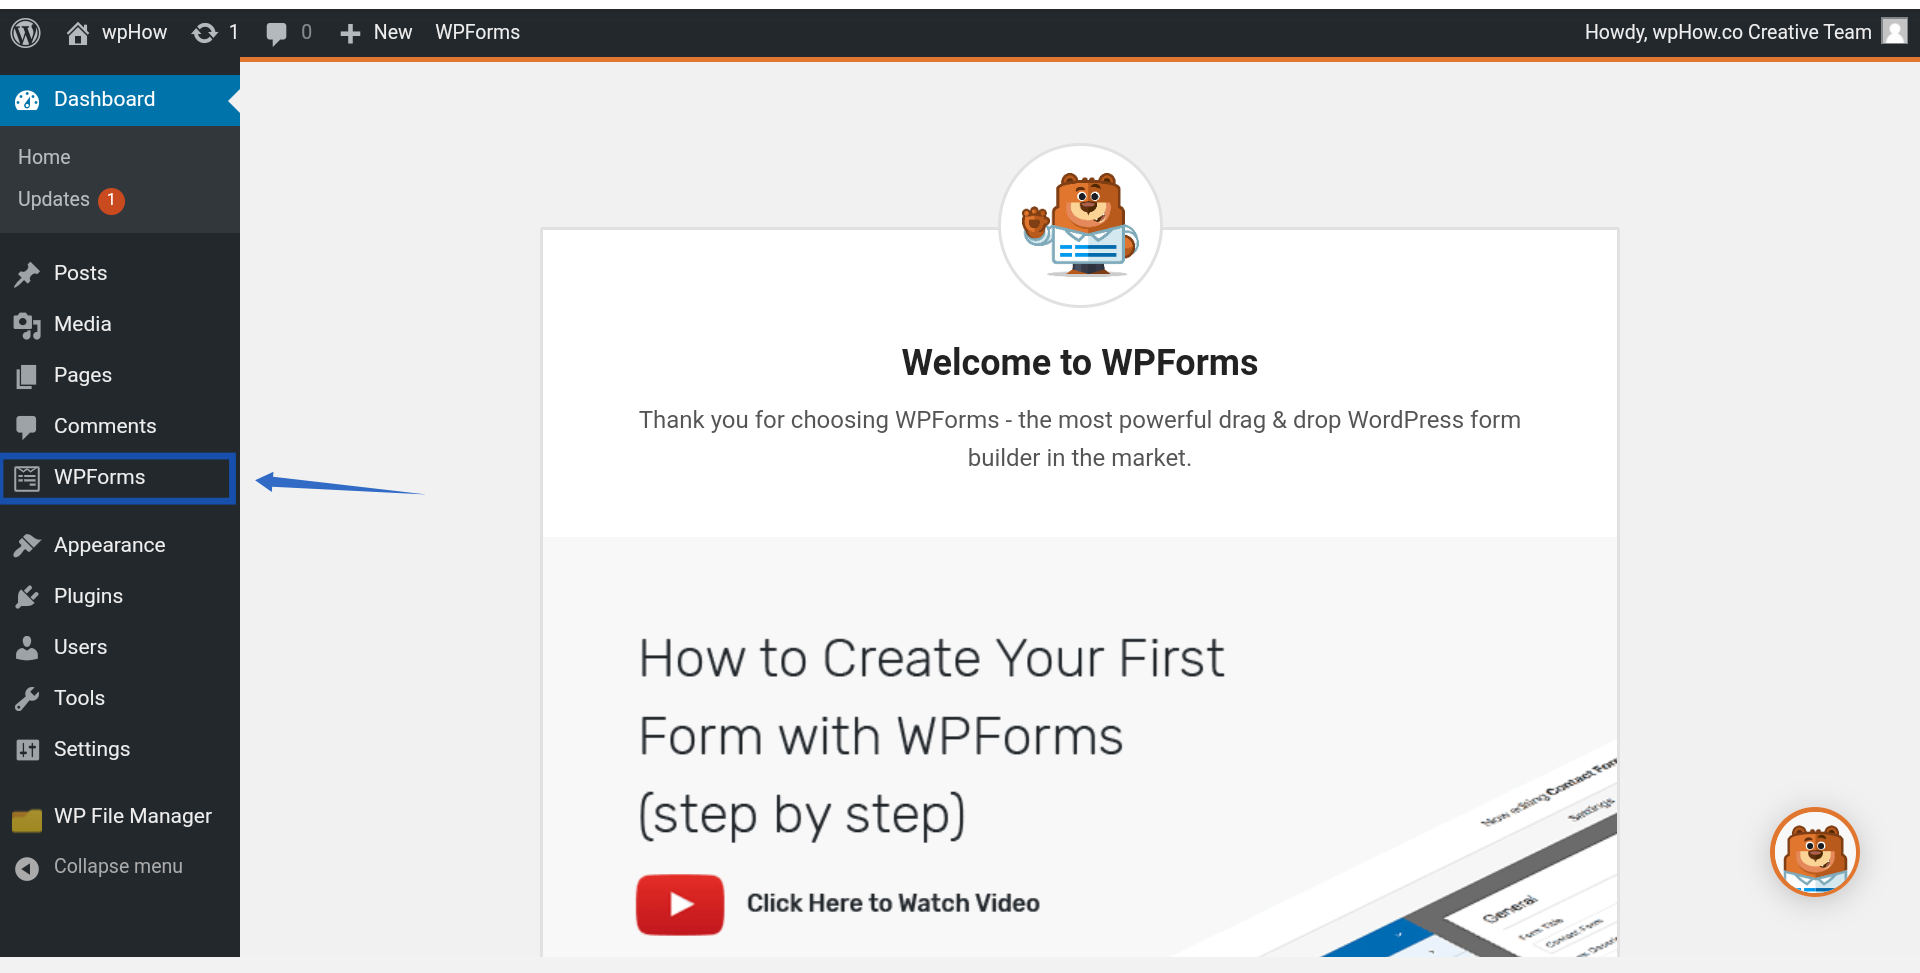
After activating the plugin, the WPForms option will appear in the Dashboard.
Step 4: Add New Form.
Dashboard >> WPForms >> Add New.
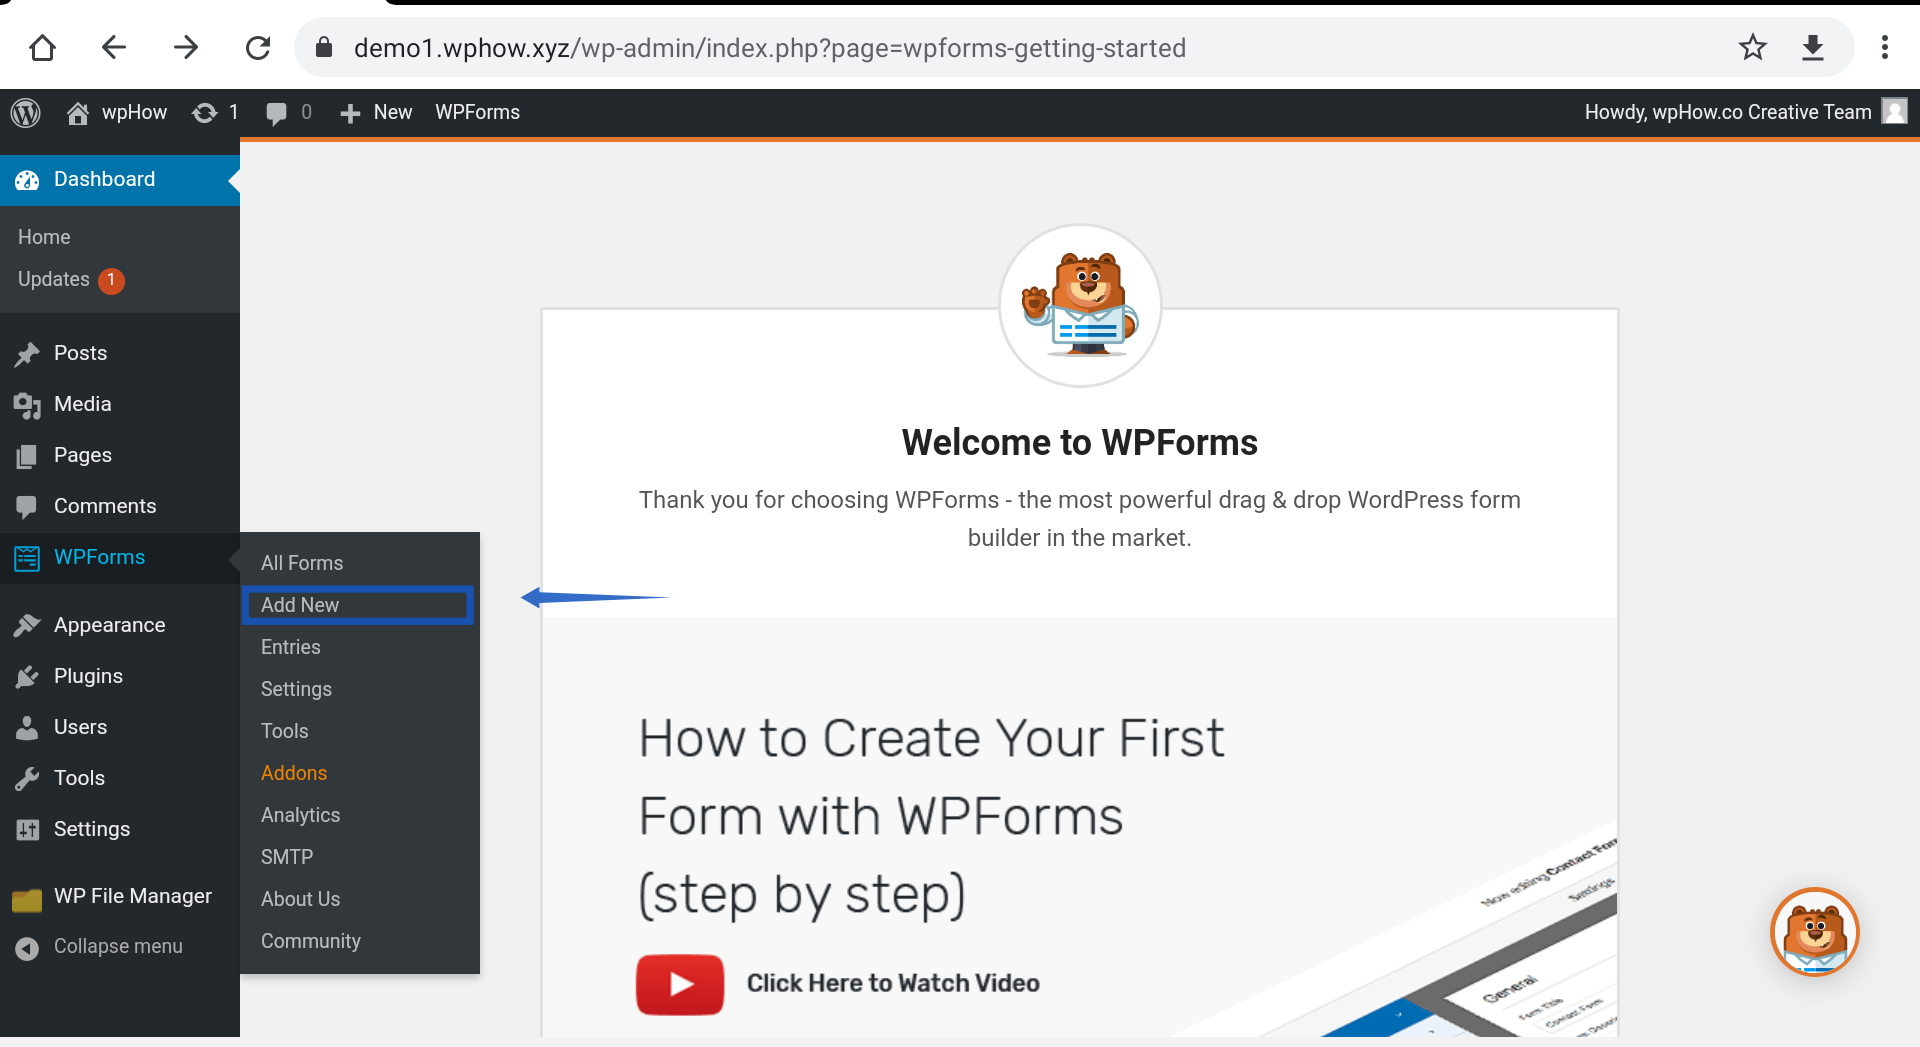
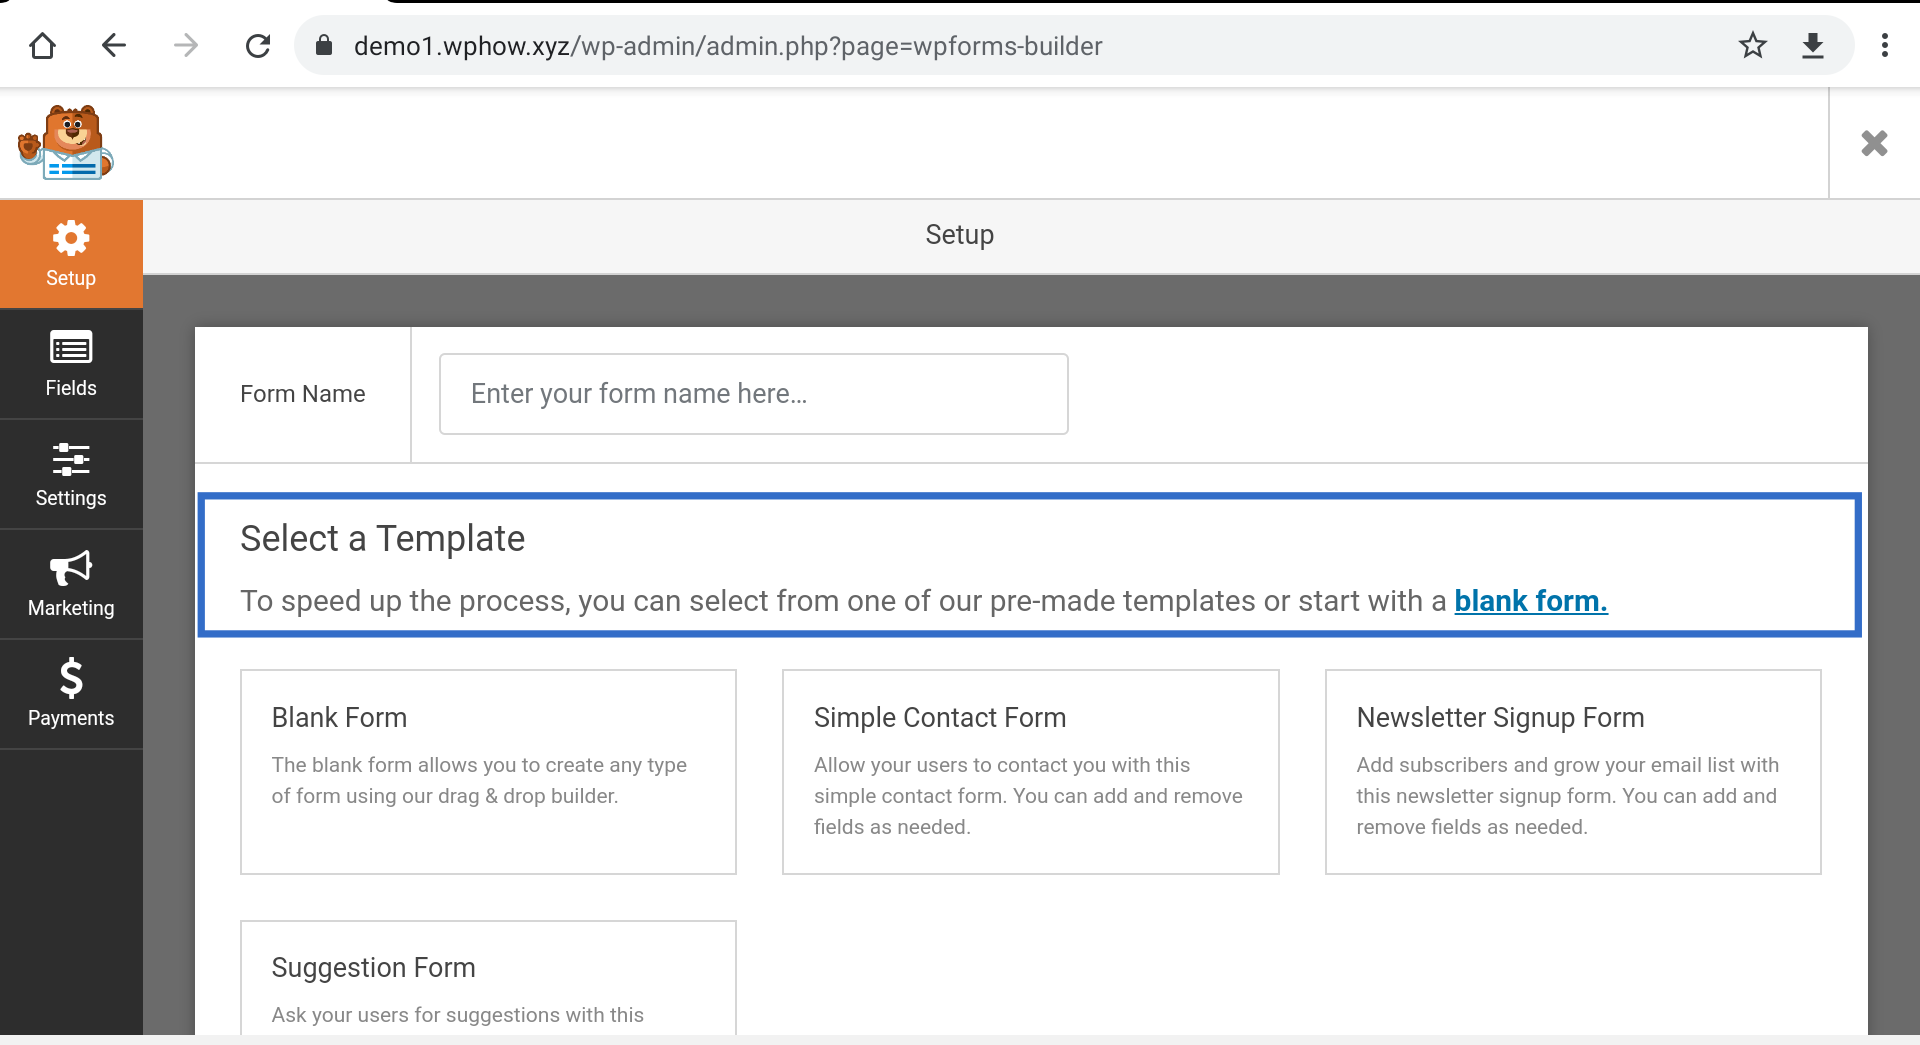
As you click on Add New option, it will bring up Setup Page. See the image. The setup page has many options to configure our Contact Form. The panel under setup has Fields, Settings, etc. options to configure a Contact Form.
Click On Fields Option.
Under the fields option, you will get predefined Contact Form Templates, you can start with a blank one, or make use of an existing Template like Simple Contact Form. Here we are using Simple Contact Form as our example Template.
Step 5: Click On the Simple Contact Form template.
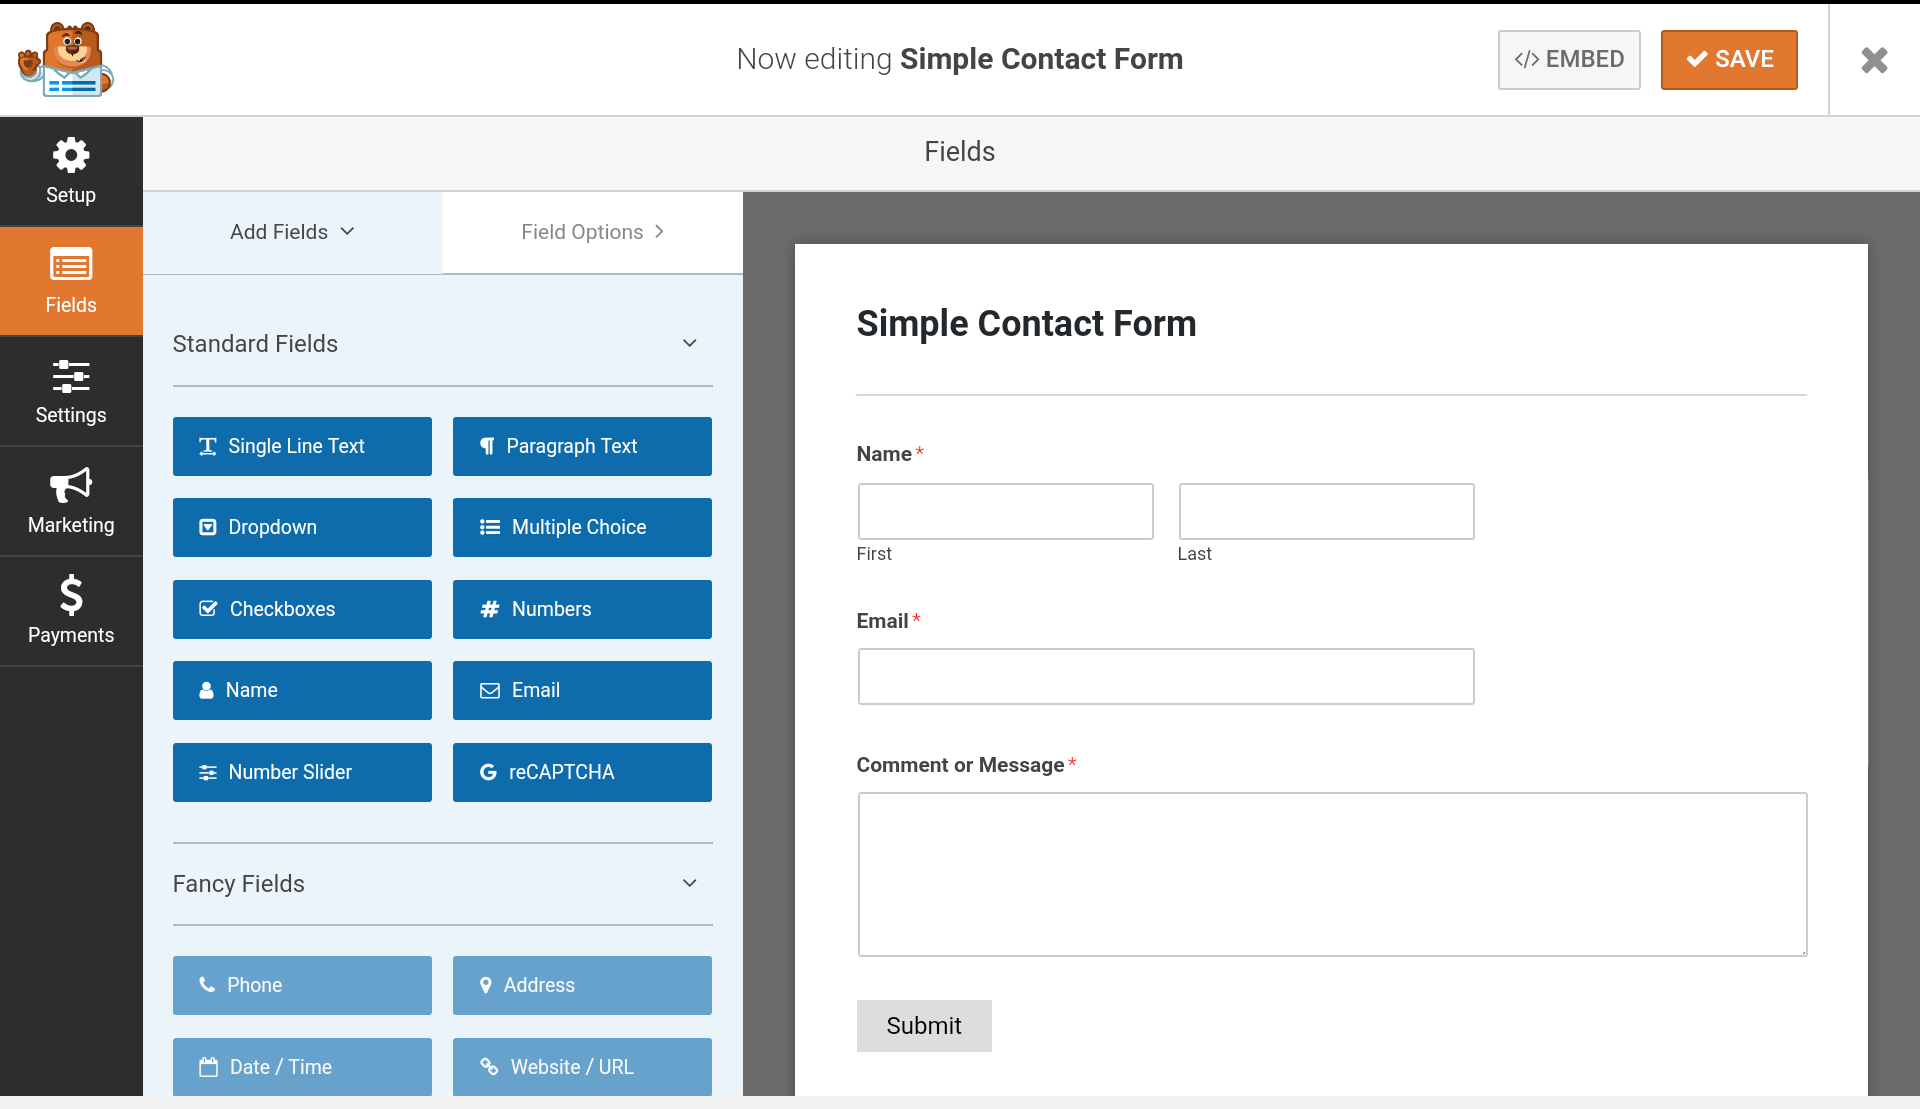
On the screen, a pre-formatted Simple Contact Form comes with four fields by default. You can add other fields using the drag-and-drop interface of Add fields Tab. Here we are adding the Paragraph text field as an example.
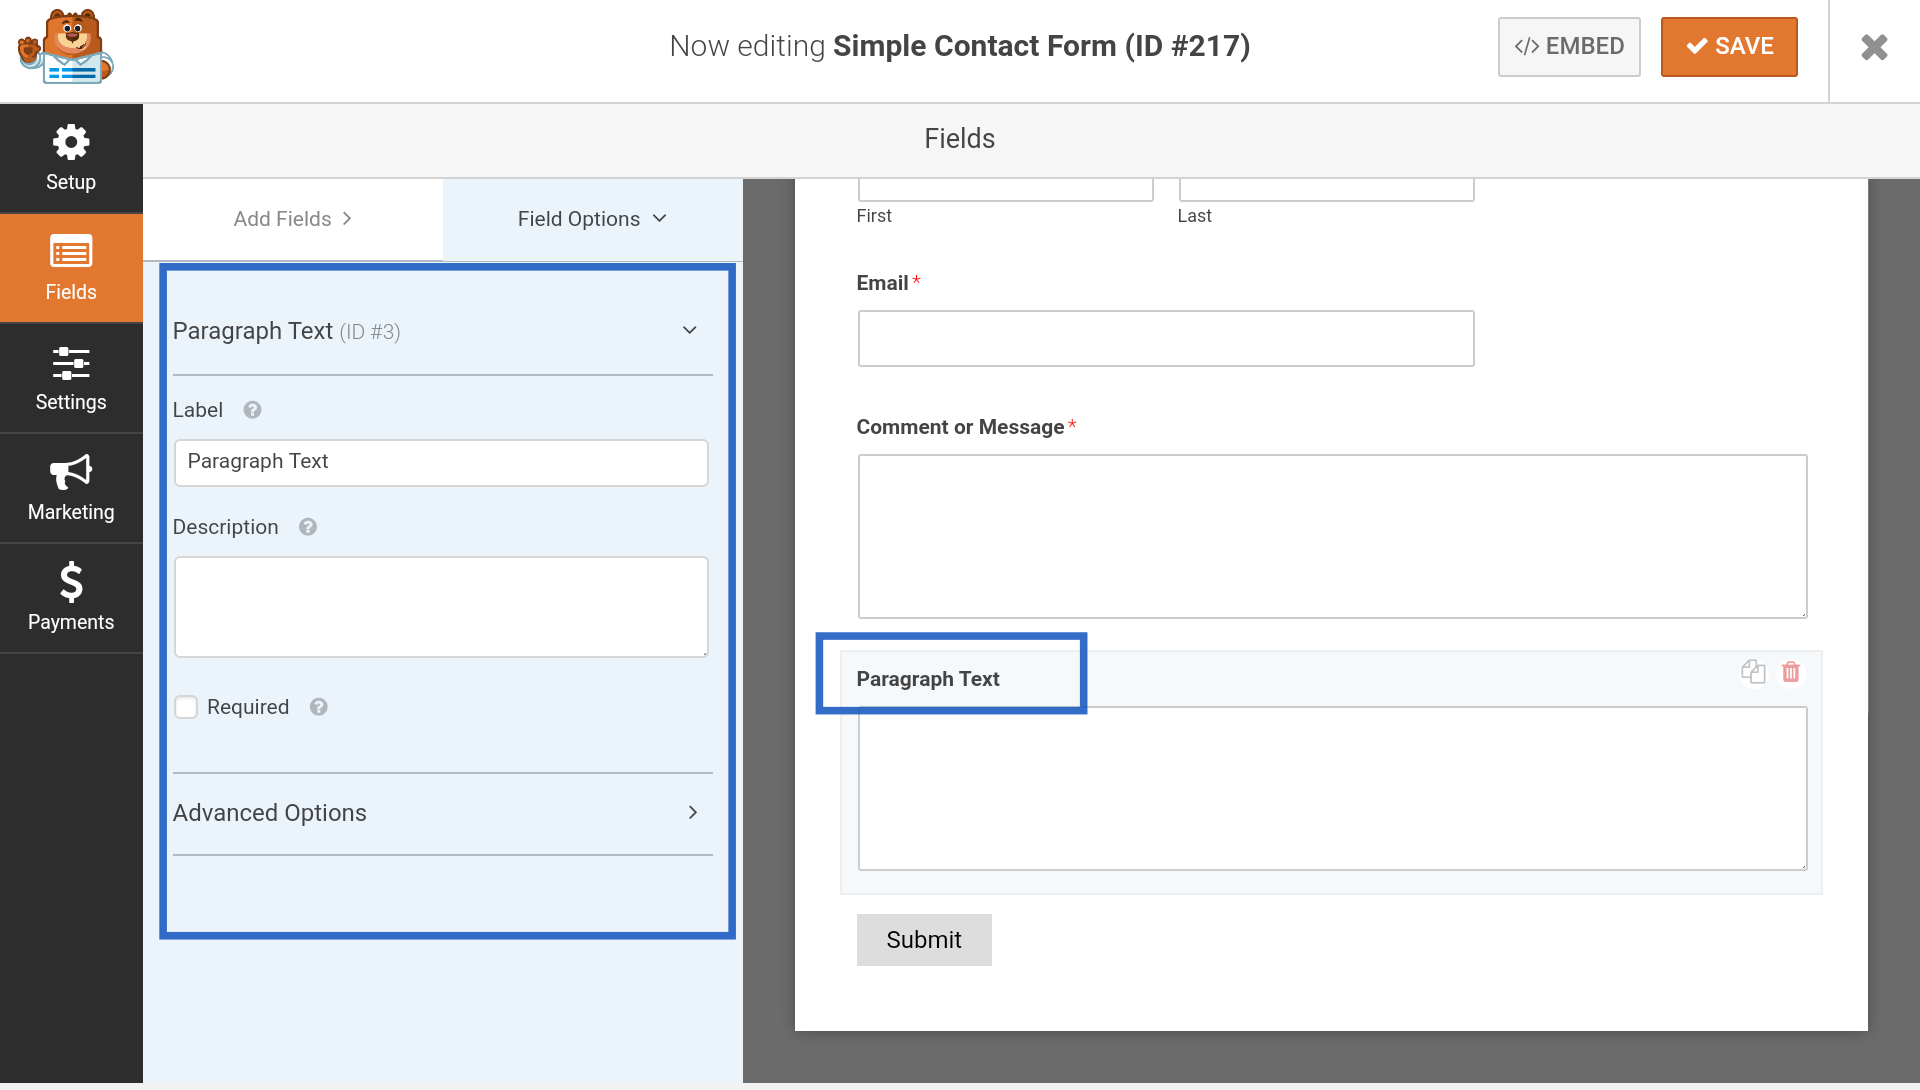
Now a new Paragraph field is added to the form. The left-hand side panel comes with a Setting option for a selected field. You can change the label, add a description, etc. for a selected field. A field can be deleted by clicking on the delete icon at the top right corner of the field.
Now it’s time to move to Settings options to configure Email, From Name, and other options.
Step 6: Click On Settings.
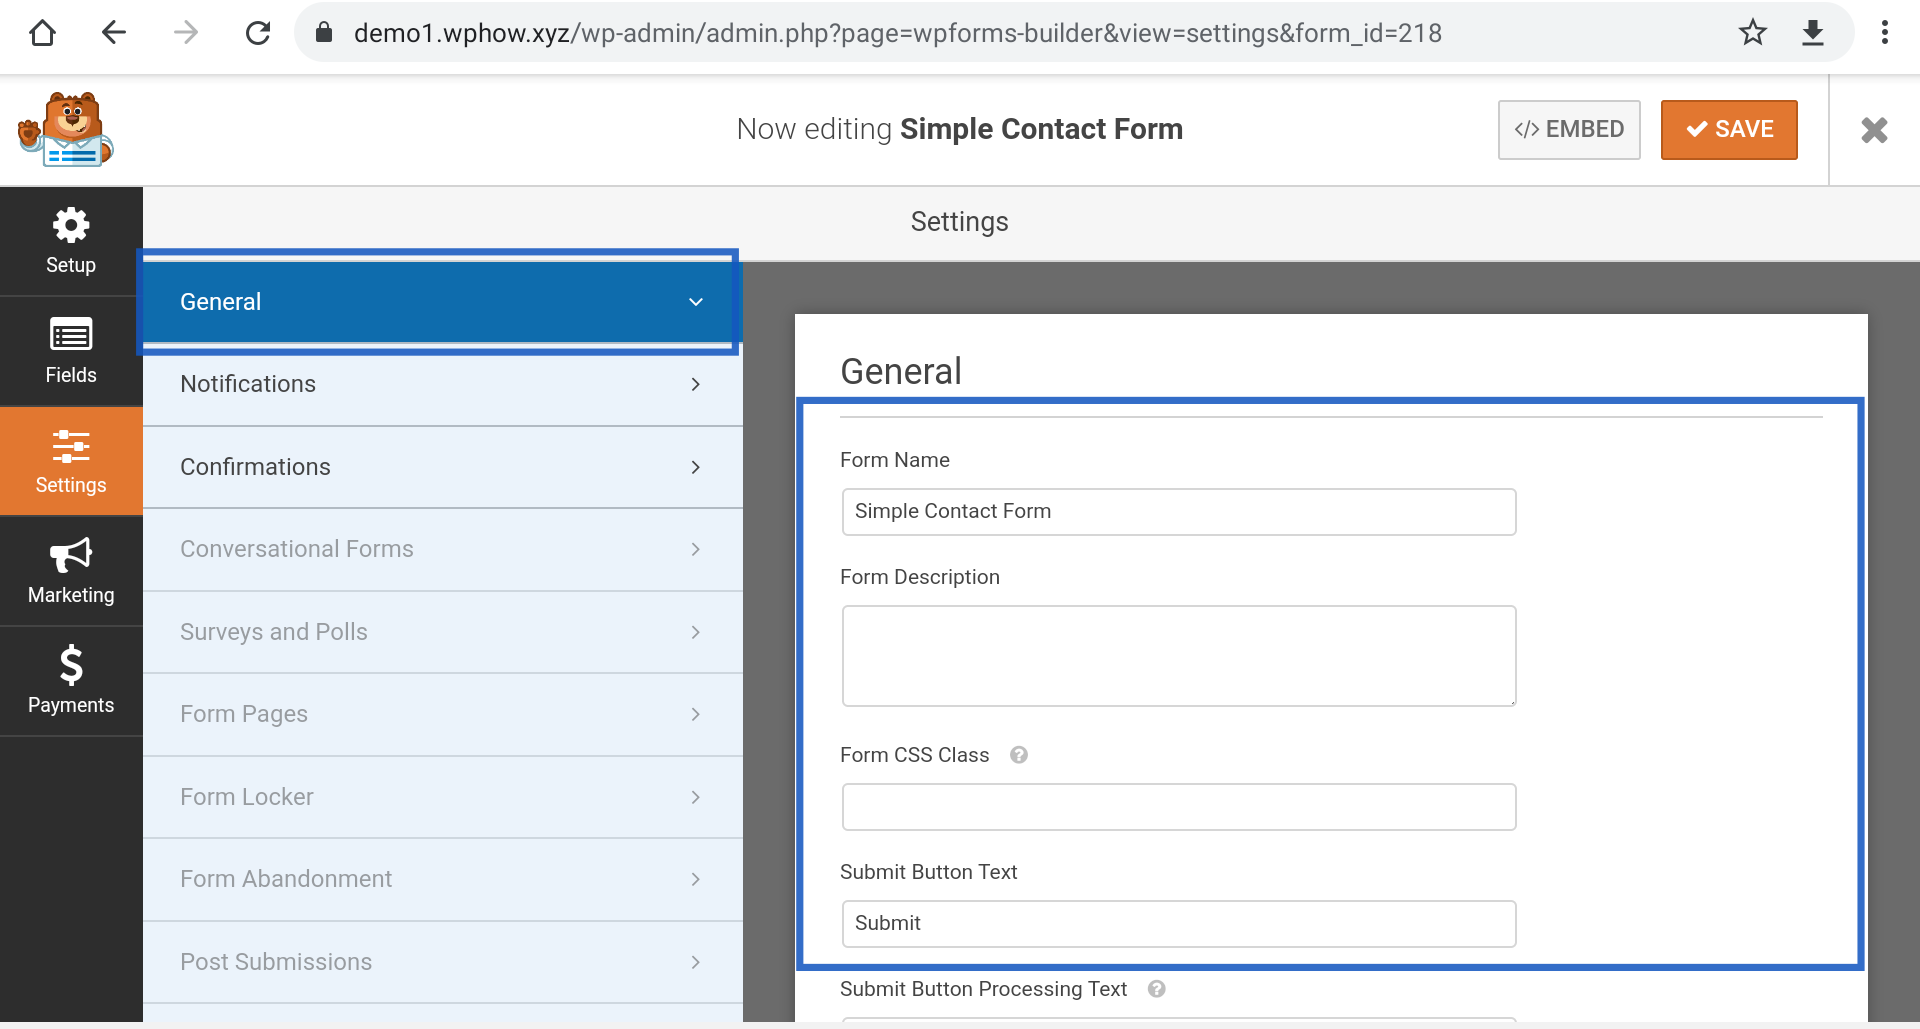
There are several options are available in Settings like General, Notification, etc.
General option:
Here you can edit the form name, form description, caption of Submit Button, etc. We are leaving them as it is.
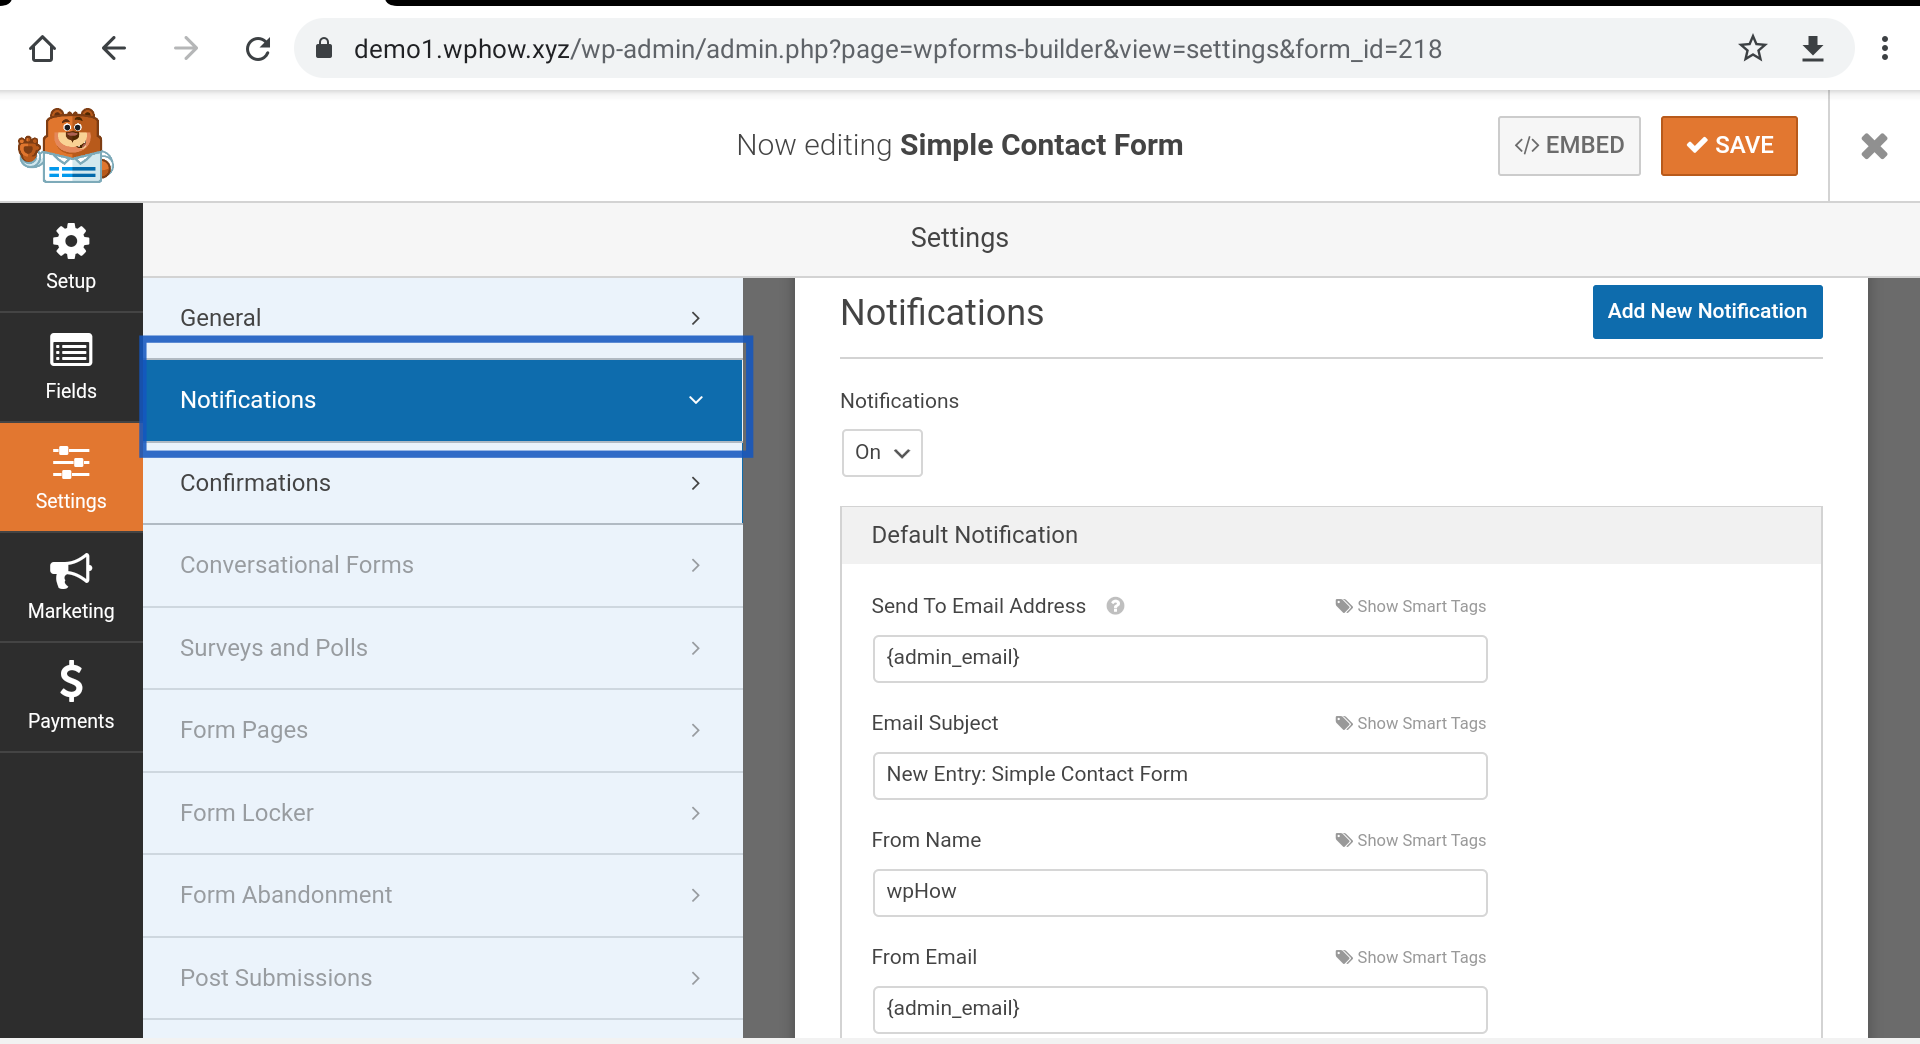
Notification option:
Let’s look at each option available in the Notification option.
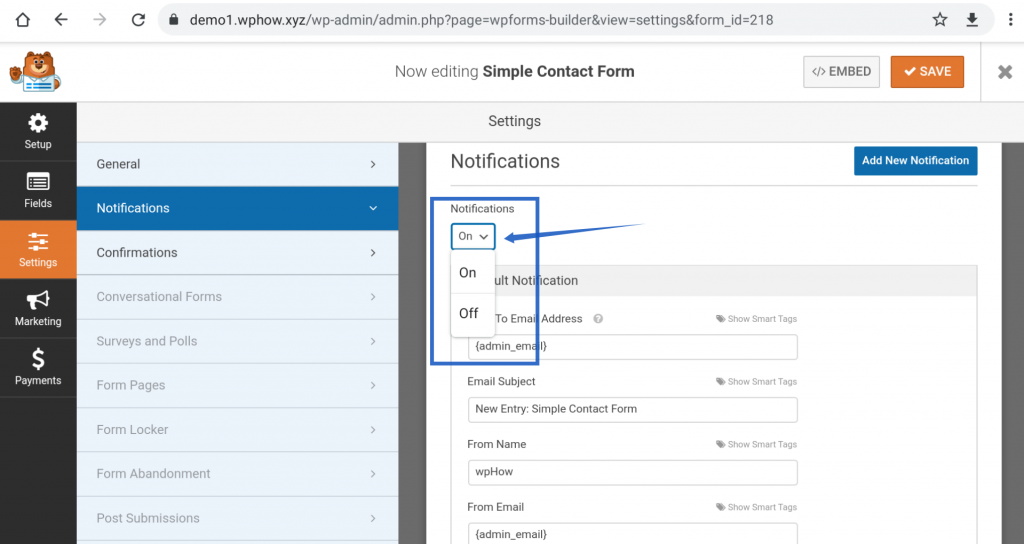
If you want to stop notifications then set the toggle Button Notifications to Off, by default it is set to On.
Send To Email Address:
By default, these notifications are sent to the site admin email address. The {admin_email} Smart Tag is set by default, which means that if you use it then a notification E-mail will be sent to the admin Email address configured in WordPress Site. You can change it to any other Email address, even you can set more than one Email address separated by a comma right here.
Email Subject:
The subject of the Email, by default, is New Entry followed by Form Name, you can change it to whatever you want.
From Name:
Name of the notification e-mail sender.
Form Email:
E-mail Address of notification E-mail sender.
Reply-To:
A notification e-mail reply will be sent to this address.
Step 6: Click On Save.
After configuring your Contact Form press the Save button given in the upper right corner of the screen.
Step 7: Getting Shortcode.
Dashboard >> WPForms >>All forms.
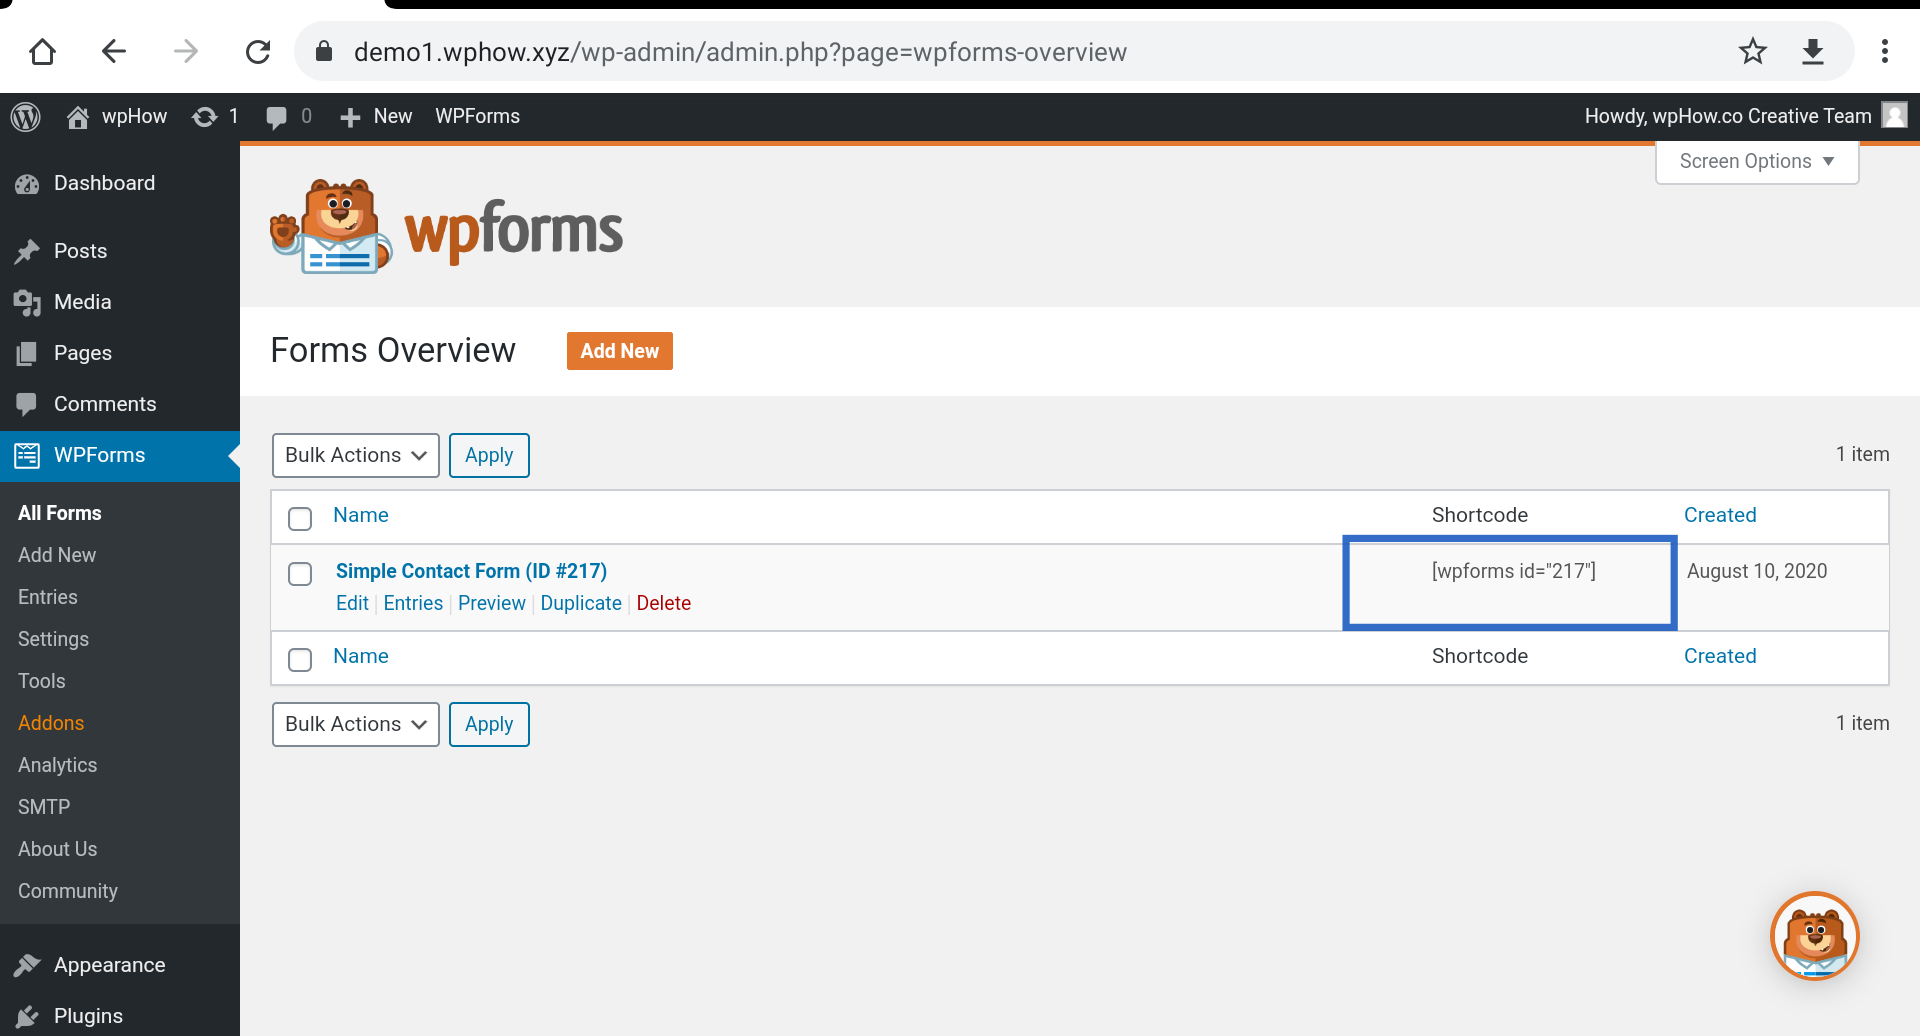
Copy the Shortcode, you can paste it into any post. See the image.
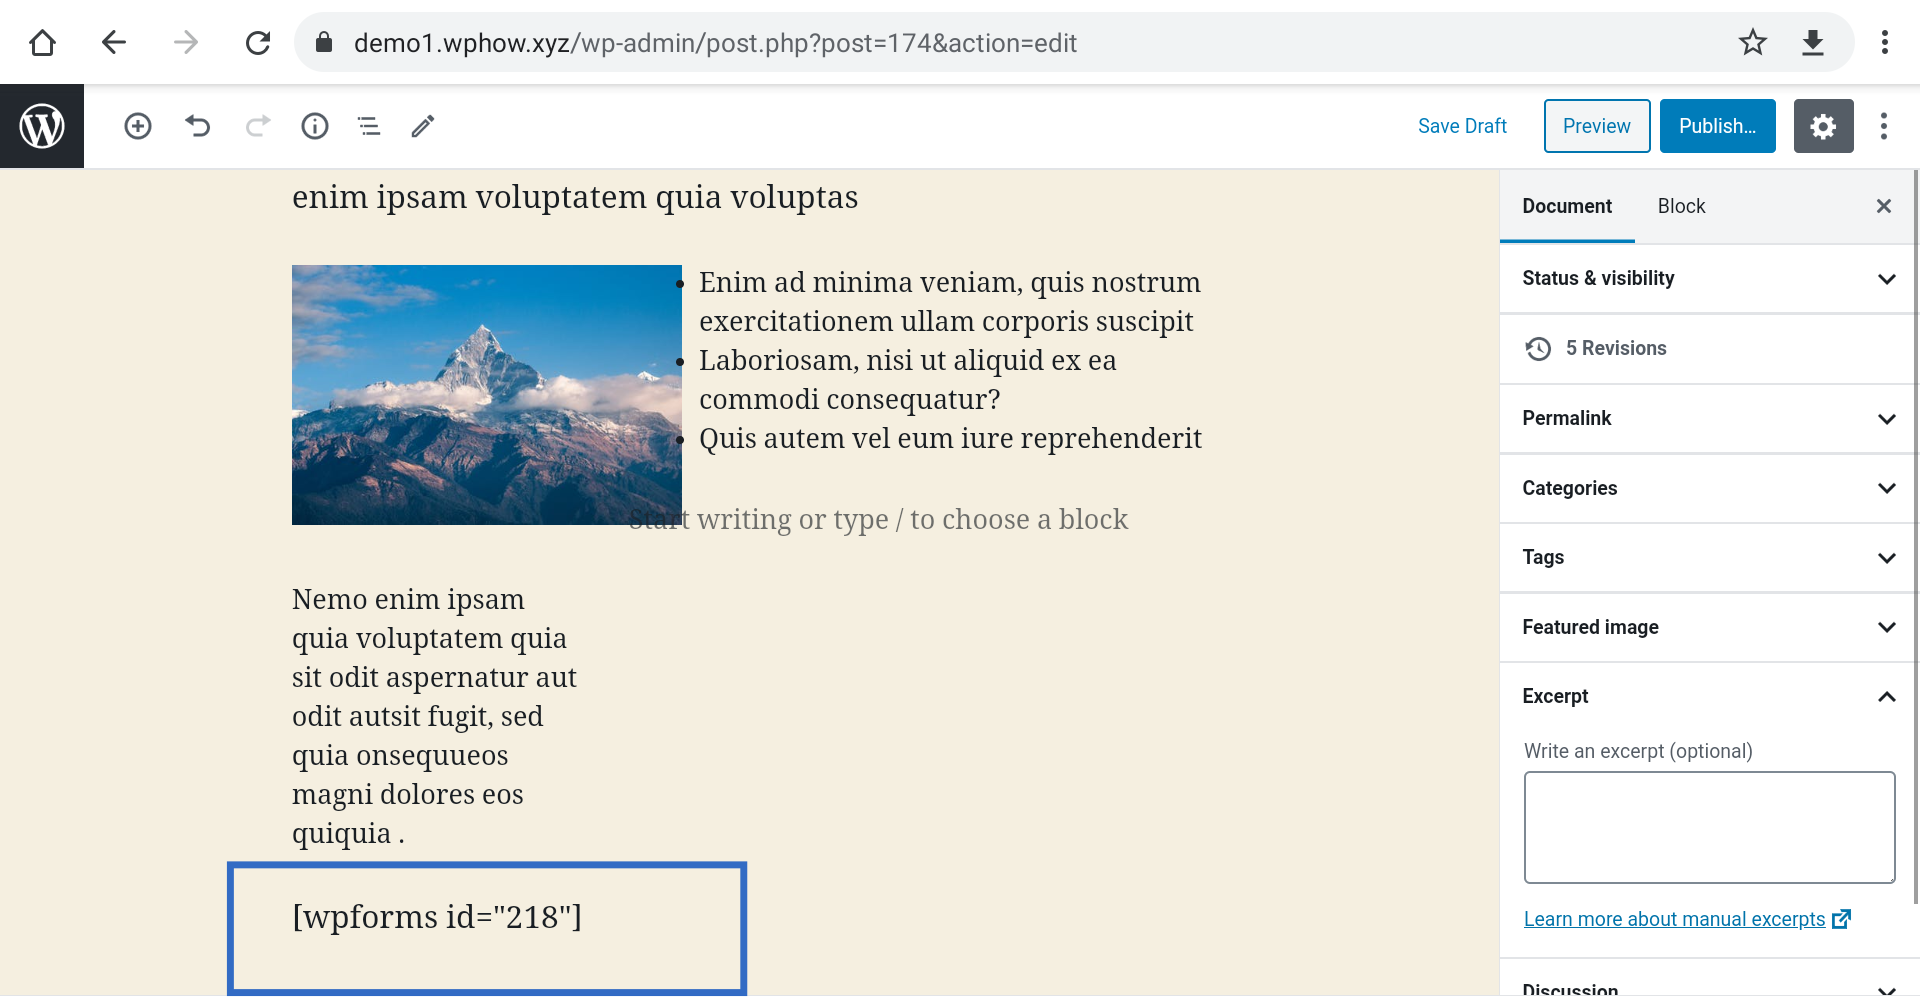
Let’s see the effect of inserting a shortcode. See the image.

You can also insert WPForms Widget in any Widget ready area.
Step 8: Widget Insert.
Go to Dashboard >> Appearance >> widget.
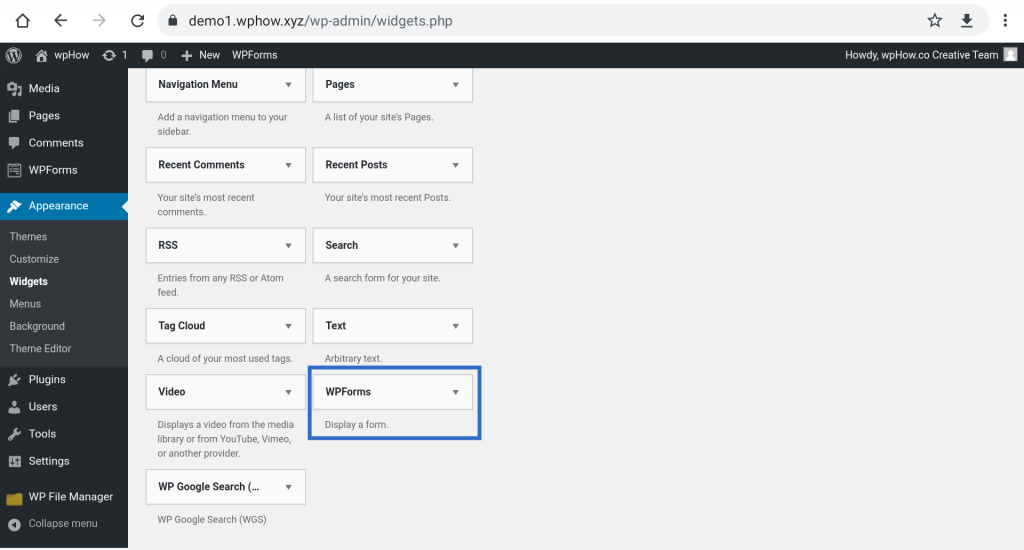
Step 9: Add To Widget Ready Area.
You can insert this Widget in any Widget ready area available in your theme. We are inserting it in the Footer area.
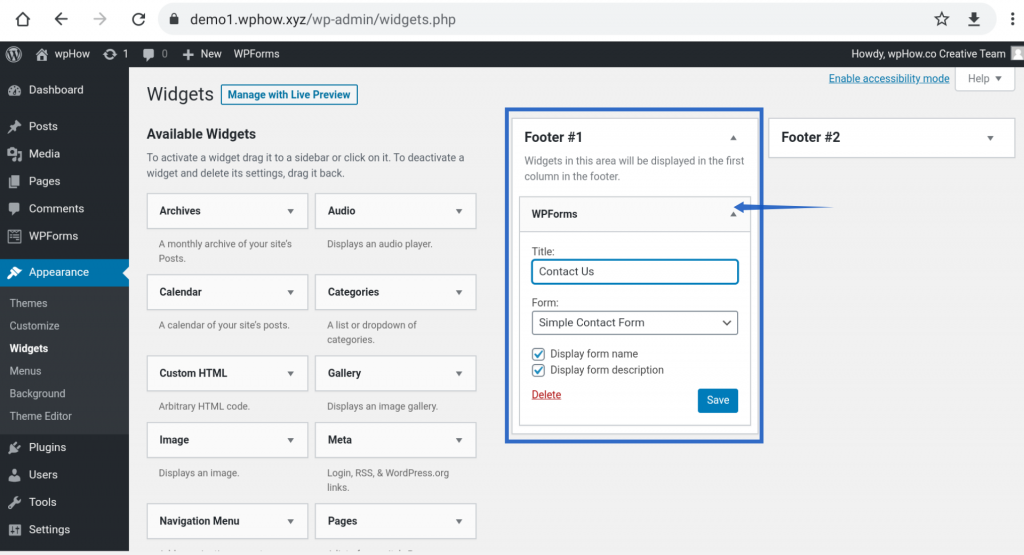
Now fill Title say Contact Us and set the Form as Simple Contact Form from the drop-down option, you can also check both checkboxes if you want to display the Form name and Form Description. After setting all fields click on Save Button.
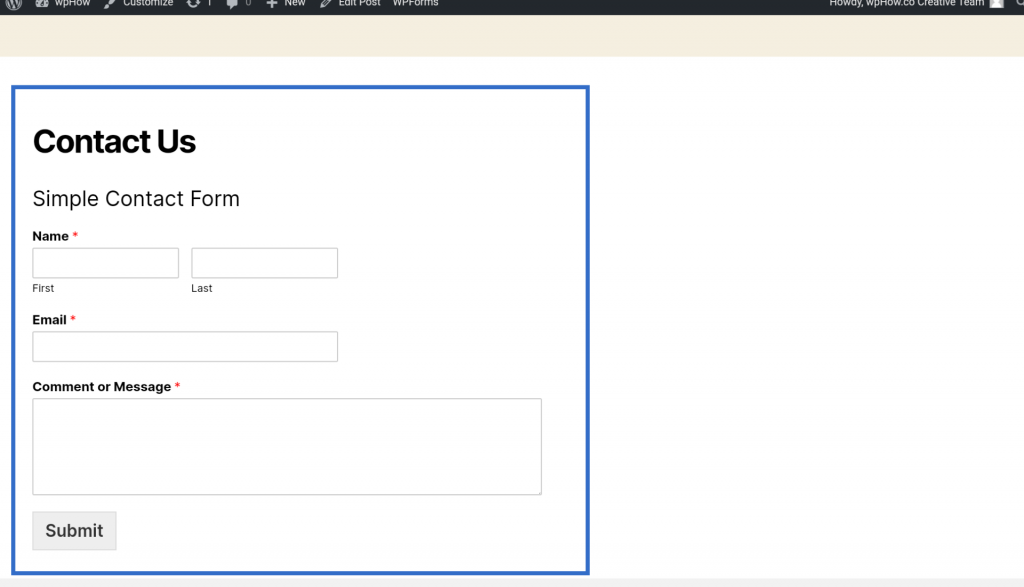
Let’s see the Contact Form in the footer area.
Wrapping Up
And that’s how you can add a contact form in WordPress. As a website owner, collecting the contact information of your users can help you better understand od market and improve your customer database. With the data collected, you can customize personalized recommendations and messages for your users. There are countless benefits and advantages to collecting users’ information.
If you like reading this blog, also read our step-by-step guide on How to Fix the WordPress White Screen of Death? (6 Common Tips) and How to Create an Engaging FAQ Section Using Elementor? (5 Easy Steps).
[wbcr_html_snippet id=”4204″]


Stuck Somewhere?
Connect With JustHyre
Hire WordPress Engineers for custom jobs like Website Customization, SEO Optimization, Clearing a Hacked Website, Installation & Configuration & more.
Connnect with JustHyre
0 Comments