How to Change Margins in WordPress (3 Minutes Beginner’s Guide)
Do you want to change margins in WordPress? Margins are a focal point in the user experience symphony. If put together correctly, your website will look clean, organized, and professionally designed.
Adjusting the margins of elements on your WordPress website can significantly improve the overall layout and appearance. It helps you create your unique brand identity and visually appealing website.
Here, in this blog, we will guide you on how you can easily change margins in WordPress. Before that let’s understand a few basics and why margins are important.
Importance of Margins in Web Design
Margin is the space around the border of an element on your website. For instance, if we add 20 px of margin around a piece of content, that means, we are going to have 20 px of space all around the selected content.
Margins are one of the most important parts of web design. The purpose of using margins is to make sure that the elements on the website don’t look cluttered and squished together.
Now you might be wondering when to use margins.
- To create a gap/space around the content block
- Adjust an element’s positioning
- To create a space between two elements
Want to upgrade or change the WordPress theme of your business? Read, How to Properly Change the WordPress Theme (Ultimate Guide)
Why Are Margins Important in WordPress?
Since margins are an important aspect of web design, you need to consider them while editing your website or user interface. They make your UI look clean and sophisticated to your users.
Most WordPress theme takes care of the margins, but in some cases, you might need to edit them to align with your branding. They help you create a sense of balance and add more breathable space. Moreover, they help your users to navigate effortlessly through your business’ website.
Factors to Consider When Adjusting Margins in WordPress
- Theme Settings Exploration: Explore theme settings – that’s where all the designing happens. Many themes in WordPress allow a simple means of changing margin values without complex coding.
- CSS Customization: If you are a precision lover, then custom CSS is for you. It is like having a toolbox for your margin and being able to adjust it according to how you want it.
- Device-Specific Optimization: The audience is varied and so are the devices. Make sure your margins are adjusted for various screen sizes, and test the website on numerous screens.
- Consistent Testing: Your website is a living entity. Frequently test your design to make sure that the margin modifications you made are consistent with developing objectives. Keep it up-to-date and interesting
- User Feedback Consideration: Pay attention to the voice of your users. Your user’s feedback is your compass, guiding you to make necessary margin adjustments that are responsive to their needs.
What Is the Difference Between Padding and Margin in WordPress?
| Margins | Padding |
| It is the white space surrounding an element. | It is the inner space an element has around itself. |
| You can use auto settings for margins. | It prevents text from appearing too close to a border |
| You can use negative values. | You can’t set auto padding and negative values. |
| It is not impacted by the styling of other elements. | It can impact the styling of other elements. |
How to Change Margins in WordPress?
There are numerous ways to change margins in WordPress websites. You can either opt to change margins in WordPress through themes or you can directly change it via the block editor.
Want to add columns to your WordPress website? Read, How to Add Columns to the WordPress Website. (3 Easy Methods)
Change Margins in WordPress Using The Full Site Editor
To customize margins on your WordPress website, especially if you are using a block-based theme with full site editor support, follow these detailed steps:
- Accessing the Site Editor:
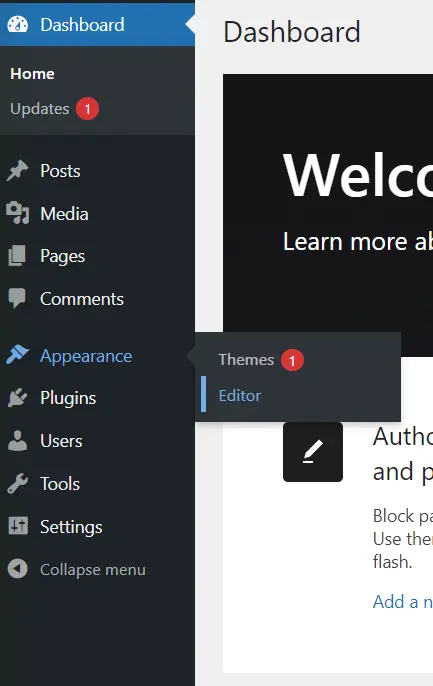
The very first step to change margins in WordPress is to access the Site Editor. Locate the site editor by going to Appearance » Editor.
- Select Styles:
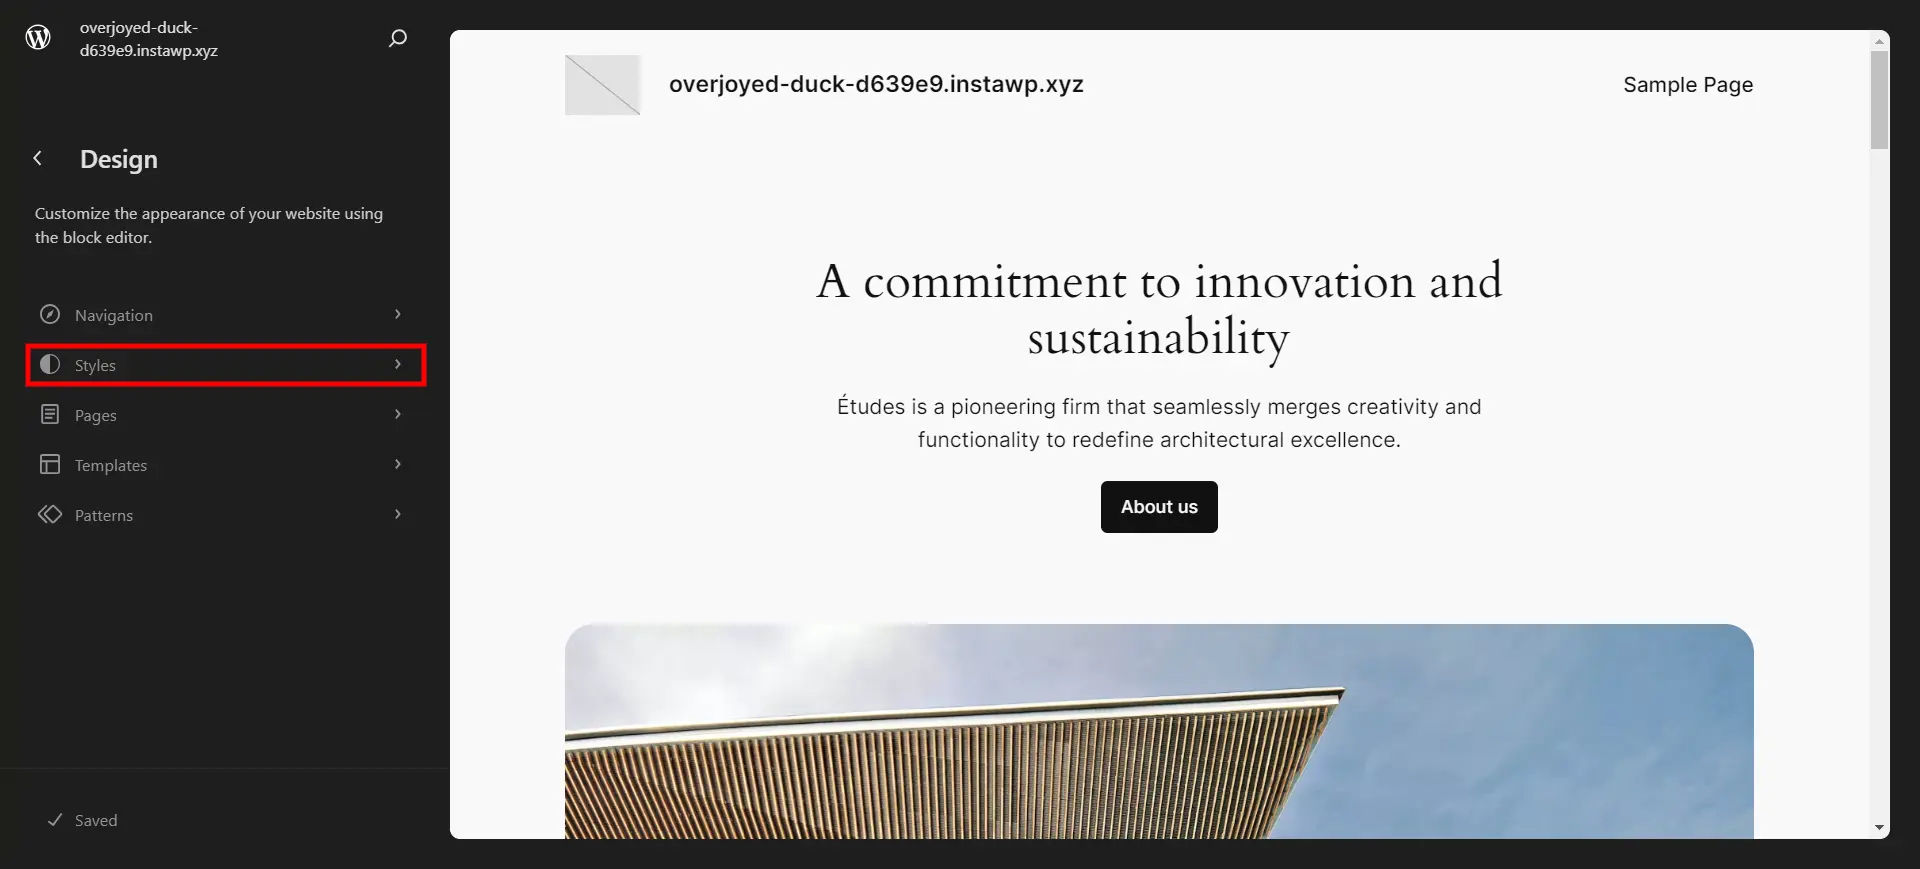
Once in the site builder, choose ‘Styles’ from the left panel or click anywhere on the preview window to proceed.
- Selecting the Area for Margin Adjustment:
Click on the particular location or component within the preview that you wish to change margins. In the right-hand side column, locate ‘Style’, and under it is located an option to change margins.
- Adjusting Margins:
The margin area will be visually emphasized as you change the margin settings in the editor. You can change margins in WordPress content on the above, below, right, or left sides as you deem necessary.
Looking for a beautiful and functional WordPress website? Visit Brand Exponents.
Adding Margins in The Block Editor
- Accessing the Block Editor:
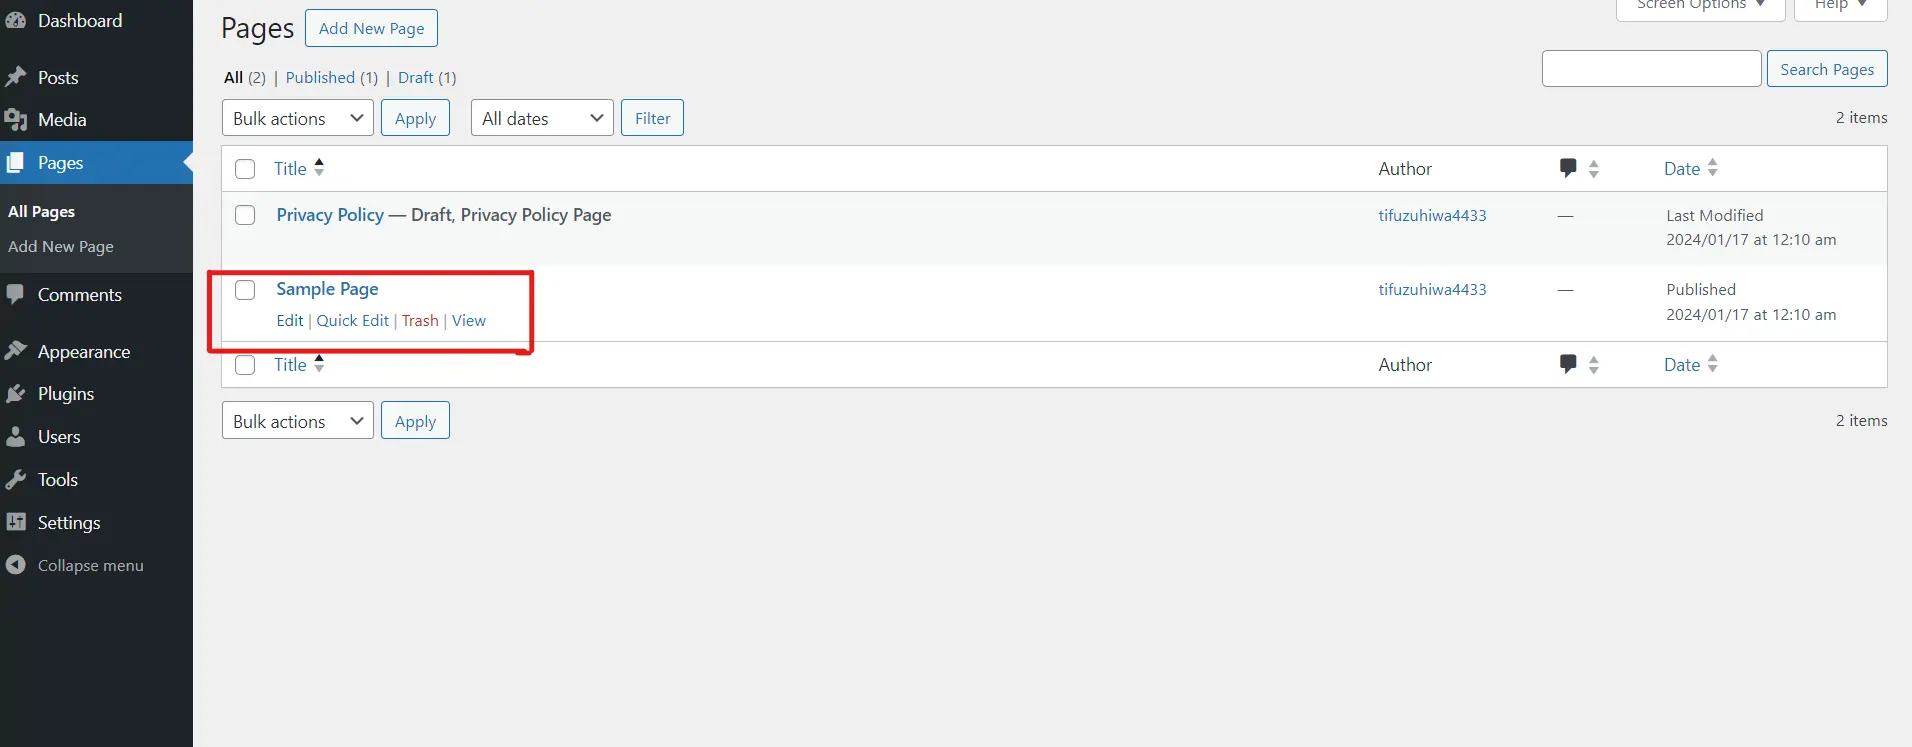
Go to the page or post where you wish to change margins in WordPress. Next, click on ‘Edit’ and access the block editor.
- Locating the Desired Block:
Specify the particular block in which you desire to insert or change margins in WordPress. Each block represents a particular part of your content, for instance, a paragraph; an image heading, or any other module attached in the form of blocks.
- Opening Block Settings:
Find the block settings icon, usually represented by a gear or pencil symbol, and click on it to access the block settings.
- Navigating to the Block Tab:
In the block settings, click on “Typography”. This allows you to tweak several visual aspects of the selected block.
- Adjusting Margins:
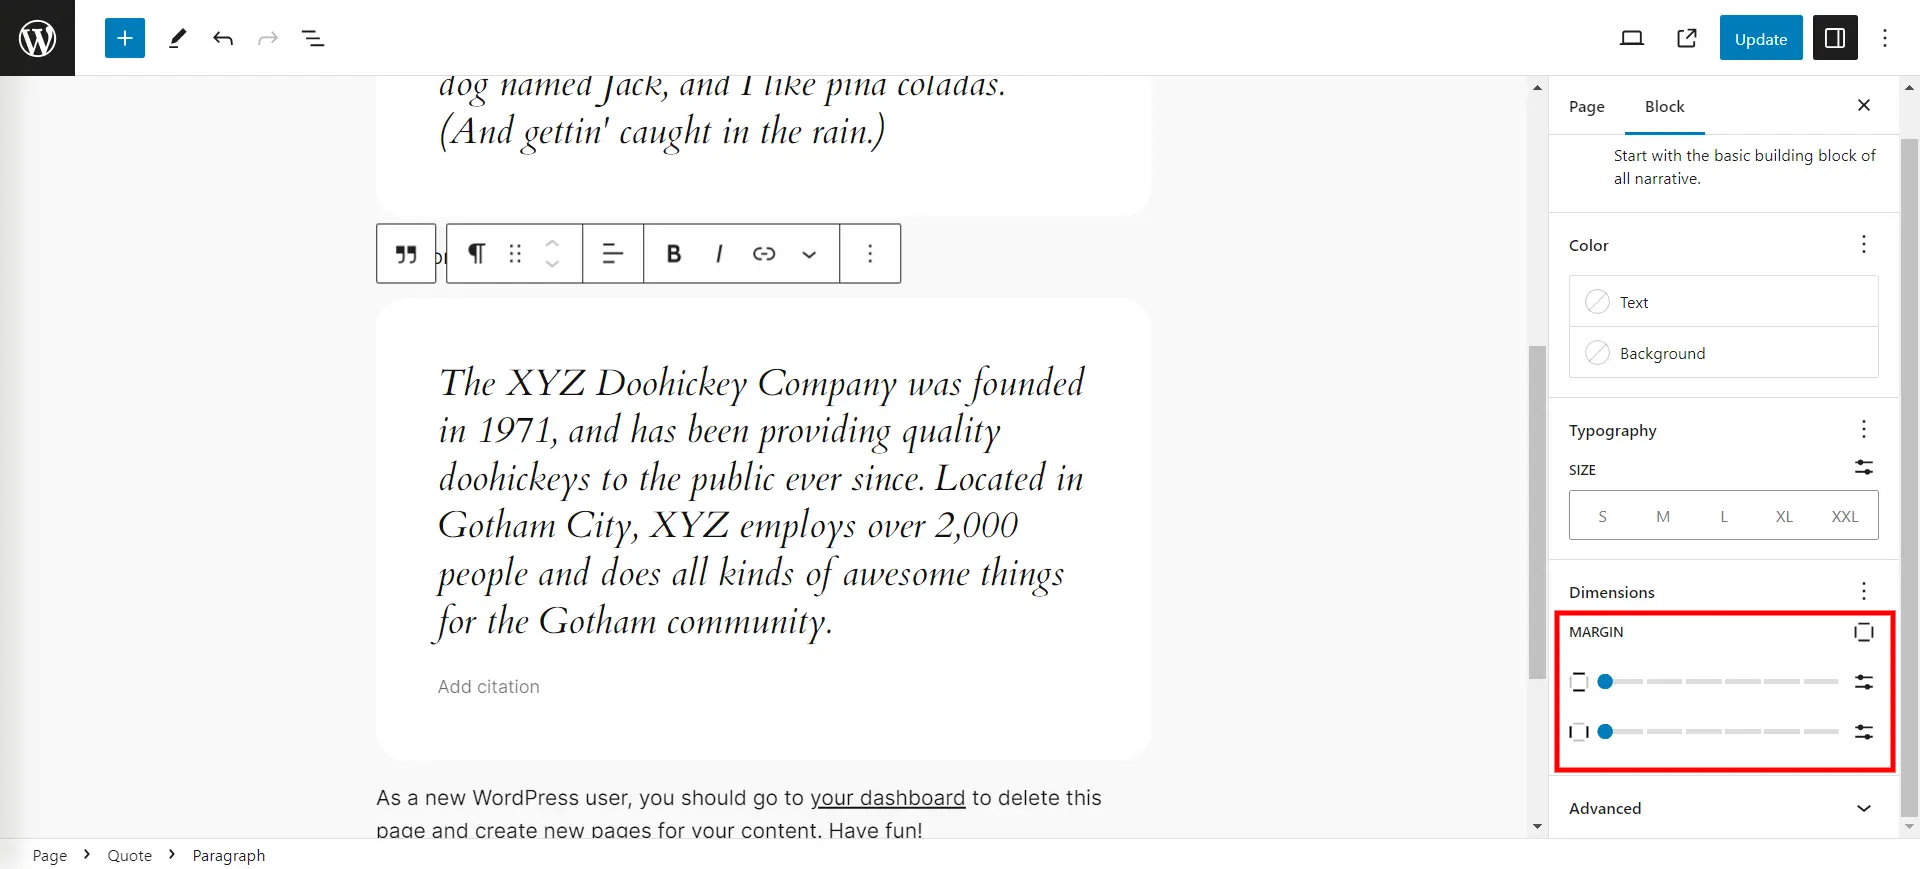
Inside the Style tab, scroll down until you locate either the “Dimensions” or “Margins” option. Select the appropriate option to reveal margin settings. Here you can enter the numerical values or adjust margins by using sliders. Modify the values according to your design choices regarding whether you need space on the top, bottom left, or right of the block.
In a Nutshell
Margins play a significant role in the appearance of your website. Since most of the users scan your website and then read it, margins make the whole process quite easy. With appropriate margins, it is easy for users to navigate through the content.
We hope this blog has helped you easily change margins in WordPress. If you like reading this blog, also read our detailed guide on Ultimate Website Migration Checklist: 16 Steps You Need to Do and How to Create a Responsive WordPress Navigation Bar. (3 Easy Steps).


Stuck Somewhere?
Connect With JustHyre
Hire WordPress Engineers for custom jobs like Website Customization, SEO Optimization, Clearing a Hacked Website, Installation & Configuration & more.
Connnect with JustHyre
0 Comments