How to Add a Pros and Cons Table in WordPress? (3 Easy Steps)
Do you also want to create a pros and cons table in WordPress?
If you are writing a review blog, there are high chance that you talk about its advantages and disadvantages. Creating a pros and cons table helps users to navigate and examine the product easily. It works as a good content break as well as hooks the readers more.
Here, in this blog, we have shown you a simple way to add a pros and cons table in WordPress. But before that let’s have a look at what is pros and cons table and why you should use it.
Key Takeaways
- The pros and Cons list helps you to give a summary of the product or service.
- It is highly beneficial if you are writing a review blog or a listicle blog.
- Use the “I2 Pros and Cons” and “Mighty Pros and Cons” plugins to add the pros and cons table in WordPress. It is easy to use and highly customizable.
What Is the Pros and Cons Table and Why Do We Need It?
Pros and Cons Table is also known by various other names like advantages and disadvantages, merits and demerits, or positives and negatives. Just like the name suggests, a pros and cons list is a documentation of all the pros and cons of a specific product action or service.
A pros and cons list helps your customers decide whether they should opt for a particular item or action or not. A pros and cons table helps you display exactly what makes that product desirable in the first place.
If you run a blogging platform and if you have listicle blogs like top 10 smartphones or top 5 Google certification forms, then you can have a pros and cons list at the end of every blog. This will help users easily examine the product.
Also, you can use a pros and cons list to show how your new products or services are better than the older ones. This will promote your products and help in more sales.

Steps to Create Pros and Cons Table in WordPress
Step 1: Install and Activate the I2 Pros & Cons
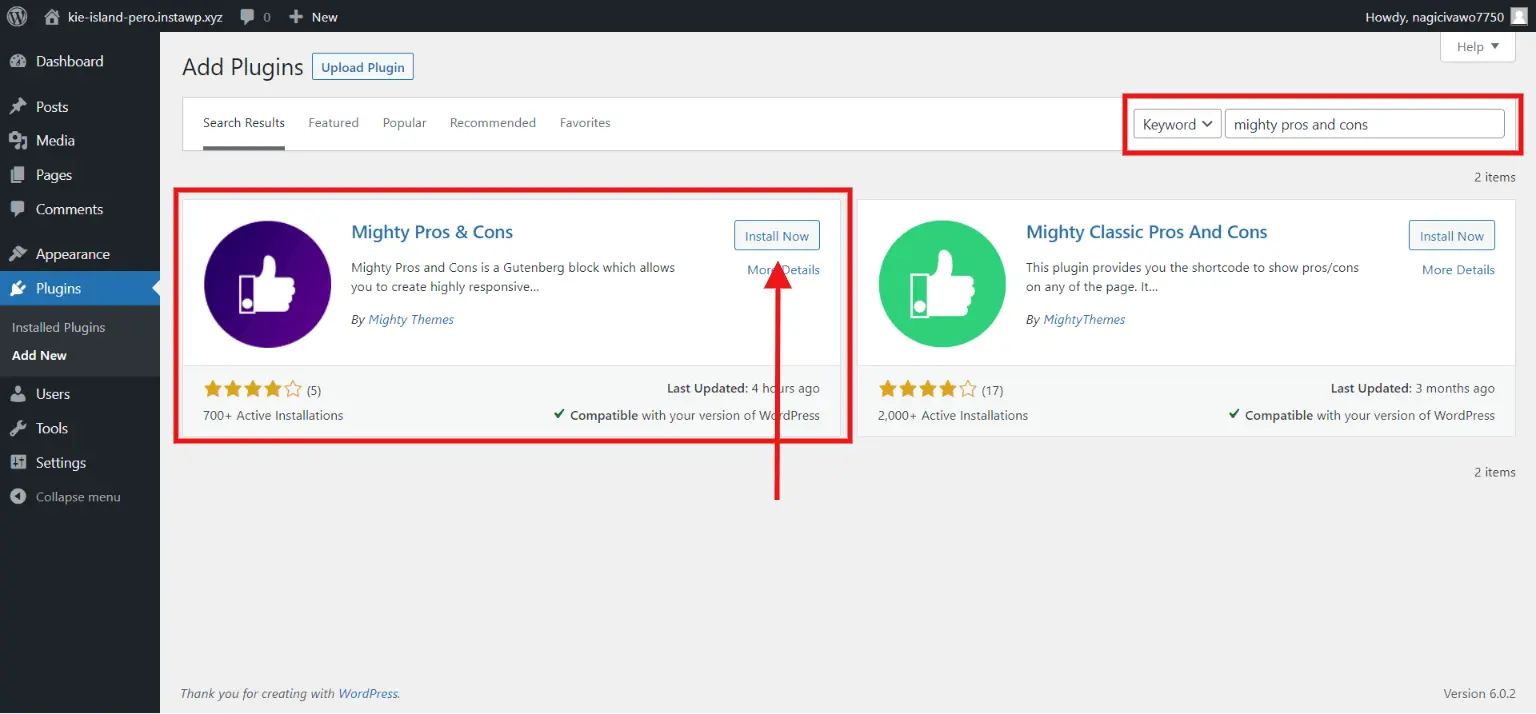
The first step to adding a pros and cons table in WordPress is to install the plugin. Go to the “Plugins” in the WordPress sidebar and then search for the “i2 Pros & Cons” plugin. Install and activate the plugin by clicking on the respective buttons.
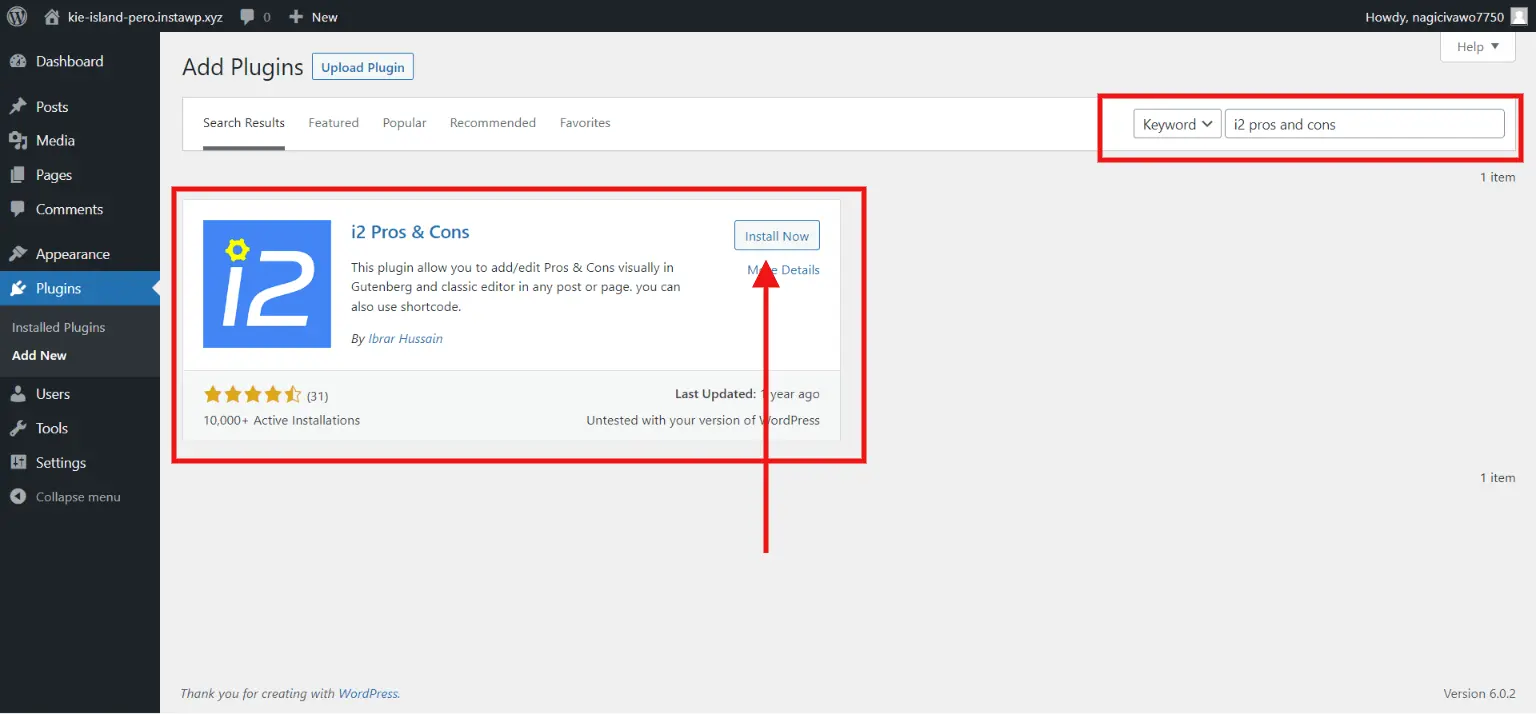
i2 Pros & Cons plugin is a highly customizable and easy-to-use plugin. It caters to a wide range of users’ requirements.
Step 2: Add the I2 Pros & Cons Blocks
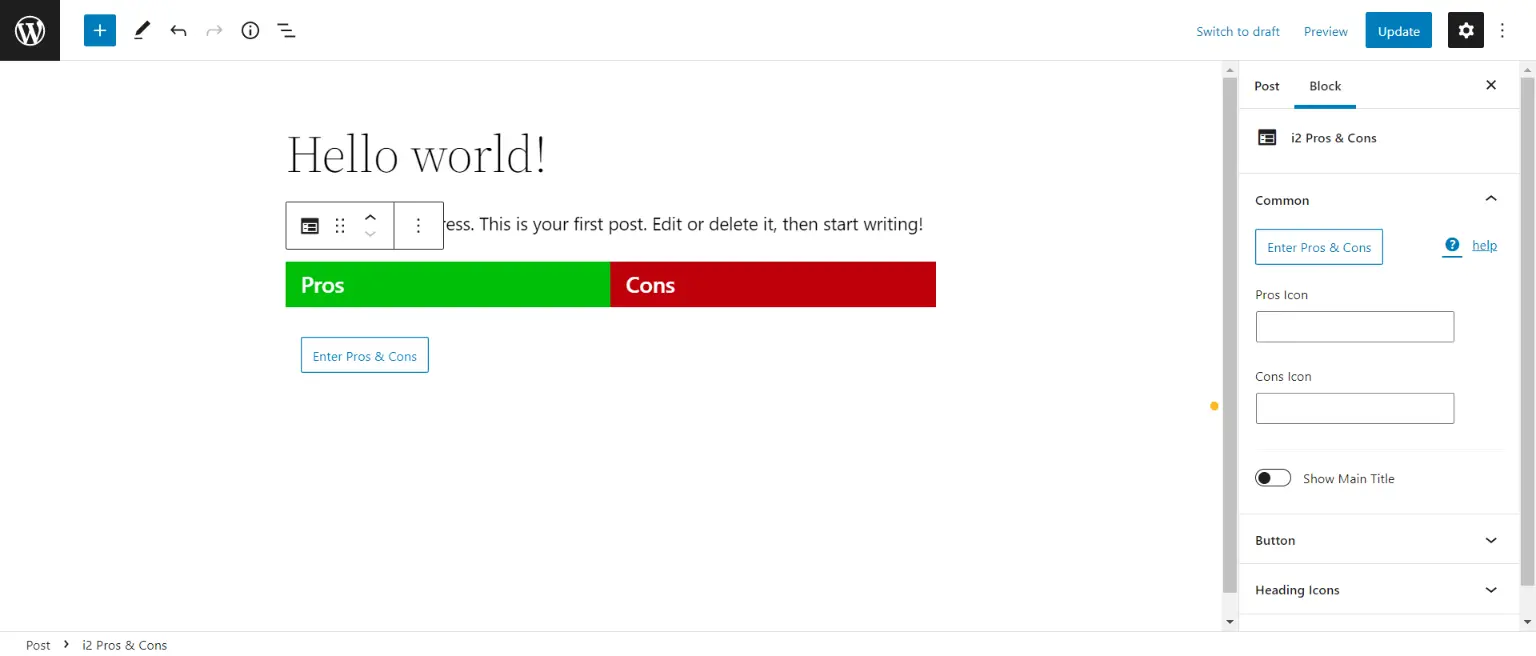
Now, you can customize the settings to make your pros and cons list. But first preview the default view inside the Gutenberg editor, so that it will give you a fair idea of your changes.
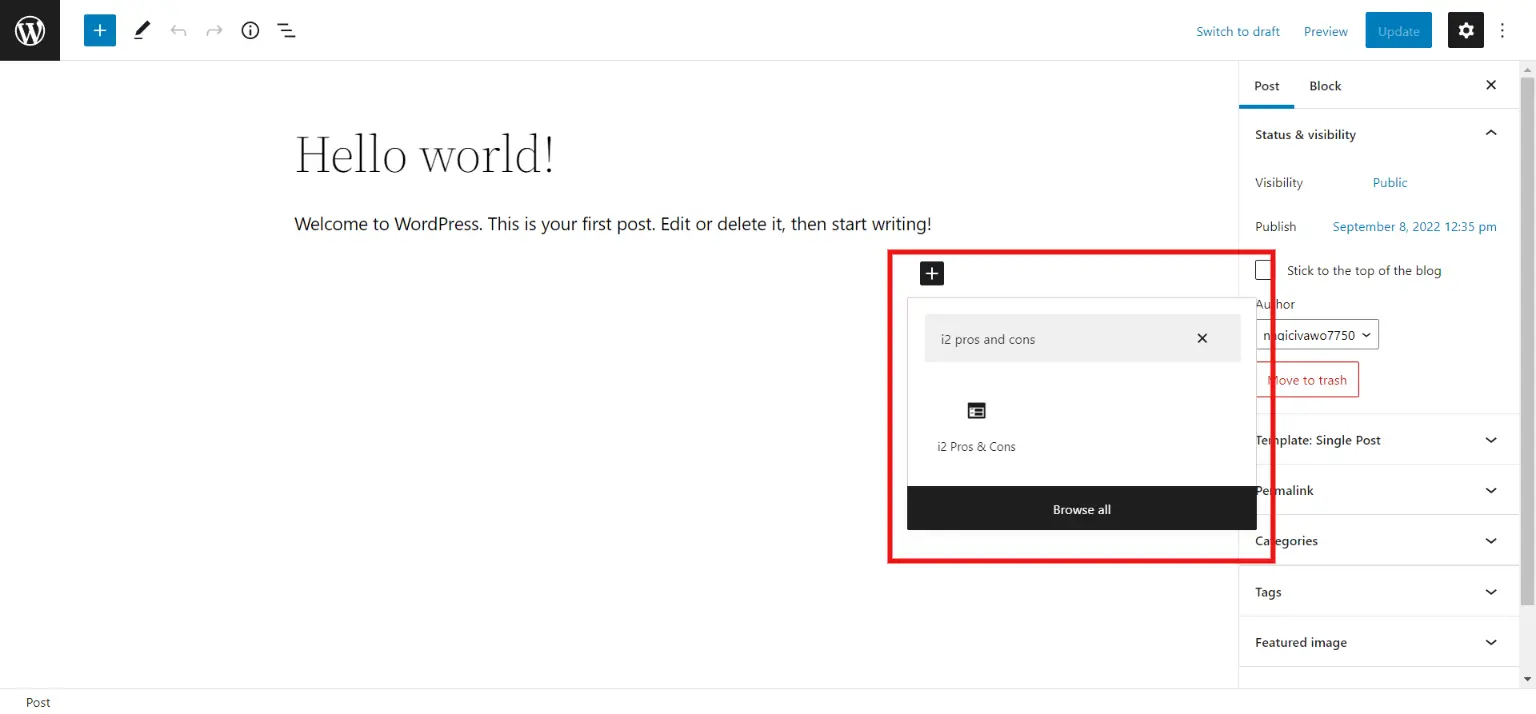
Now, adding i2 Pros & Cons blocks is simple. Just like you add any Gutenburg blog in the text editor, you can add the i2 Pros & Cons block by clicking on the (+) icon. Click on the (+) icon and search for the i2 Pros & Cons block.
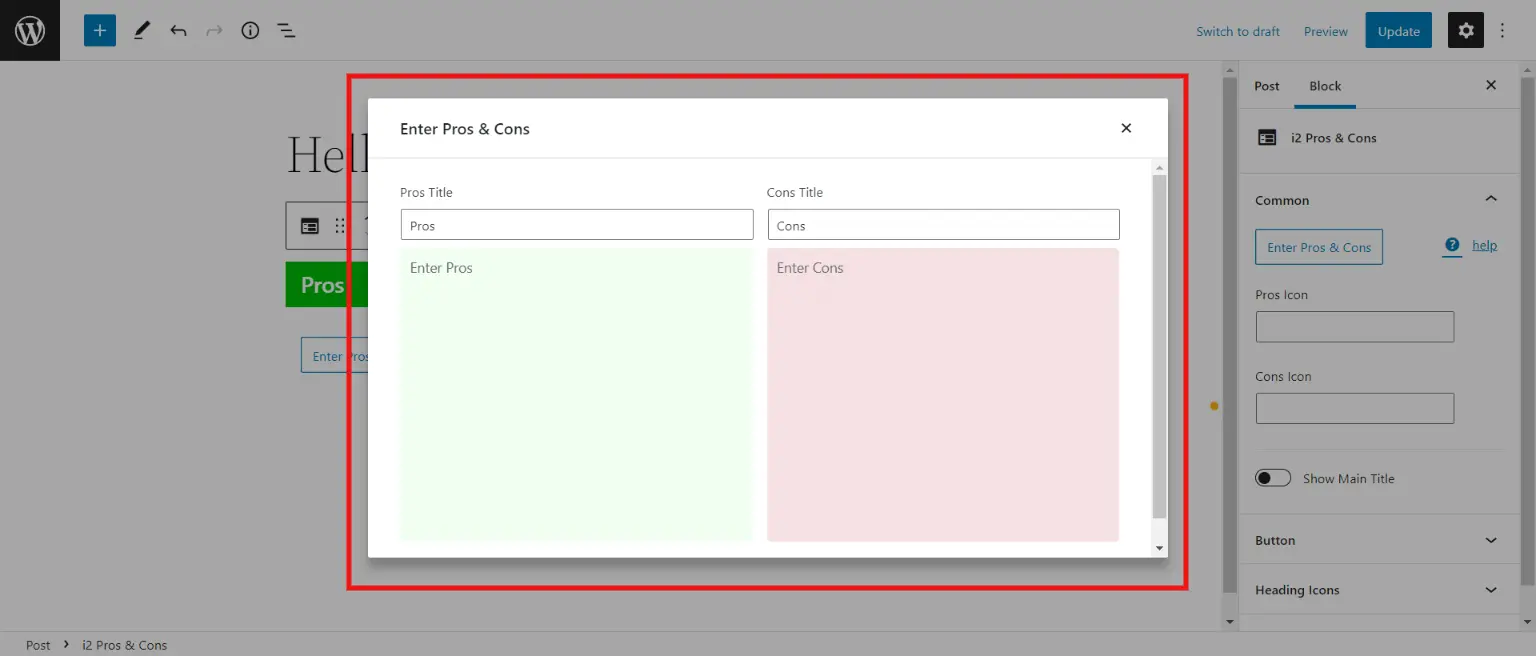
There, you will have a default version of the list. Next, click on the “Enter Pros & Cons” button. Clicking on this button will result in a small pop-up window. Here you will see two columns for the pros and cons table in WordPress respectively. Here, you can also change the name of the pros title and cons title.
Next, add all the individual points on the respective side. Note that when you close that window, you will find thumbs up on the pros side and thumbs down on the cons side.
Now, when you click on the block, you will find several options that you can configure like showing the main title slider. This will enable you to add the main title to the table.
We suggest you save the changes you make before going further to the customization part.
Step 3: Customizing the Pros and Cons Table in WordPress
Once done with adding the pointers and changing the pros title and cons title, it’s time to customize the pros and cons table in WordPress. Play around and change the colors, icons, borders, buttons, and more, and see what makes your table look good.
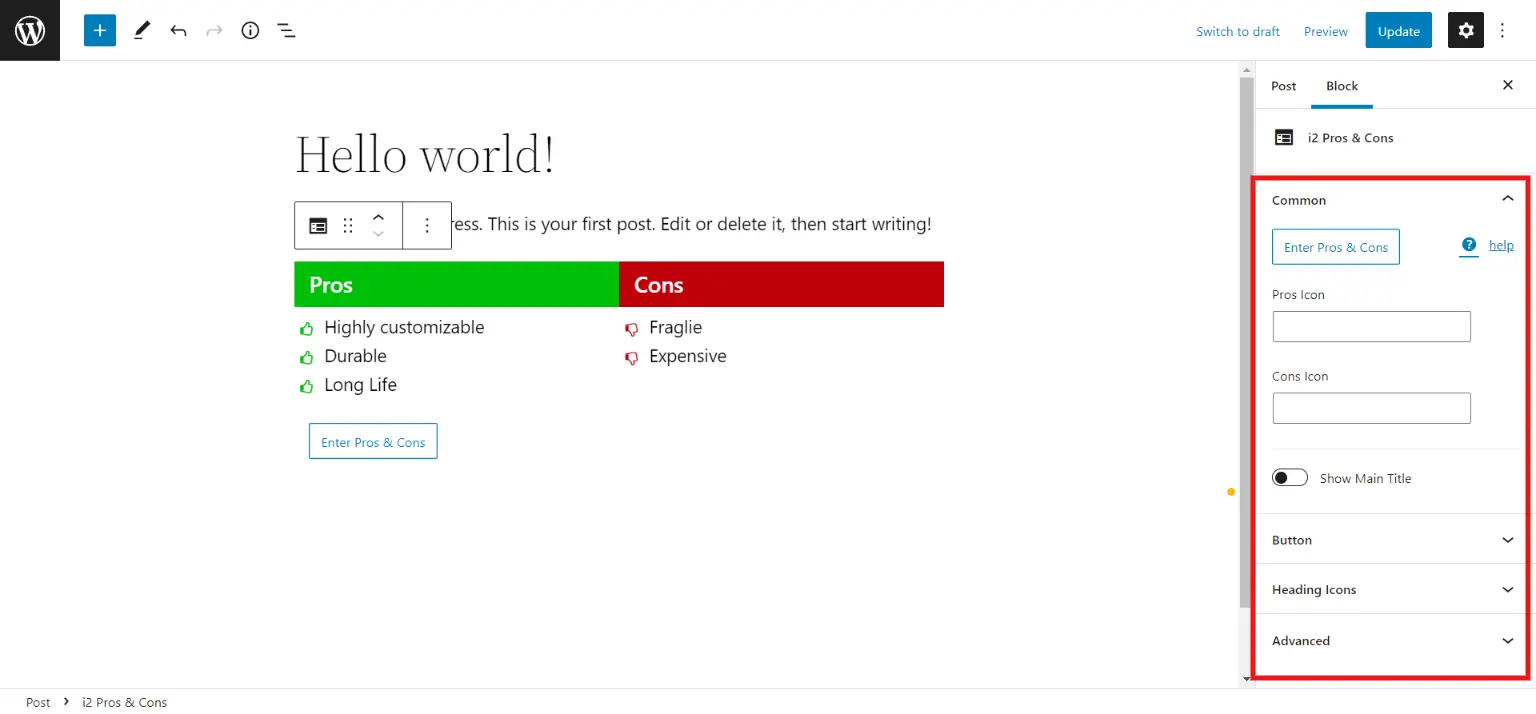
When you click on the i2 Pros and Cons option in the WordPress sidebar, you will find various subheadings like Global, Heading, Section, Box Shadow, and more. You can select them individually and configure them.
Once you are done with all the customization, hit the “Save” button and there you will have your pros and cons table in WordPress.
Method 2: Using the “Mighty Pros and Cons” Plugin
Step 1: Install and Activate the Plugin
Go to the “Plugins” in the WordPress sidebar and search for the Mighty Pros and Cons plugin. Install it and hit the activate button.
Step 2: Add “Mighty Pros and Cons” Block
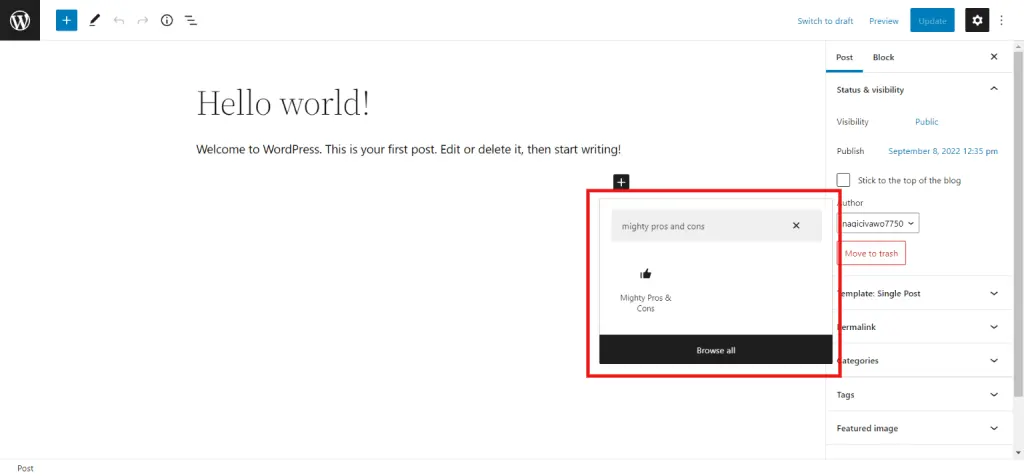
Now, go to the post where you want to add a pros and cons list. Click on the (+) icon and search for the “Mighty Pros and Cons” block. Click on it and you will find a pros and cons table in your post.
Step 3: Customize the Pros and Cons Table
Once done with inserting the block in the post, it’s time to customize it and make it look amazing esthetic-wise. With the Mighty Pros and Cons plugin, you can easily change the background color, hide or show the title and button, and edit the border type, border color, and even the border size.
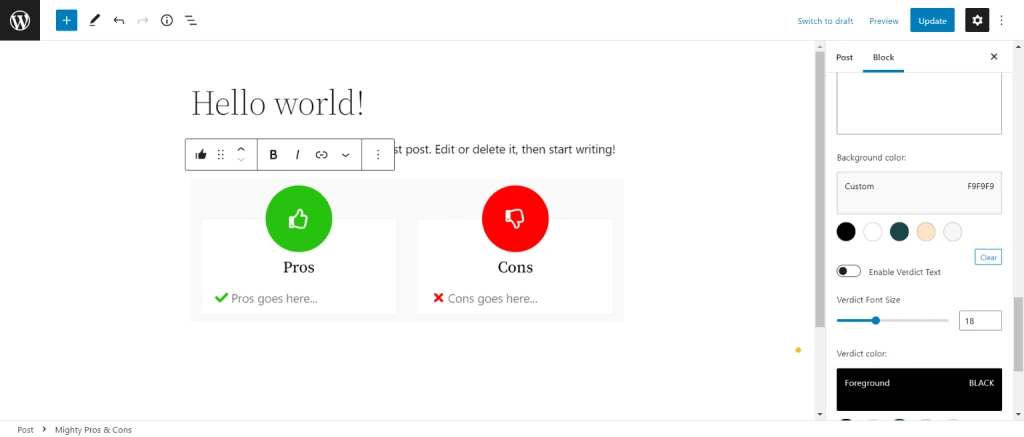
Mighty Pros and Cons have a lot of customization options. Play around and find the ones that work for your website.
FAQs
1. Why have a pros and cons table in WordPress?
If you are writing a review blog or adding a review to WordPress, then the pros and cons list helps users navigate its features and disadvantages in a very brief manner.
2. Which tool should be used to add a pros and cons table in WordPress?
WordPress is loaded with amazing table plugins, but for the pros and cons list, we suggest you use the i2 Pros and Cons plugin. It is very easy to navigate and you can master it in a few minutes.
3. Is it possible to customize the pros and cons table?
Yes. With the “I2 Pros and Cons” plugin, you can easily edit color, icons, borders, buttons, and more.
4. What are WordPress tables?
WordPress tables are a feature allowing users to create structured data presentations, commonly used for organizing information like pricing or schedules within posts or pages.
5. What are the pros and cons plugins?
The Pros and Cons plugin for WordPress enables users to list the advantages and disadvantages of a product or service in a visually appealing format, aiding decision-making but may require additional maintenance and compatibility checks with other plugins.
Wrapping Things Up
And that’s it for this blog. We hope this blog has helped you in creating a pros and cons table in WordPress. Having a pros and cons table in WordPress will help you boost your SEO. It helps users easily navigate what are the merits and demerits of a particular product.
This was a detailed guide on how you can easily create a pros and cons table in WordPress, but if you are still stuck somewhere, you can hire WordPress engineers from JustHyre.
If you like reading this blog, also read our expert guide on How to Display Recent Posts in WordPress by Category Name. (3 Easy Methods) and How to Display Recent Posts in WordPress by Category Name? (3 Easy Methods).


Stuck Somewhere?
Connect With JustHyre
Hire WordPress Engineers for custom jobs like Website Customization, SEO Optimization, Clearing a Hacked Website, Installation & Configuration & more.
Connnect with JustHyre
0 Comments