How to Create an Attractive Testimonial Block In Elementor? ( 2 Easy Methods)
Want to create an attractive testimonial block in Elementor? You have landed on the correct page. Testimonials are a great way to show social proof and market your business. A website testimonial gives credibility to your website. Testimonials are sales tools and more than that they represent the company’s work and its reputation.
Elementor is a visual WordPress website builder. It helps in advanced styling, layouts, and design elements for your WordPress content. Elementor is a drag-and-drop editor which makes it easier for people to use. Elementor template library has various templates that you can insert with just one click.
In this blog, we will show you how you can easily create a testimonial block in Elementor. But before that let’s see what is testimonial and how it affects your business.
What Is a Testimonial?
A testimonial is a statement passed by a customer who has tested the product or service of your business. A standard testimonial shows how a customer had a challenge and how the company or a brand delivered the solution. It works as a marketing factor for your business and signifies the credibility of your products and services.
A testimonial can be of different types like a quote testimonial which is brief and concise, a social testimonial where a customer tweets about your service or shares screenshots about your product, a video testimonial where your customer records a video about their experience, and many others.
Why Is Testimonial Good for Your Businesses?
1. Social Proof
Social proof is one of the most important aspects of marketing. It’s more trustworthy and the particular reason for the circumstance is that the customer talks good things about your service or product because they have experienced it.
2. Create an Emotional Connection
A testimonial helps you to connect with your potential customer at an emotional level. When a customer is in the dilemma of whether to buy your product or not, a testimonial will come into play and help them to make decisions. A testimonial excites the emotions of customers, who then will try to make a purchase in order to feel the same satisfaction or happiness described in the testimonial.
3. Highlighting Customer Success
Testimonials are a great way of social proof that your business understands customers’ needs and preferences because a testimonial shows the customer’s story and how your business has helped them. That way, people who have a similar problem will have proof that your business is the best option for their problems.
4. Build Client Loyalty
A high level of engagement with brands automatically builds connections and loyalty is created. When a customer buys your product and after that when asks them about their experience, it signifies that your business does care about the customer’s experience and thus creates loyalty.
5. Opportunities to Grow
Not all feedback will be positive. There will be some negative feedback where a customer may not have found your service good enough for them. You should not neglect or suppress them. Take it as an opportunity and use that information to improve your product or service.

How to Create a Testimonial Block In Elementor?
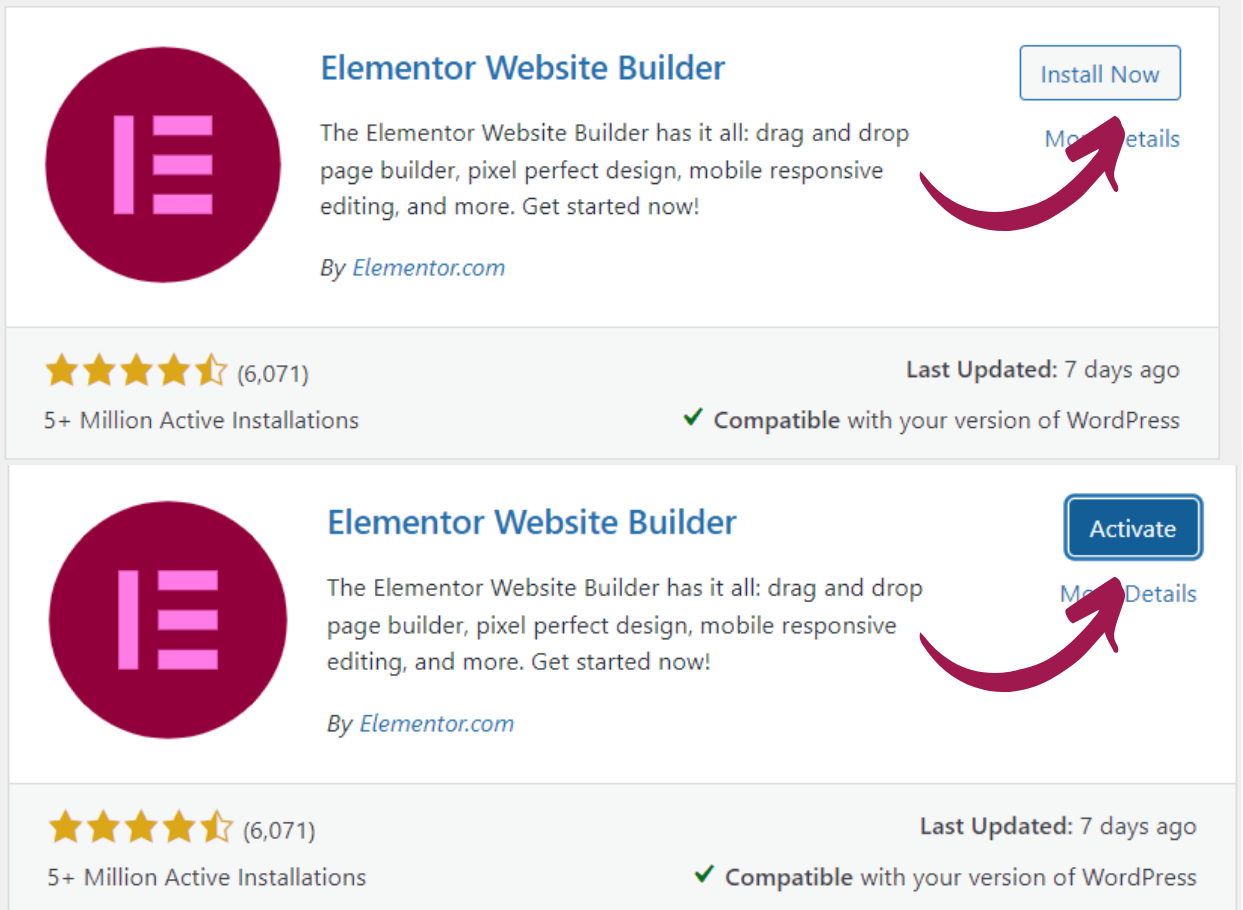
Creating a testimonial with Elementor is as simple as making a pie. Firstly, to create a testimonial block in Elementor, you need to download Elementor to your WordPress site. For that, go to the “Plugins” in the menubar of your WordPress and then search “Elementor”. Download it and activate it. After that, you will see the “Elementor” option in WordPress Menubar.
Click on “Getting Started” and then “Create your First page” to create a page for the testimonial block in Elementor. Now, to create a testimonial block in Elementor, there are two easy methods. First, from the direct widget and second from scratch.
Method 1: From Direct Widget
A testimonial block in Elementor can be easily created with widgets. If you are new to Elementor and don’t want too much customization, you can create a testimonial from the direct widget.
Step 1: Select Your Structure
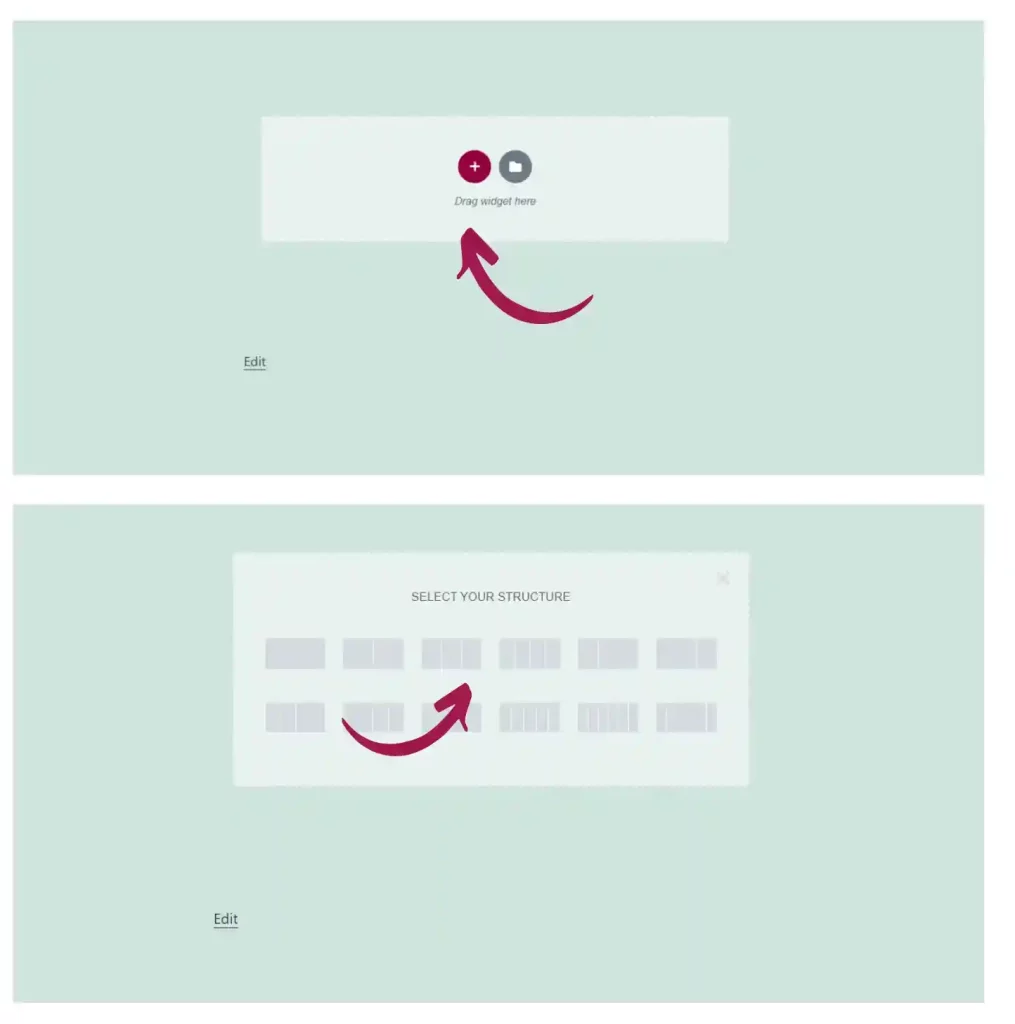
Click on the “Add New Section” symbol and select your structure. If you wish to add inner sections to your testimonial, go to the “Widgets” panel and drag and drop the inner section into the section. Click on a column, right-click and then select “Duplicate” to duplicate the respective column.
Step 2: Edit the Section
You can customize the added section by clicking on the “Edit Section” symbol. There you can edit the layout and style of the section. From the “Advanced” option you can edit motion effects, responsive design, and likewise.

Step 3: Add Testimonial Block
Now to add the testimonial section, go back to the widgets panel and search “Testimonial”. Drag and drop it to the section. And that’s it, your testimonial section is ready. All you need to do now is edit the content. You can do that by clicking on the “Edit Column” button and the “Content” to edit text and image, “Style” to edit the style of the section, and “Advanced” for advanced edits like motion and background. And it’s that simple to create a testimonial block in Elementor with widgets.
Method 2: Creating a Testimonial Block In Elementor From Scratch
Step 1: Select Your Structure
To create a testimonial block in Elementor from scratch, Just like the first method, select your structure and edit it.
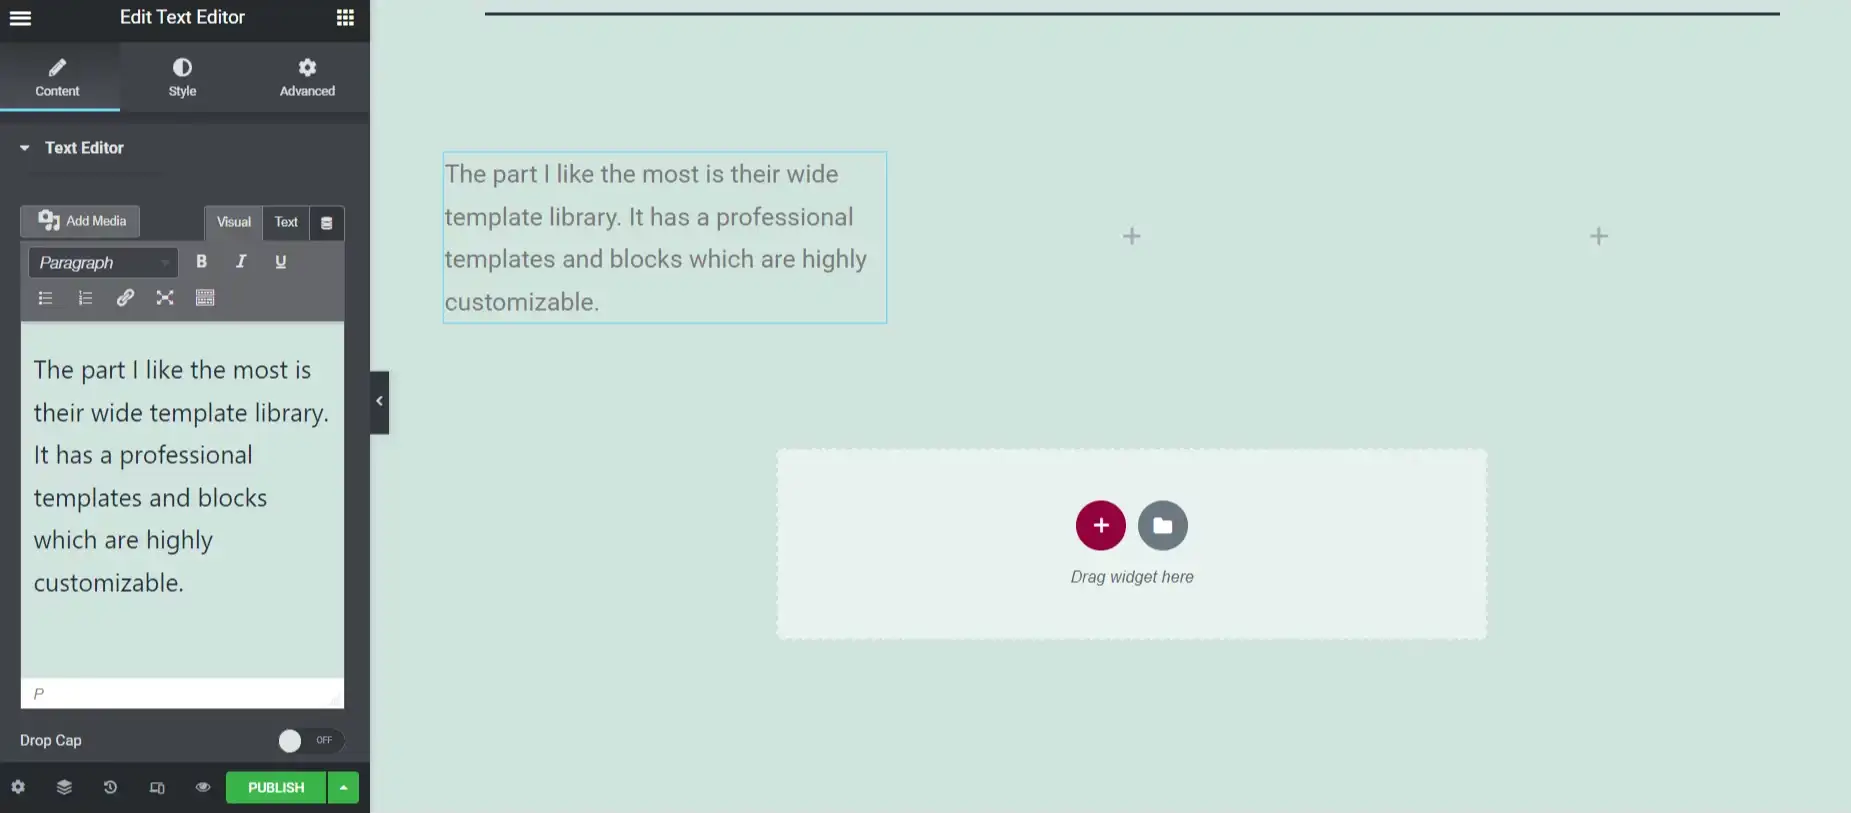
Step 2: Adding Content to the Columns
To add content to your columns first hover over the widgets panel and drag and drop “Text Editor” to the column. You can format the text and the text block. Edit your content under the “Content” section and style like color and alignment from the “Styles” section. Use the “Advanced” section to give padding, margin, and likewise to your content.
Next, drag and drop the “Image” element below the text editor to add an image to your testimonial. Insert an image by clicking on “Choose Image”. Select the size and alignment of the image according to your requirements. From the “Style” section manage the width, height, and opacity of the image. Make all the necessary edits from the “Style” and “Advanced” sections.
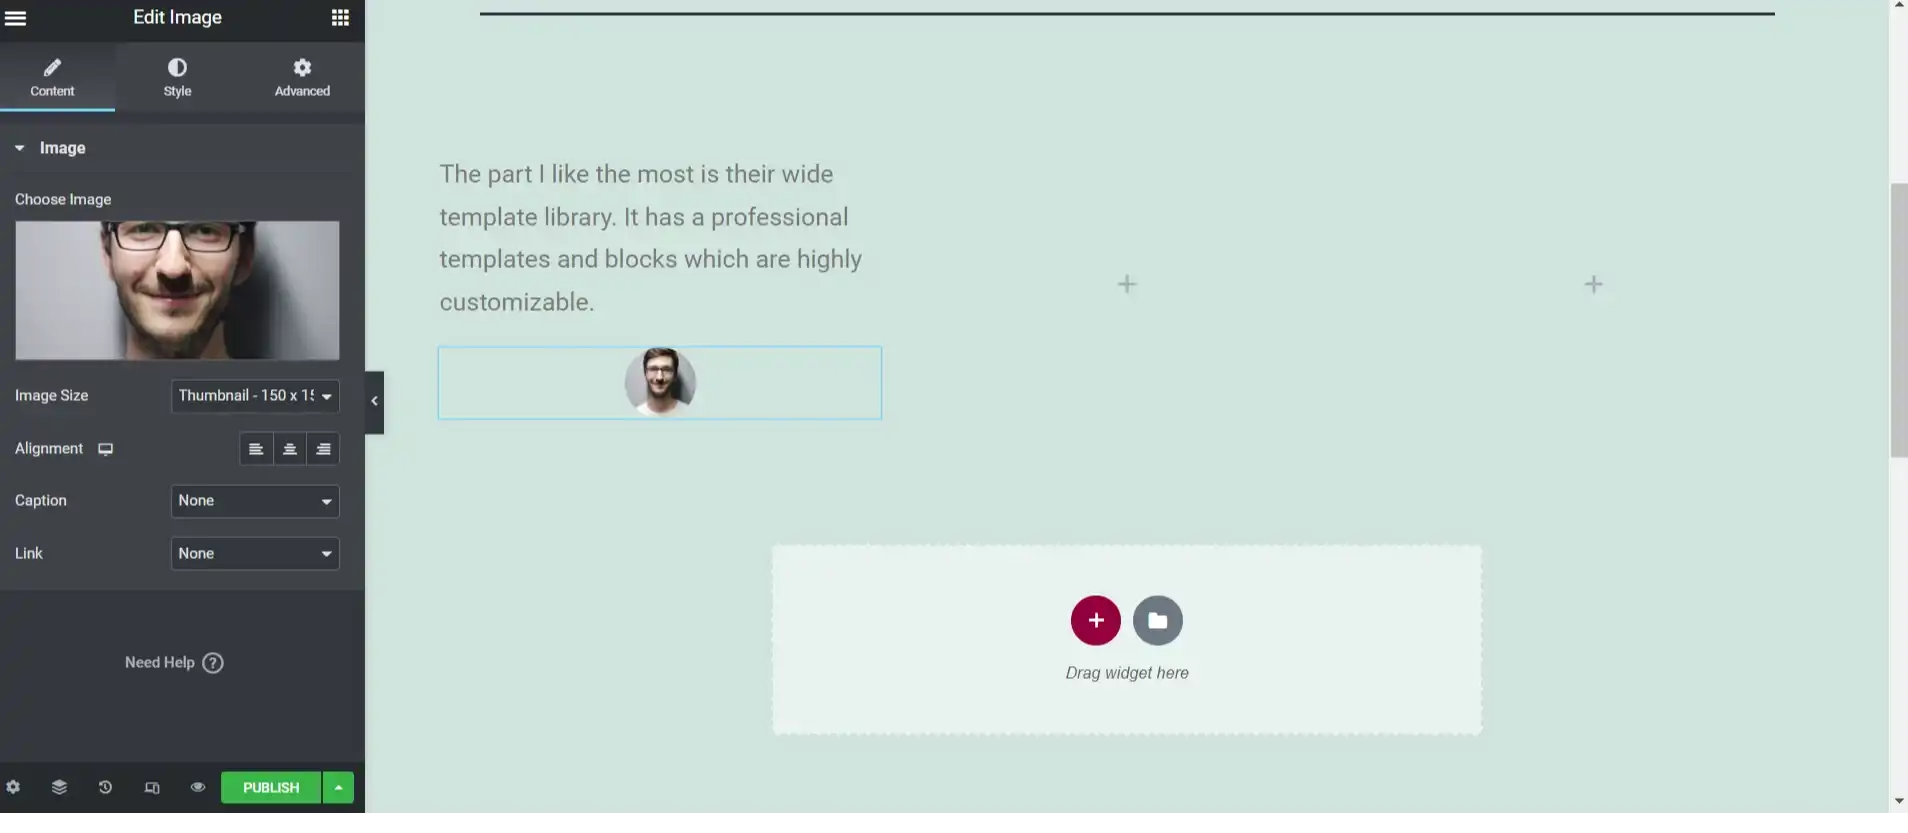
After that add the name and job title of the person who gave the testimonial. To add a name under the image, select “Heading” and drag and drop it below the image widget. Edit the text and change the size and alignment of the heading from the “Content” section. Edit typography, stroke, shadow, color, and blend mode from the “Styles” section on the left side of the interface. Use the “Advanced” section to edit borders, masks, positioning, and likewise.
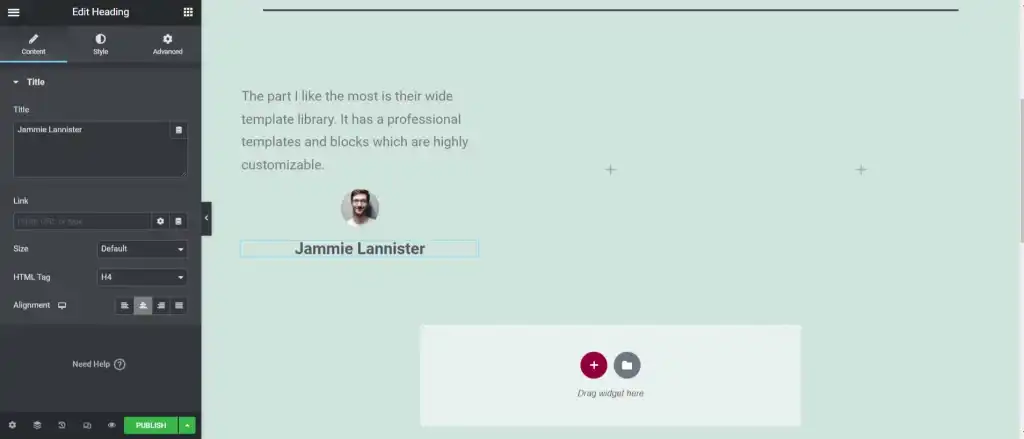
Now, to add the job title, simply add a text editor from the widgets panel. Drag and drop it below the heading widget. Edit it according to the requirements.
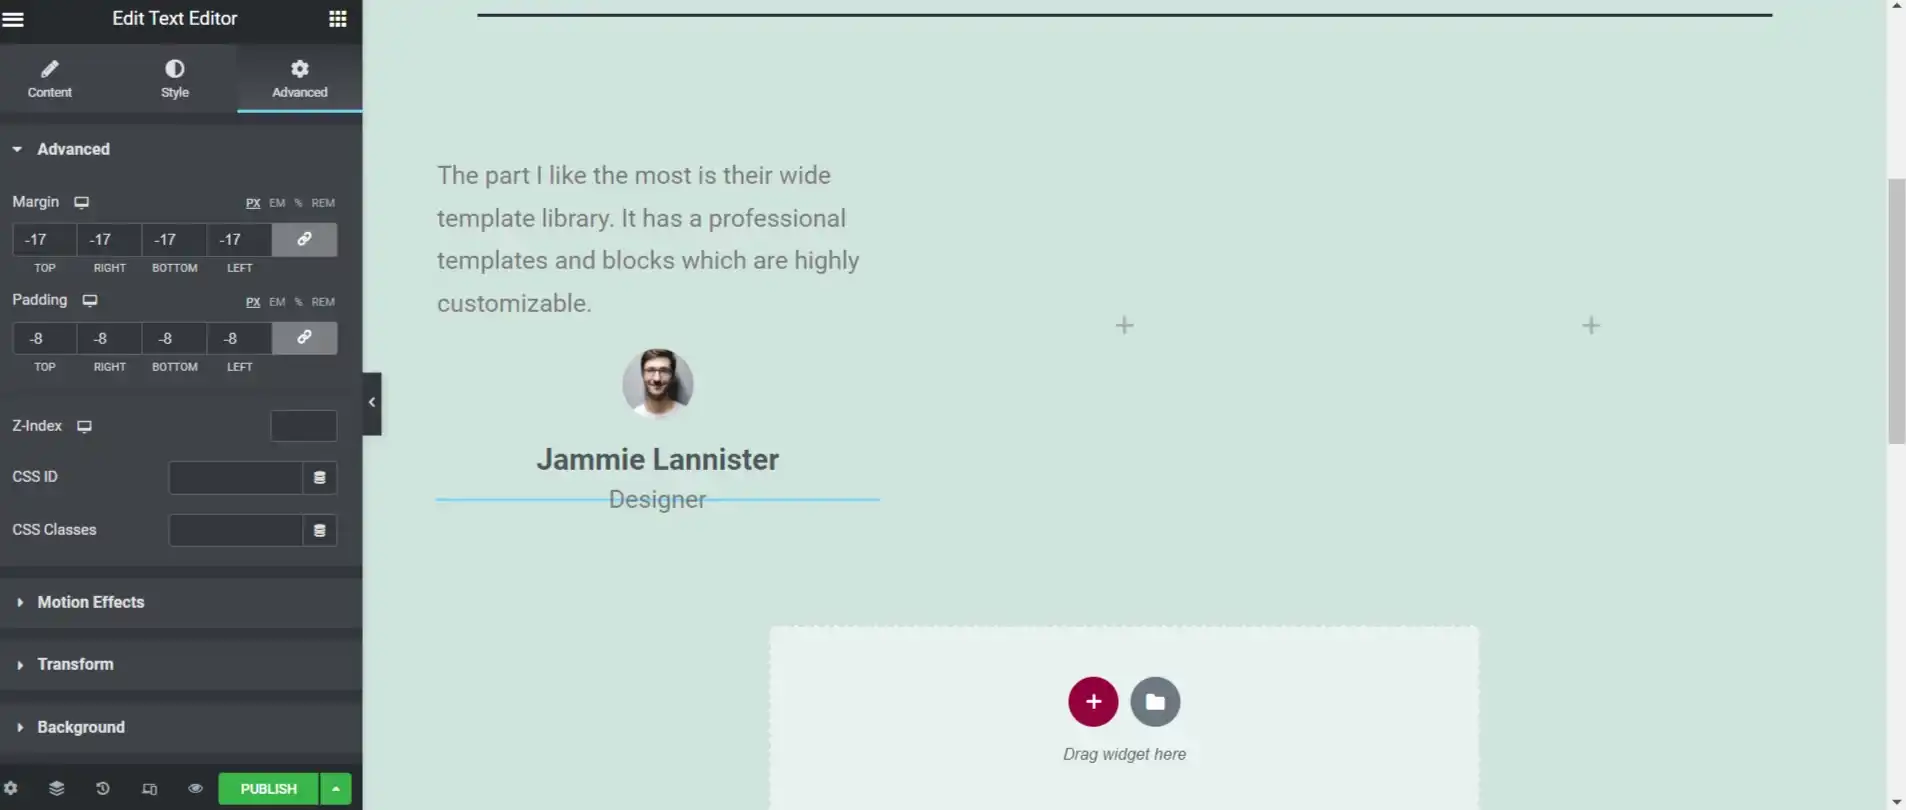
Now to make the testimonial block in Elementor look more esthetic, play with the advanced options like padding and shadow. And there you have your first testimonial.
Now to add testimonials to other columns, simply right-click the “Edit column” button and copy it. After that paste it to the blank column by right-clicking on the “Edit column” button. Now, delete the blank column and there you will have another testimonial. Just edit the text and image.
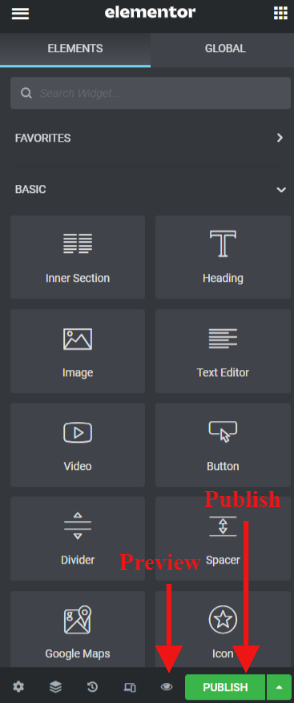
Step 3: Preview and Publish
After creating a testimonial block in Elementor, it’s time to preview it. To preview, click on the button present beside the “publish” button. If satisfied with the preview, publish it on your website by clicking on the “Publish” button provided. And if not, go back and make the necessary edits.
Wrapping up
And that’s all. Use this block to make an attractive and engaging testimonial block in Elementor. Elementor is a well-crafted WordPress website builder that helps you to create designs from scratch even if you don’t know how to code. It also has a wide template library for you to choose from.
Testimonials that are well-designed and presented on your website will show the capabilities and services of your business. A strong testimonial includes credibility through stats and figures, specificity, solved problems, and the customer’s POV.
A testimonial block in Elementor can be easily created with drag-and-drop options. It creates responsive designs that result in dynamic changes in the appearance of the content, depending on the screen size and its orientation. Try Elementor to create amazing testimonials with different layouts and advanced styles.
[wbcr_html_snippet id=”4204″]


Stuck Somewhere?
Connect With JustHyre
Hire WordPress Engineers for custom jobs like Website Customization, SEO Optimization, Clearing a Hacked Website, Installation & Configuration & more.
Connnect with JustHyre
0 Comments