How to Set up Woocommerce With WordPress? (7 Easy Steps)
Setting up WooCommerce with WordPress can seem to be a complicated process. But with a proper guide, one can easily configure it.
WooCommerce, being one of the most popular eCommerce platforms, offers you a flexible and highly customizable way to set up your online store. It is cost-effective, easy to manage, and beginner’s friendly.
Here, in this blog, we will take you through a detailed guide on how you can easily set up WooCommerce with WordPress.
Why Use Woocommerce With WordPress?
WooCommerce offers an easy and convenient way to set up your online store. It can seamlessly integrate with WordPress and let you reach out to your global audience.
It also offers a rich library of free and paid extensions that help you customize your store and add more functionality to it. Besides this, it is highly secure. It uses a tokenization system that secures all the payment information on the payment processor’s servers rather than the site’s database.
With all these benefits comes WooCommerce’s extensive guide and support documentation which can help you in case of any need. You can also reach out to the team via email for assistance.
How to Set up Woocommerce With WordPress?
Step 1: Setup a WordPress website
The very first step to set up WooCommerce with WordPress is to set up a WordPress website. Choose a web hosting provider that supports your requirements. Evaluate whether you need shared hosting, a VPS (Virtual Private Server), or managed hosting.
Once you decide on the hosting provider and buy a domain name, you will need to install WordPress and log into your admin dashboard.
Customize the general settings including site title, tagline, and timezone under Settings > General. Under Settings > Permalinks, pick up a permalink structure that is SEO-friendly and descriptive.
Step 2: Install WooCommerce
Once you have set up your WordPress website, you need to install the WooCommerce plugin. For setting up WooCommerce with WordPress, follow the below-mentioned steps:
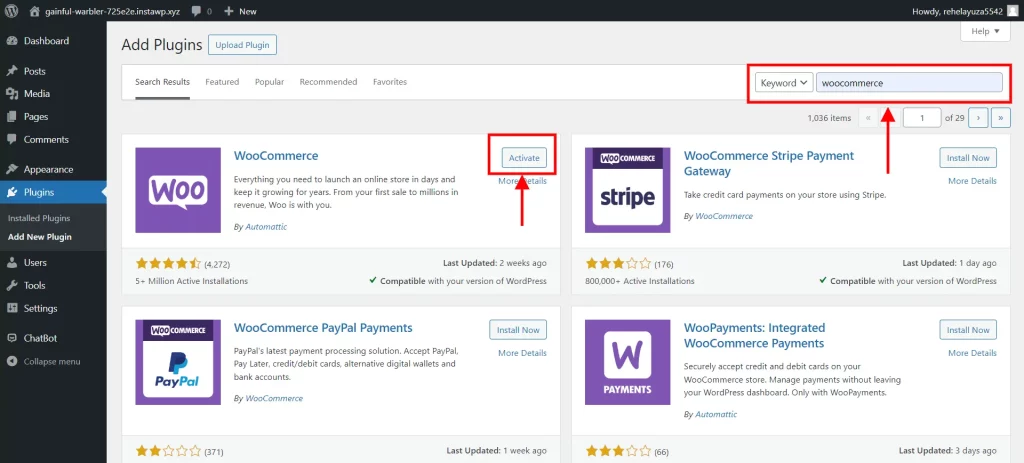
- On the WordPress dashboard, click Plugins > Add New.
- Search for “WooCommerce” in the search bar.
- Click “Install Now” next to the WooCommerce plugin.
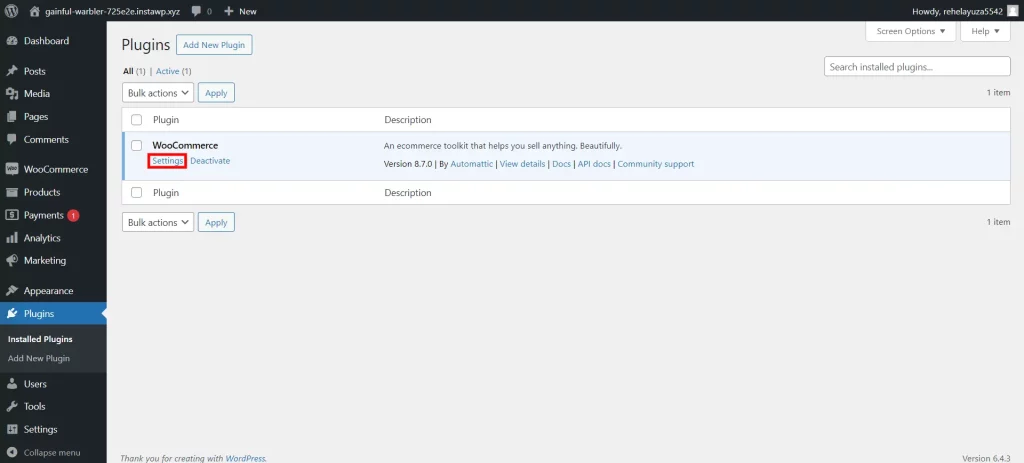
- Once installation is complete, click “Activate” to activate the plugin on your website.
Step 3: Configure WooCommerce
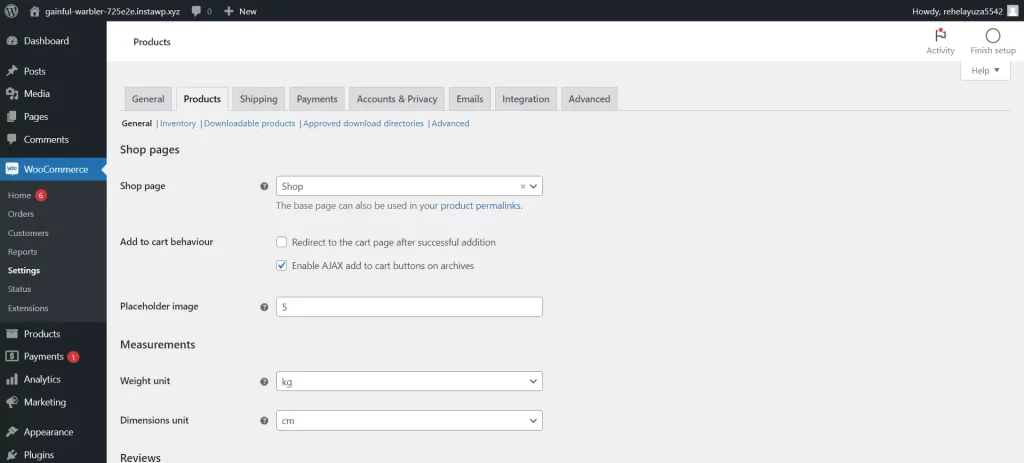
After the activation, WooCommerce will take you on a step-by-step setup wizard to help you configure it properly. Select the store’s location, currency, and the units of measure for weight and dimensions. Pick whether you tax or not, based on your company’s needs.
Next, while adding WooCommerce with WordPress, you need to select the shipping options.
- Define shipping zones depending on the regions or countries you want.
- Set up shipping methods that include flat rate, free shipping, or local pickup.
- Specify the shipping rates and rules for each shipping method.
Once, done with that Choose the preferred modes of payment for your customers, for instance, PayPal, Stripe, Square, or offline payments. Configure each payment gateway with appropriate settings, e.g. API keys or account details.
Create a tax rate based on local laws and tax codes. Figure out whether taxes should apply according to the shipping address or the billing address of the customer.
Step 4: Add Products
Navigate to Products > Add New. From the WordPress dashboard menu, click “Products” and then “Add New” to create a brand-new product.
Next, to set up WooCommerce with WordPress, you will need to enter the product details:
- Type the product name, description, and short description.
- Establish the product price, sale price (if there is any), and regular price.
- Categorize and tag products to make sure your products are organized well.
Choose the appropriate product type: simple product, grouped product, external/affiliate product, or variable product. For variable products, specify the attributes (e.g. size, color) and their corresponding prices and stock levels.
After that, you will need to work on inventory management. For that,
- Enable stock management to be able to know the product’s quantities.
- Establish stock status (in stock, out of stock, or on backorder) for each product.
- Set up low stock threshold notifications to get notified when your inventory levels are low.
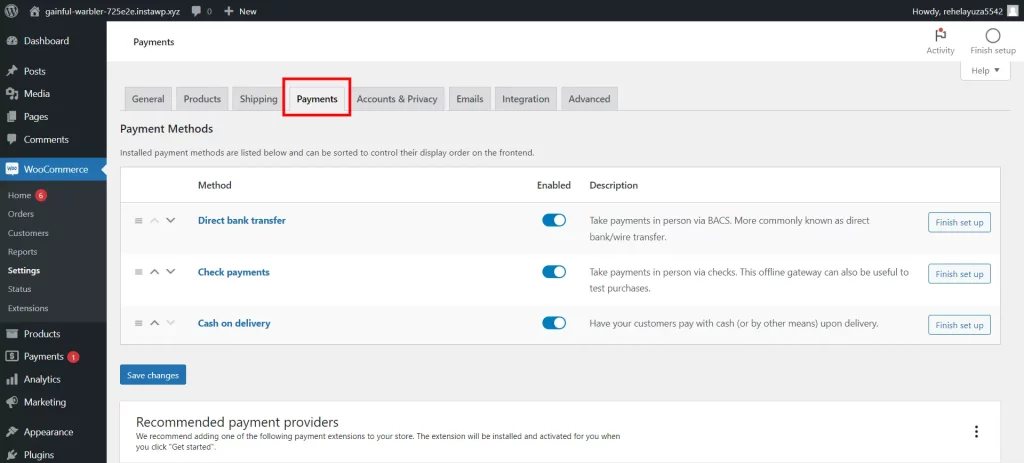
Step 5: Choose Payment Gateways
On the WordPress dashboard, go to WooCommerce > Settings. Proceed to the “Payments” tab to access the payment gateway settings. Configure the payment gateways you wish to provide to your customers. Configure each payment gateway with the required settings, for example, the API keys, account details, and payment methods.
Conducting test transactions with different payment methods helps to make sure that payments are processed correctly. Make sure that customers get order confirmation emails and that orders are tracked correctly in the WooCommerce dashboard.
Step 6: Install Additional Plugins (Optional)
Next, to set up WooCommerce with WordPress, you can add some plugins that can help you speed up the performance and save time. Have a look at the WordPress plugin repository or third-party marketplaces for plugins that enhance WooCommerce’s capabilities.
Add plugins that bring functions like advanced analytics, email marketing integration, product reviews, or social media sharing. Enable the plugins and set their options in line with your needs. Select plugins from well-known and reliable sources that are compatible with your WooCommerce set-up. Regularly update plugins to mitigate security flaws and make sure they are in sync with the latest WordPress and WooCommerce iterations.
Step 7: Optimize for SEO
Install and activate an SEO plugin like Yoast SEO or Rank Math. Maximize the use of product titles, descriptions, and meta tags with the exact keywords. Make use of descriptive URLs (permalinks) that feature keywords related to the product. Compress images by optimizing without compromising their quality. Take advantage of caching plugins to boost page loading and site performance in general.
Set up the permalink settings to use “Post Name” or a custom structure including relevant keywords.
Wrapping Everything
Setting up WooCommerce with WordPress is easy and simple. WooCommerce helps you sell all types of products, whether they are physical goods, downloadable products, or service-based products. Adding WooCommerce with WordPress will help you increase sales and generate more revenue.
If you like reading this blog, also read How To Create A Child Theme In WordPress. 3 Easy Ways, How To Update A Theme On WordPress? 3 Easy Ways and How To Edit WordPress Template Files? 3 Easy Methods.


Stuck Somewhere?
Connect With JustHyre
Hire WordPress Engineers for custom jobs like Website Customization, SEO Optimization, Clearing a Hacked Website, Installation & Configuration & more.
Connnect with JustHyre
0 Comments