How to Install Google Tag Manager WordPress? (3 Easy Steps)
Finding it difficult to install Google Tag Manager on your WordPress website?
Google Tag Manager is a centralized tool for all the tags you have for your website. It lets you control all the tags from a single dashboard. You can manage all your scripts from a single dashboard. Setting up Google Tag Manager can be tricky in the beginning, but its user-friendly interface makes it a lot easier to use, even for a beginner.
This is a simplified guide on how to install Google Tag Manager on your WordPress. But first, let’s see what is Google Tag Manager and how it can be useful to you.
What Is Google Tag Manager?
Google Tag Manager is a tag management system that allows you to add multiple code snippets to track the conversation, traffic, and other analytical data. With google tag manager you can manage all your tags from just a single dashboard. There are built-in tag templates for Google Analytics, DoubleClick, Adwords, Google Consumer Survey, and many other third-party analytics and tracking platforms.
Google Tag Manager is mainly used to see how a campaign or a particular advertisement is doing. The tag lets you know if a website visitor who clicked your advertisement eventually completed a valuable action such as signing up for a subscription plan or making a purchase of your product.
With this tool, users can deploy tags on their website without having to edit any code, a great relief for beginners and non-technical users. But if you are an advanced user or have knowledge of coding, you can also add your tracking codes with custom HTML.
So basically, Google Tag Manager is a centralized tool that maintains all the site’s tags. If you want to update the tag for any particular campaign, then you might need to adjust and edit some code snippets, which are not beginner-friendly. Even for the advanced user, it is not preferable as updating tags usually has a big chance of making an error. So, Google Tag Manager makes it easy to update as you don’t have to manually add code blocks to web pages.
Google Tag Manager also ensures that the site runs properly and with a user-friendly error-checking process, it handles critical data more safely. It also ensures that your site runs properly even when there is more traffic.

How to Install Google Tag Manager in WordPress?
To set up Google Tag Manager in WordPress there are 3 simple steps you need to follow.
Step 1: Sign Up for the Google Tag Manager Account
The very first step to installing Google Tag Manager to your WordPress website is to have a Google Tag Manager account. To do so:
- Go to the Google Tag Manager website and click on “Start for free”. The free version has a lot of features but if you want more advanced features and 24/7 support, you can opt for Premium Version.
- Sign in with your Google account.
- Once done with signing in, you will have to create an account. For that, click on the icon provided or the ‘Create Account” button.
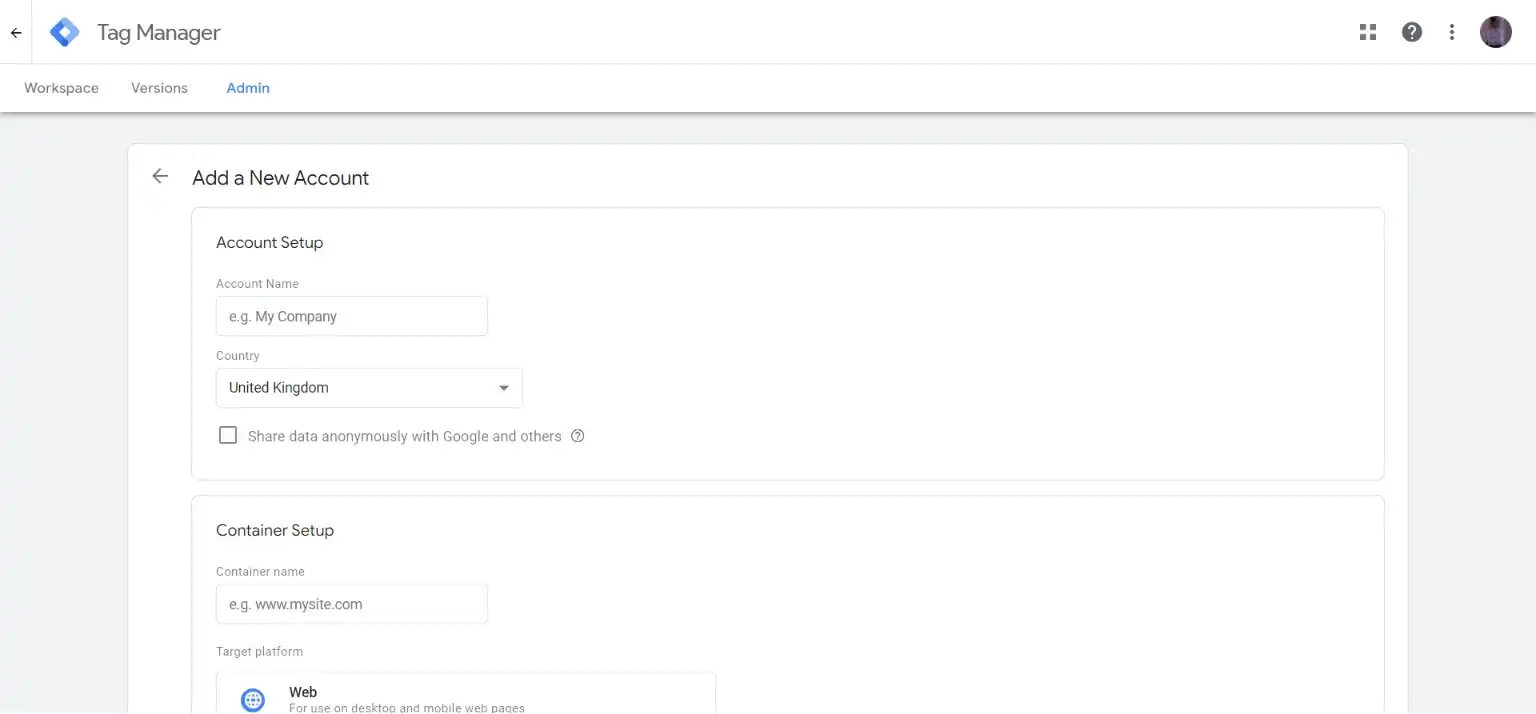
- You will land on an “Add a New Account” page. Enter the account name and select your country from the respective fields. If you are using your company’s account, then write your company’s name as the account name.
- Next, you will see a Container Setup. It is a collection of all configurations installed on a website, which include tags and triggers. Here, write your WordPress website name.
- In the “Target Platform”, check the web.
- After completing all the requirements, hit the “Create” button to create an account.
- Next, a pop-up for Terms and Conditions will appear. Accept that by checking the box and continuing the process by hitting the “Yes” button on the top-right corner of the interface.
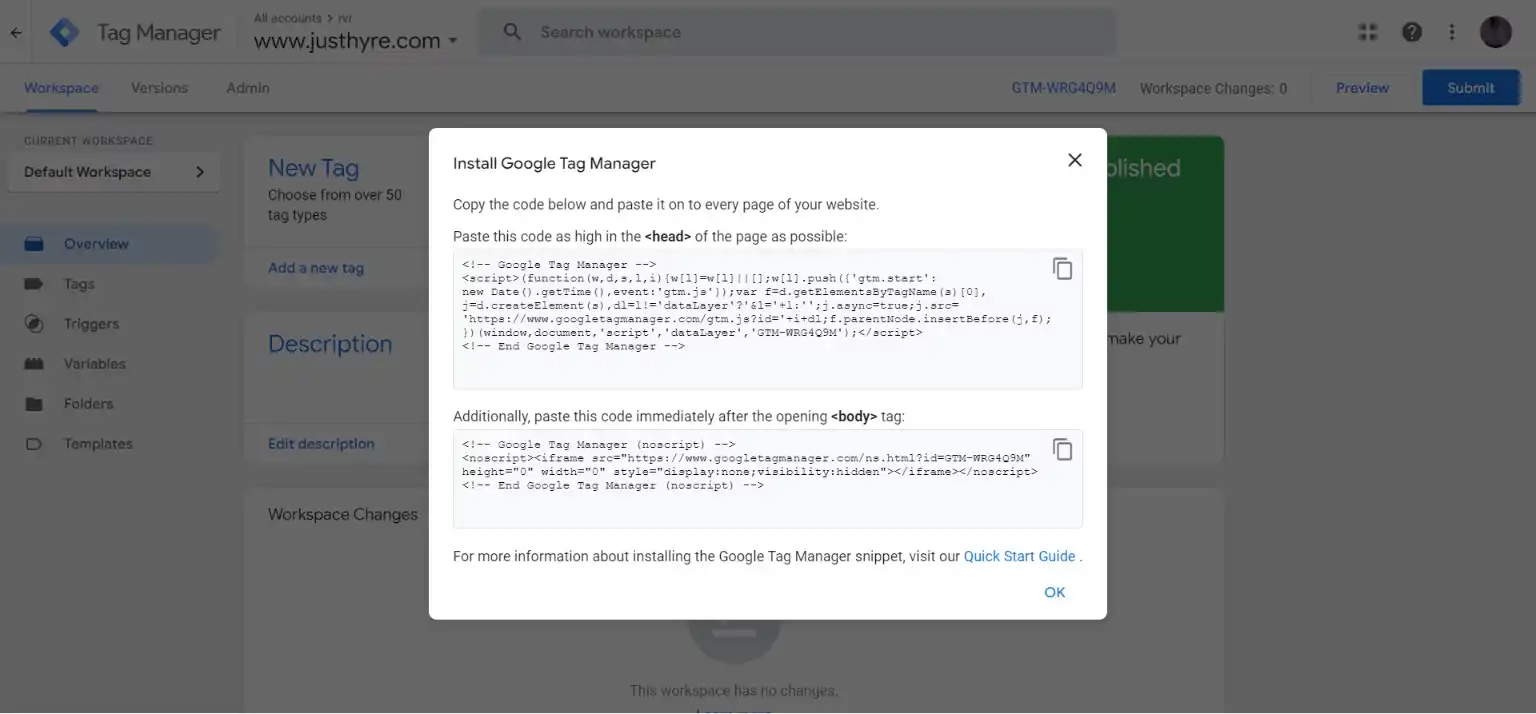
- Now, two codes will appear and you will need them to add Google Tag Manager to the website.
Step 2: Copy-paste the Tracking Codes
Now, that your Google Tag Manager code snippets, the next step to installing Google Tag Manager is to add code snippets to your WordPress website. You will need to add the tracking code to the website’s header and body via its theme. To copy and add the tracking code to your WordPress website, follow the below-mentioned steps:
- Open your WordPress admin dashboard.
- Go to “Appearances” from the sidebar and click on “Theme Editor”.
- In the “Theme Files” navigation panel, search for header.php.
- Now, go back to the Google Tag Manager tab and copy the Google Tag Manager code. Find <head> tag and paste the tag manager code just next to it.
- Now, copy the second part of the code snippet from the Google Tag Manager and paste it just after the <body> tag.
- Finally, click on “Update File” to save all the changes.
And now, your Google Tag Manager can be used to install any tracking codes.
Step 3: Publish a New Tag
Google Tag Manager provides more than 50 tag types from Google products to other third-party services. If you are good at coding then you can also add custom HTML and JavaScript tags using its interface. To add a new tag, follow the below-mentioned steps:
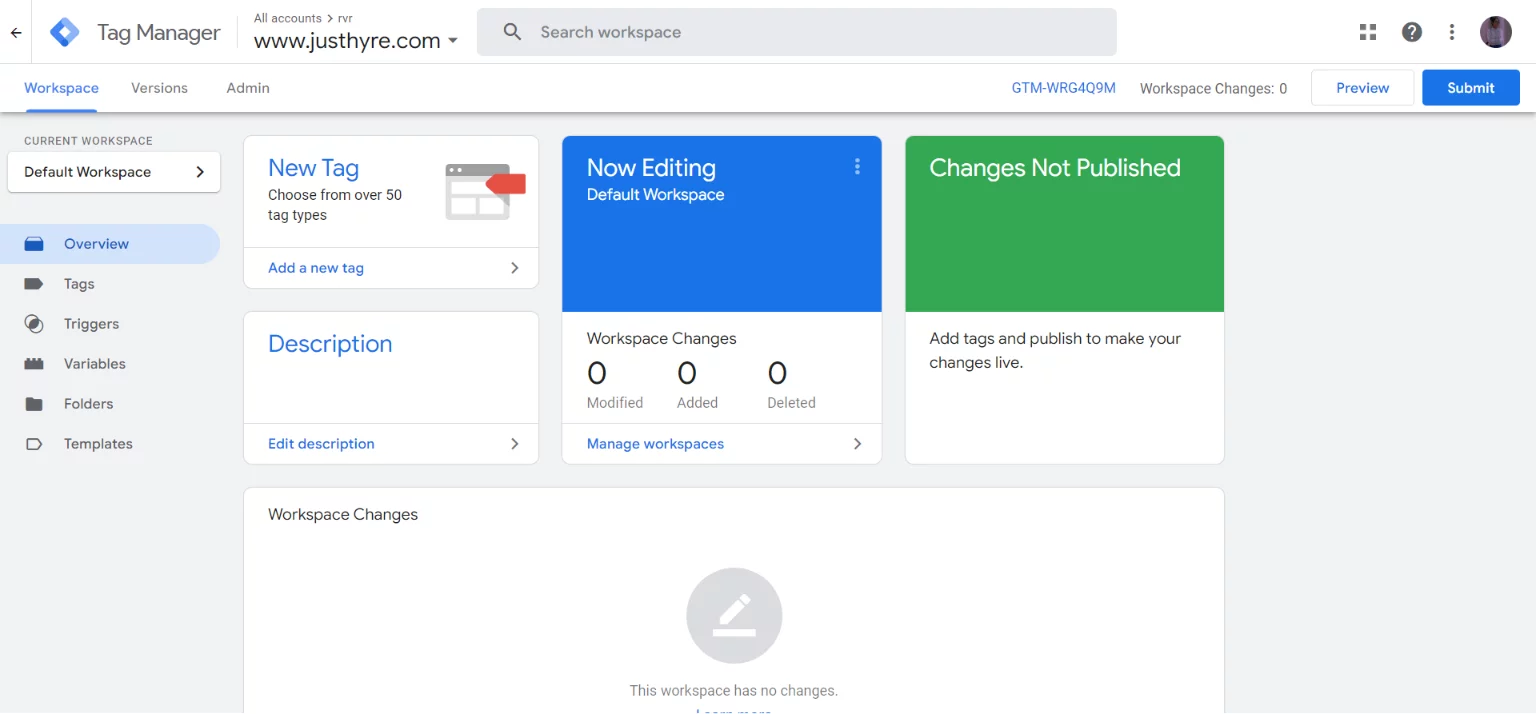
- In the Google Tag Manager, navigate to the “Workspace” tab and then click on “New Tag”, to add a new tag.
- Name the tag from the “Untilted Tag” in the top-left corner. Name it according to your requirements.
- Next, you will have to select the tag type. In the “Tag Configuration, click on Choose a tag type to begin setup. There, select the tag type you want to set up.
- Select the tracking type, under the “Track Type” dropdown.
- To enter a new variable, expand the dropdown menu of variable configurations and select “New Variable”. Here, you will have to enter the id of your tag type.
For example, if you are creating a tag type for Google Analytics, then you will have to enter your Google Analytics tracking id. Name the variable so it can be identified easily. Save it by clicking on the “Save” button in the top-right corner of the interface.
- Now, when you choose to trigger, a pop-up will appear, which will have several other existing triggers. You can add a new trigger by clicking on the (+) icon in the top-right corner.
- Finally, after all the changes, you will have to click on the “Submit” button.
Wrapping Up
And that’s it for this blog. We hope this blog has helped you to add Google Tag Manager to your website, but if you still can’t figure out how to do it, then you can hire WordPress engineers from JustHyre. Google Tag Manager is an amazing tag management system that helps you manage, track, and move tags without editing each code snippet. It is a great tool that can help you to improve your marketing strategies and design new campaigns for your business.
If you like reading this blog, you can also read our step-by-step guide on How to create a Gravatar for WordPress – A Simplified Guide and How to Test WordPress Security?


Stuck Somewhere?
Connect With JustHyre
Hire WordPress Engineers for custom jobs like Website Customization, SEO Optimization, Clearing a Hacked Website, Installation & Configuration & more.
Connnect with JustHyre
0 Comments