How to Create a Sitemap for a WordPress Website? (2 Different Methods)
Looking for a way to create a sitemap for a WordPress website?
Do you want search engine bots to be able to identify your website quickly? So you’re in the right place. You may soon set up a sitemap for a WordPress website with the assistance of this guide. Sitemaps, to put it simply, make it easier for search engines to crawl and index your website. Think of these as the directions for search engine bots. Sitemaps are another crucial tool for the search engine optimization of your website (SEO).
Understanding WordPress Sitemap
Your WordPress website may contain many pages containing various information types. Naturally, you would also want it to be shown to all users as quickly and effectively as feasible. The WordPress Sitemap enters the picture here. The list of website pages is contained in an XML file. Search engines use this file to explore your website and index the information you wish to appear high in search results.
A sitemap for a WordPress is used by various search engines like Google, Bing, DuckDuckGo, and others to gather data about your website, including where your content is hosted, when it was last updated, how essential the page is to your website, and more.
Furthermore, XLM files mean extensible markup language. It is the language of machines, which means it is the language in which search engines understand things. It is purely for technical visibility and has nothing to do with users as HTML language does.
WordPress Sitemap as a Need of the Hour
Whenever one writes a new article or uploads content on WordPress without any backlinks, it gets difficult for the search engine crawler to index it. Here the problem arises that without indexing, the search engines would not be able to rank it on the search page. Therefore, popular websites like google enable website owners with an option to upload website sitemaps separately.

How to Create a Sitemap for a WordPress Website?
Step 1: Check the Structure of Your Webpages
The first thing is to look at your website and figure out how your pages would be displayed on the table. For example, if you have a gadget website, then you will probably have divisions like About, Blog, Devices, Offers, and Contact. Under that, you will have subdivisions like, under the blog page, you would have blogs categorized for smartphones, laptops, I-pads, and likewise.
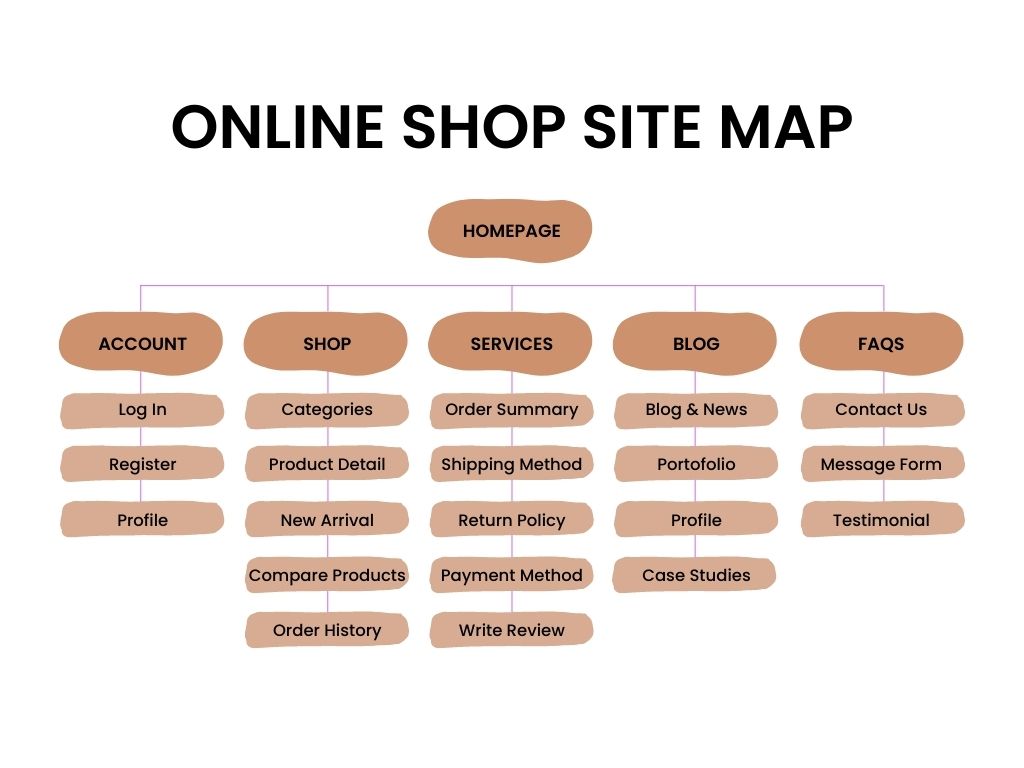
Keep in mind that the pages away from your home pages are less likely to rank and in terms of SEO, not all pages created are equal. It is highly suggested that all the pages created are accessible in a maximum of three clicks.
Step 2: Code the URLs
Once you figure out the site structure and its importance, next you will have to code the URLs. You will have to edit each URL with XML text where you will have to add the XML code for each URL like location, last changed, changed frequency, and priority of page.
Step 3: Validate the Code
Even if you have been coding for a long time, there can still be chances of human errors. But to index your website, they shouldn’t be any mistakes in the coding. Hence, you will need to validate your sitemap for a WordPress website. You can do that from the XML Sitemap Validator tool.
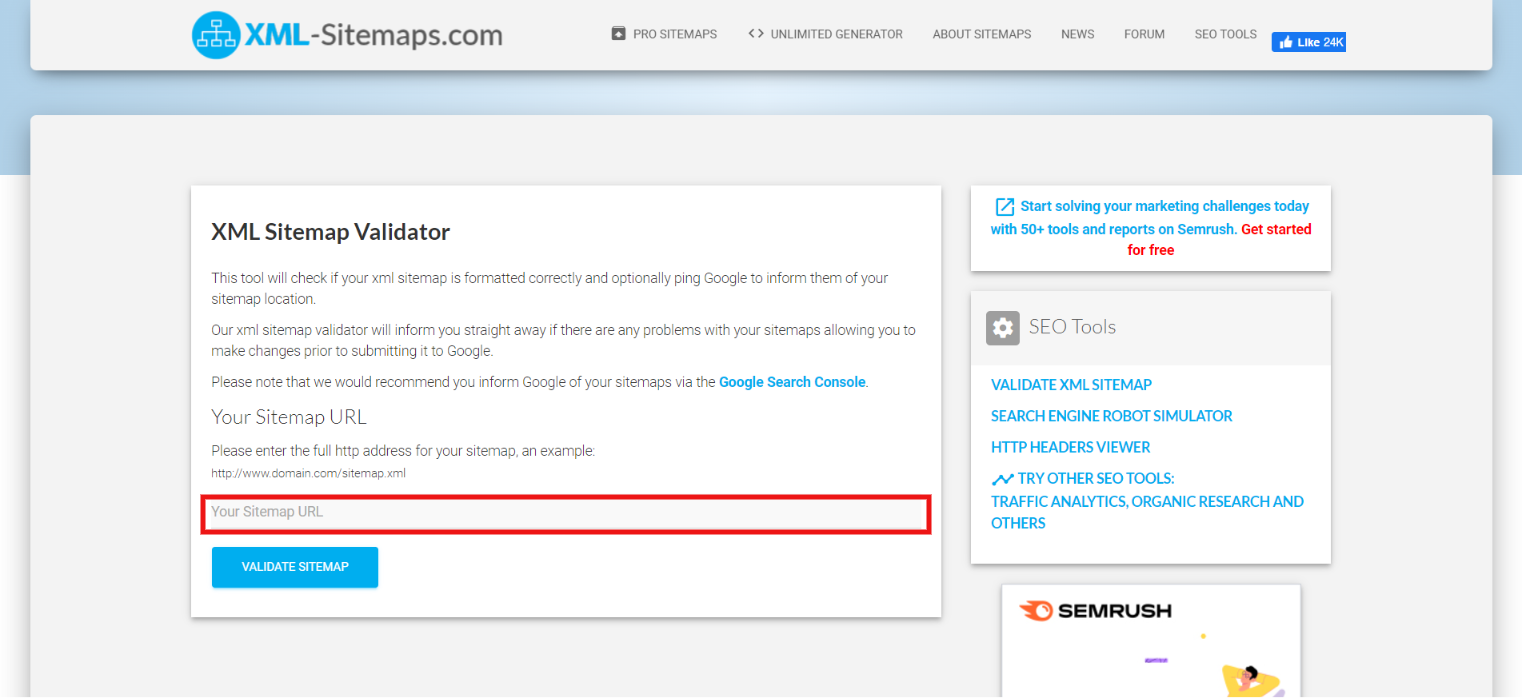
This tool will make sure that the XML sitemap you created is correct or not.
Step 4: Add Your Sitemap to the Root and Robots.txt
Once you are done with creating and validating your sitemap, you will need to add it to the root folder of your website. This will also add the pages to your website. You can check the XML code of websites by adding “/sitemap.xml” to the URL.
Also, you will have to add your sitemap to the robots.txt file.
How to Set up Sitemaps Using a Plugin?
The most straightforward approach to setting up a sitemap for a WordPress website is via a plugin. Although WordPress has a built-in sitemap generator, it occasionally falls short in terms of indexing websites.
You can only tweak or make required modifications to the default WordPress sitemap if you are an expert in PHP code. Consequently, plugins make the process of building a sitemap in WordPress simple.
Let’s quickly take a look at how to set up a sitemap using Yoast SEO plugin. Using Yoast makes search engine optimization simply because it automatically activates XML sitemaps for your WordPress website.
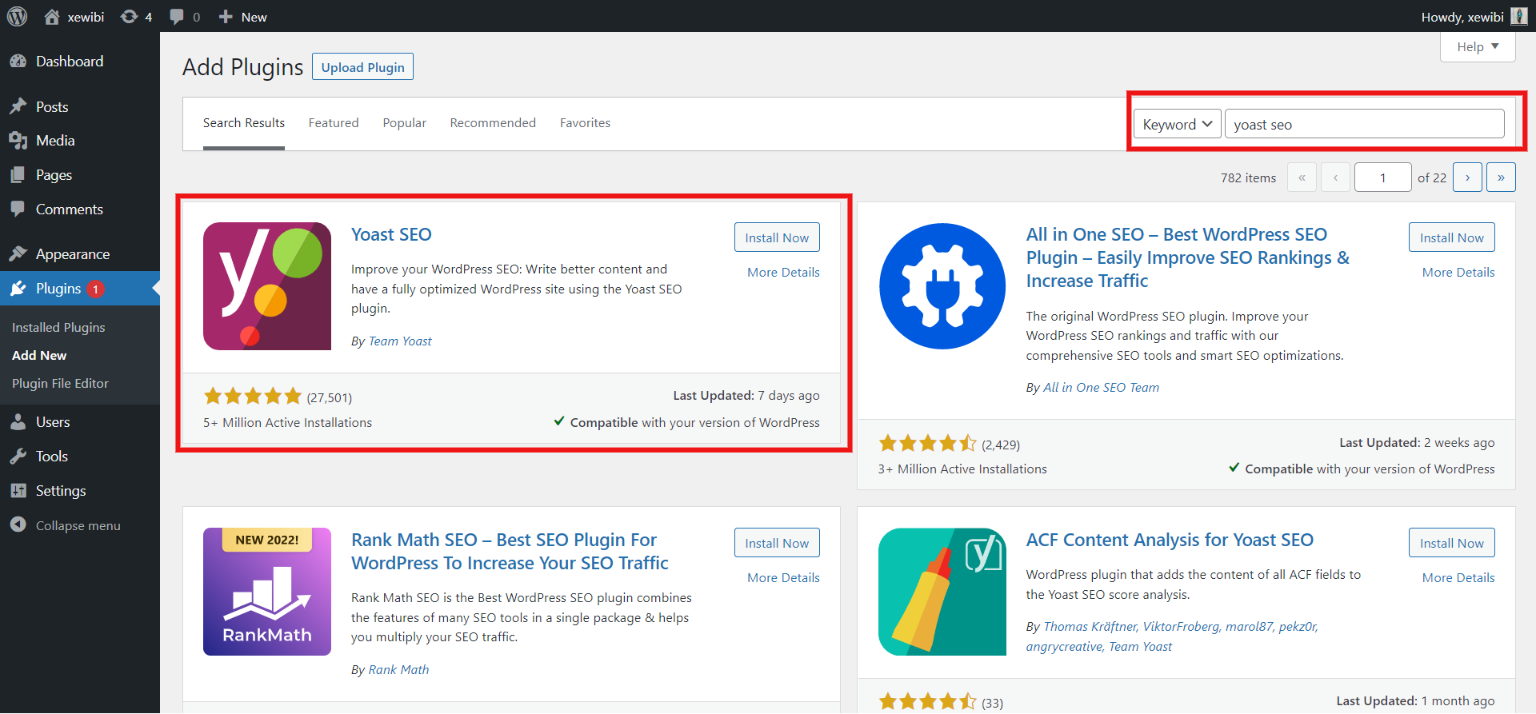
Step 1: Install and Activate Yoast SEO
First, go to the WordPress admin dashboard and navigate to “Plugins” in the sidebar. Here, search for Yoast SEO and then install and activate the plugin.
Step 2: Access the Plugin
Once done with activation, you will find the “SEO” option in the sidecar of your admin dashboard.
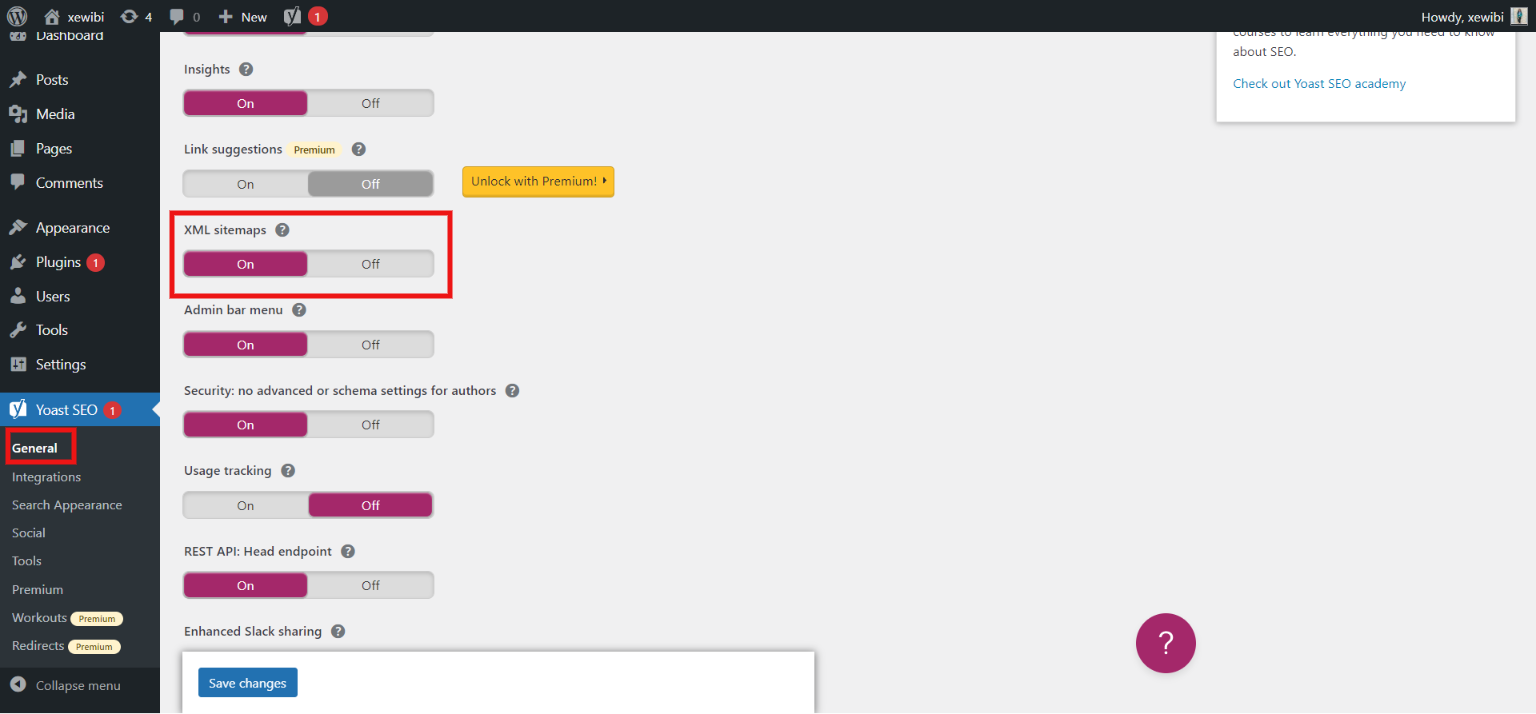
Step 3: Turn on the XML Sitemap
Go to SEO General now and select the Features tab. Turn on XML sitemaps and save your modifications. Your WordPress website is currently enabled for the XML sitemap. The XML sitemap will keep getting updated by the plugin. To view your WordPress Sitemap, click the question mark tooltip icon.
How to Upload Your Sitemap on Google Console?
Choose the property type first. By choosing the Domain option, enter your domain information. To verify the domain name, click the Continue option and add a TXT record from the ‘Google Search Console to your DNS server.
Explore the Google Search Console Interface and select Sitemaps from the left-side context menu after verification is complete. To complete the Setup, enter your sitemap URL in the Add a new sitemap section and press the Submit button. Your work is done! Your Sitemap has been successfully submitted to Google.
Other search engines, like Bing, accept sitemap submissions in a very similar way.
FAQs
1. What is a WordPress sitemap?
It is a list of all the URLs on your website which helps your users and search engines to navigate all the links included in your WordPress website in a much faster and easier way.
2. How do I set up a sitemap using Yoast SEO?
Simply, install and activate the Yoast SEO plugin. Then go to the “Features” tab where you will find an option for XML sitemap.
3. Why do we need to create a WordPress sitemap?
Sitemaps list all the content that needs to be listed which helps search engine crawlers to index all your content.
Wrapping Things up
And that’s it for this blog. We have shown you an easy way to create a sitemap for a WordPress website. Sitemaps will not affect your SERP rank but they will help you index on the search engines. Sitemaps help search engines to find your website and index them, which in turn helps to improve your visibility.
This was a detailed guide to creating a sitemap for a WordPress website, if you need any assistance in adding a sitemap, you can hire WordPress engineers from JustHyre.
If you like reading this blog, also read our expert guide on How To Add Custom CSS WordPress Code easily On WordPress ? (3 methods) and How to import and easily export WordPress users? (Exporting WordPress users within 5 minutes)


Stuck Somewhere?
Connect With JustHyre
Hire WordPress Engineers for custom jobs like Website Customization, SEO Optimization, Clearing a Hacked Website, Installation & Configuration & more.
Connnect with JustHyre
0 Comments