How to Create a Newsletter in WordPress? (6 Easy Steps)
Want to see how you can create a newsletter in WordPress? This blog is for you!
If you are someone who owns a WordPress website and is looking to send the newsletter to the subscriber, then Newsletter Glue can be your friend! Newsletter Glue is a WordPress newsletter plugin using which you can send newsletters as emails to your audience and that too without any code. Since a newsletter attracts more sales, by highlighting a product or service, explaining the benefits, and then selling the product, sending a newsletter via email can be of great benefit to your business.
A customized and personalized newsletter that inclines the interest of your audience can be easily created with the Newsletter Glue plugin.
Here, in this blog, we will show you how you can easily set up the plugin and send the newsletter in WordPress. But before that, let’s see what is Newsletter Glue and some of its prominent features.
Our Tool for the Job- Newsletter Glue Plugin
Though basic WordPress has many amazing features, sending a newsletter is not one of them. And there comes “Newsletter Glue”, a Newsletter plugin in WordPress, which helps you grow your email list by sending newsletters to your subscribers. With this plugin, you can create your newsletter using a classic WordPress block editor and send it to your subscribers, a great feature for you if you are a writer or a blogger.
A list of amazing features of the WordPress newsletter plugin, Newsletter Glue:
- Publish entire blog: Newsletter Glue allows you to publish your whole blog or article to the newsletter and send it to your subscribers. This way, you can publish your content both on your blog and newsletter, which can help you generate better engagement rates.
- Newsletter pattern editor: It supports a custom newsletter editor and lets you create different pattern templates for your newsletter that too with just a few clicks. You can create your newsletter templates in the Gutenberg block editor.
- Schedule the newsletter: Instead of sending the same newsletter to the whole audience, you can segment the list, give them tags, and schedule when a particular newsletter should be sent.
- Amazing subscriber form: Newsletter glue is a feature-rich plugin. It has a prebuilt subscriber form that you can add to whatever place you want, in your newsletter. It can help you grow your subscribers with just a couple of clicks.
- Custom Newsletter Blocks: If you don’t know how to code, then Newsletter Glue has got your back. They offer you custom author bylines, social media icons, containers, metadata, and more.
- Personalize newsletter: Rather than sending all the subscribers the same newsletter, you can customize them by adding the names and links according to their interests.
- Hide content from blog/newsletter: Using a container block, you can easily hide your blogs or newsletters. You might need to hide the content to run the subscribers-only promotions.

How to Send a Newsletter in WordPress With Newsletter Glue?
There are various steps you will have to follow to send the newsletter on WordPress
Step 1: Download and Activate the Plugin
Firstly, to send a newsletter in WordPress, you will have to download the plugin. For that, go to the WordPress dashboard and find “Plugins” in the menubar. There, search for “Newsletter Glue” to send the newsletter in WordPress. Download it and activate it.
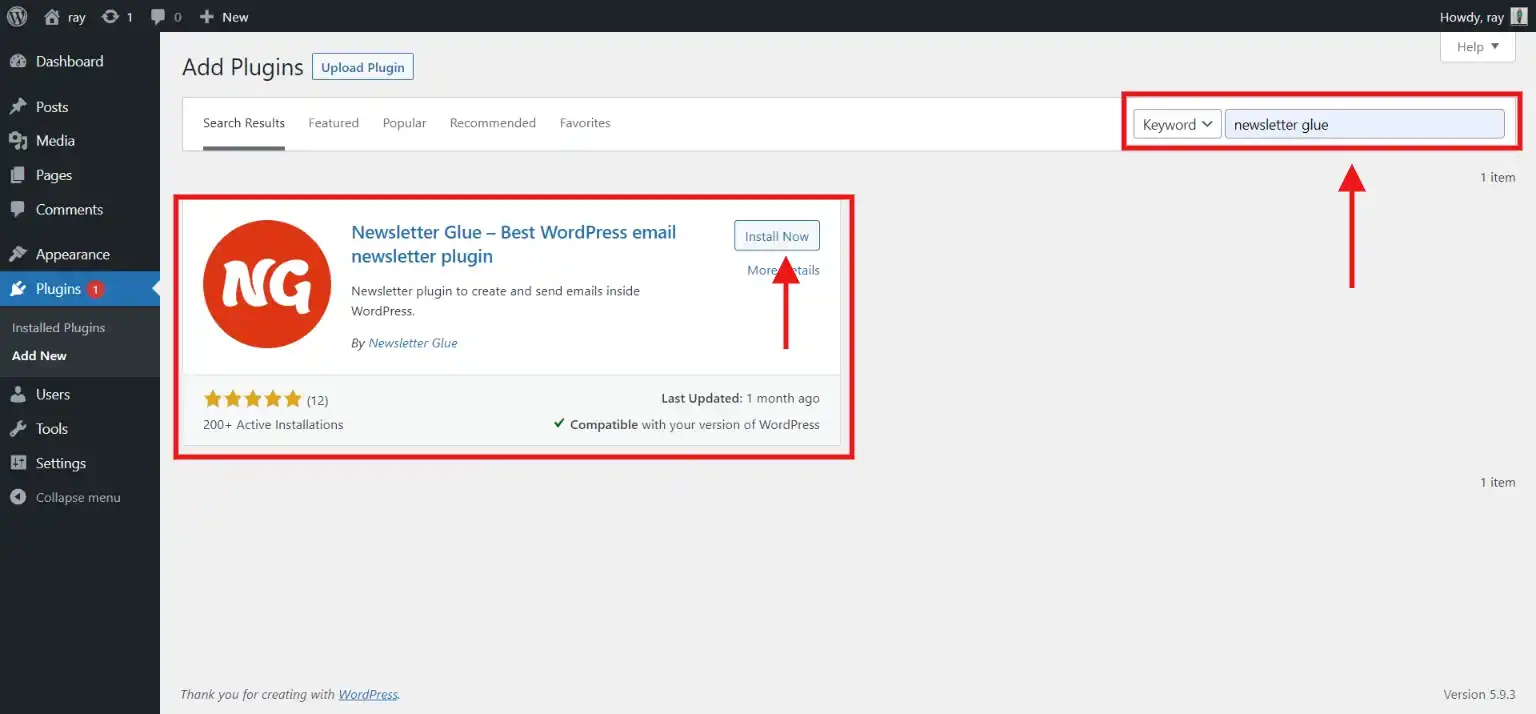
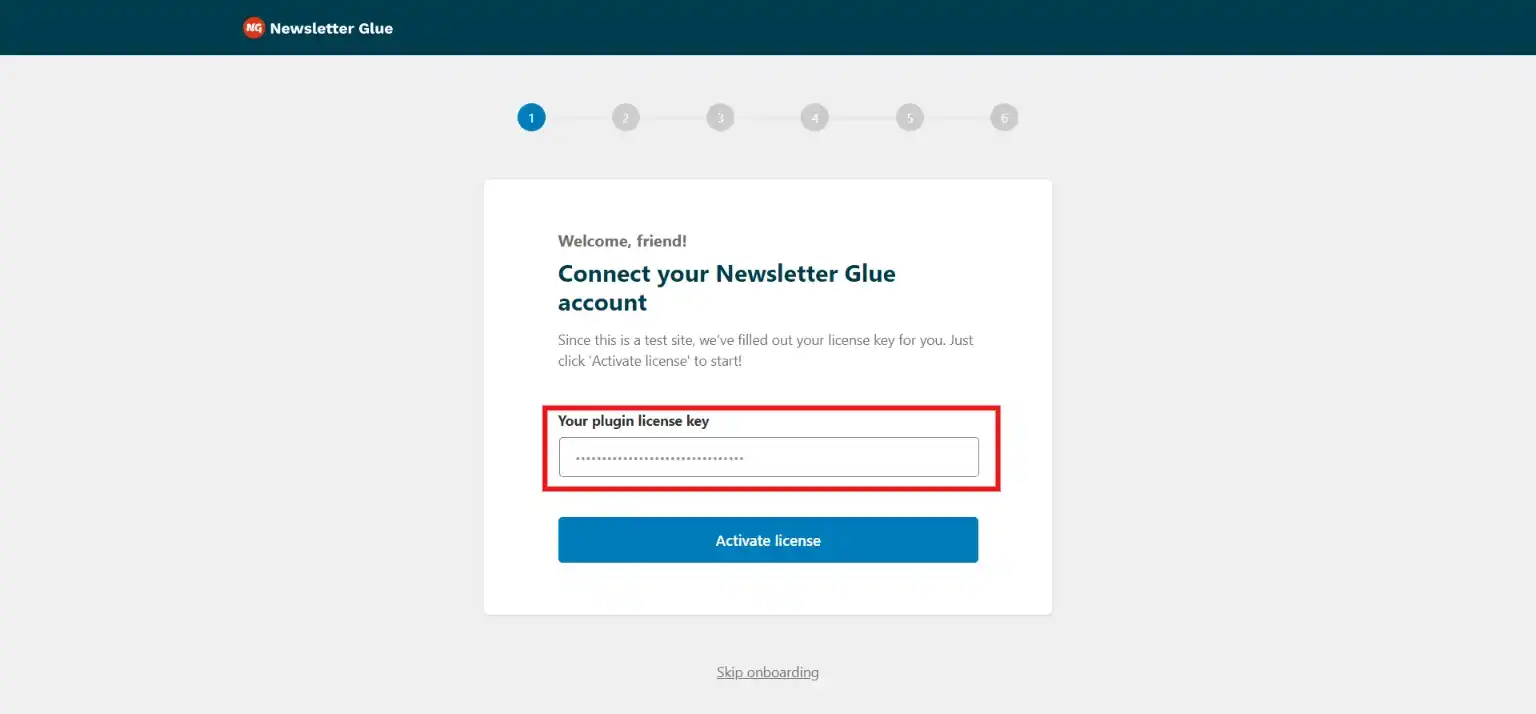
Once you download the plugin, we suggest you go for the Pro version, as it has more advanced features. After downloading the plugin, you will have to enter the plugin license key. You can easily find it on your Newsletter Glue account or your purchase confirmation email. Add your license key and click on “Activate your copy” to activate the plugin.
You can also download the plugin from the link.
Step 2: Connect with the Email Service Provider
After entering the license key, you will be taken to the next step. Here, you will have to choose the email service provider you use for your website. Newsletter Glue offers you a list of email service providers to meet your requirements. Select your and enter the API key. Once you enter the correct API key, click on “Connect” to connect it with Newsletter Glue.
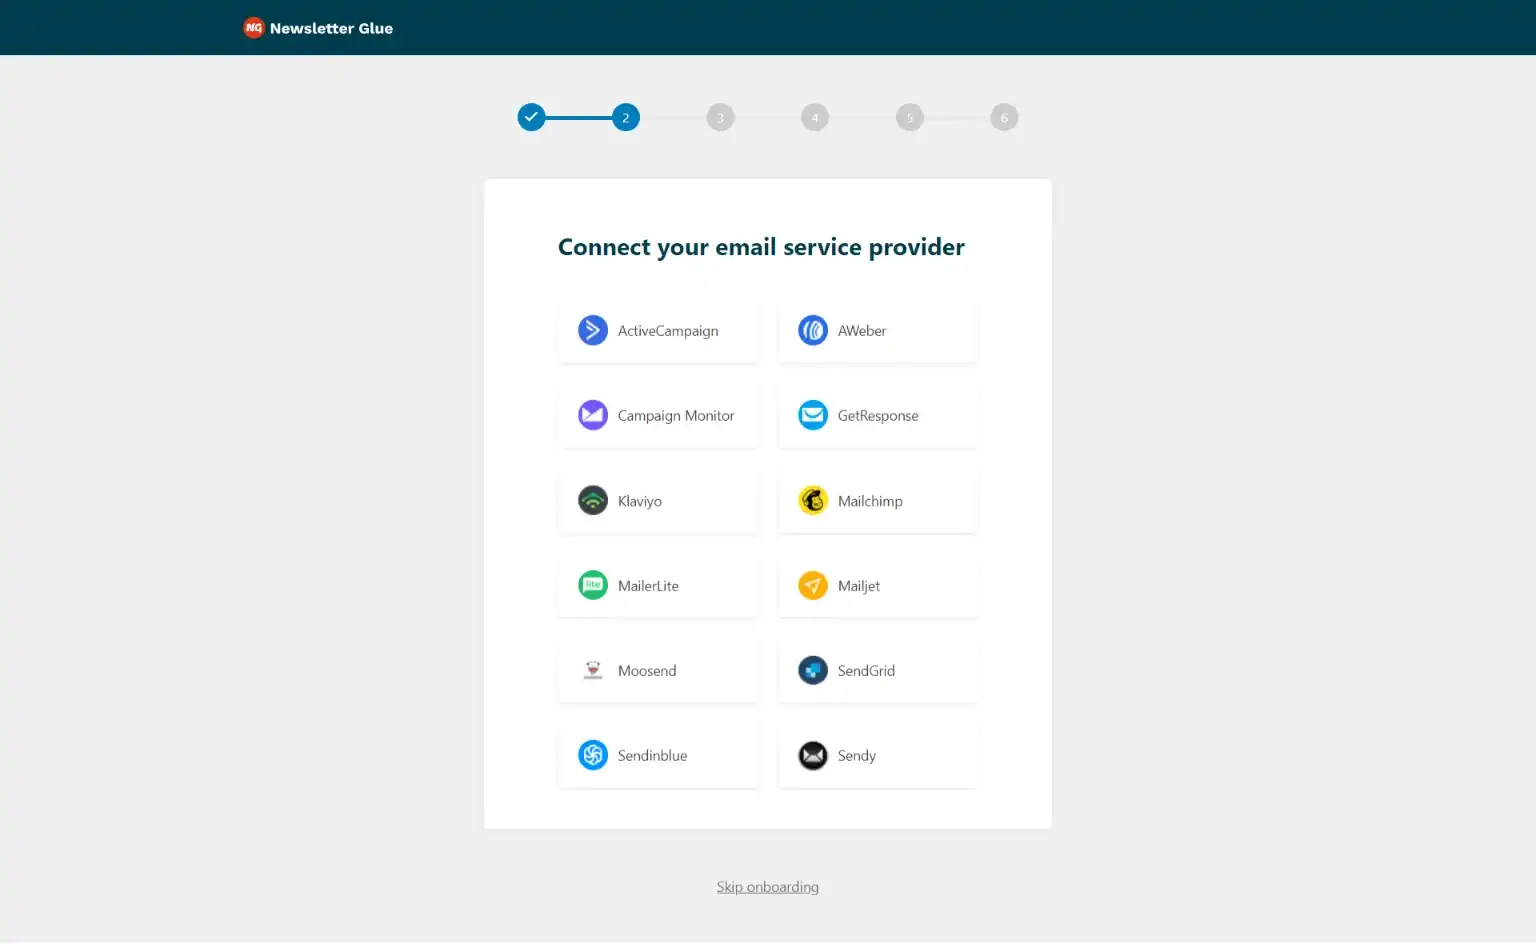
After the key validation, you will be taken to the next step.
Step 3: Set Default Newsletter Settings
In this step, you can segment your audience and give them a tag. As discussed earlier, segmenting the audience can help you in better engagement, and this step can help you do so. You have to select from which name and from which email, and a newsletter should be sent to your subscriber.
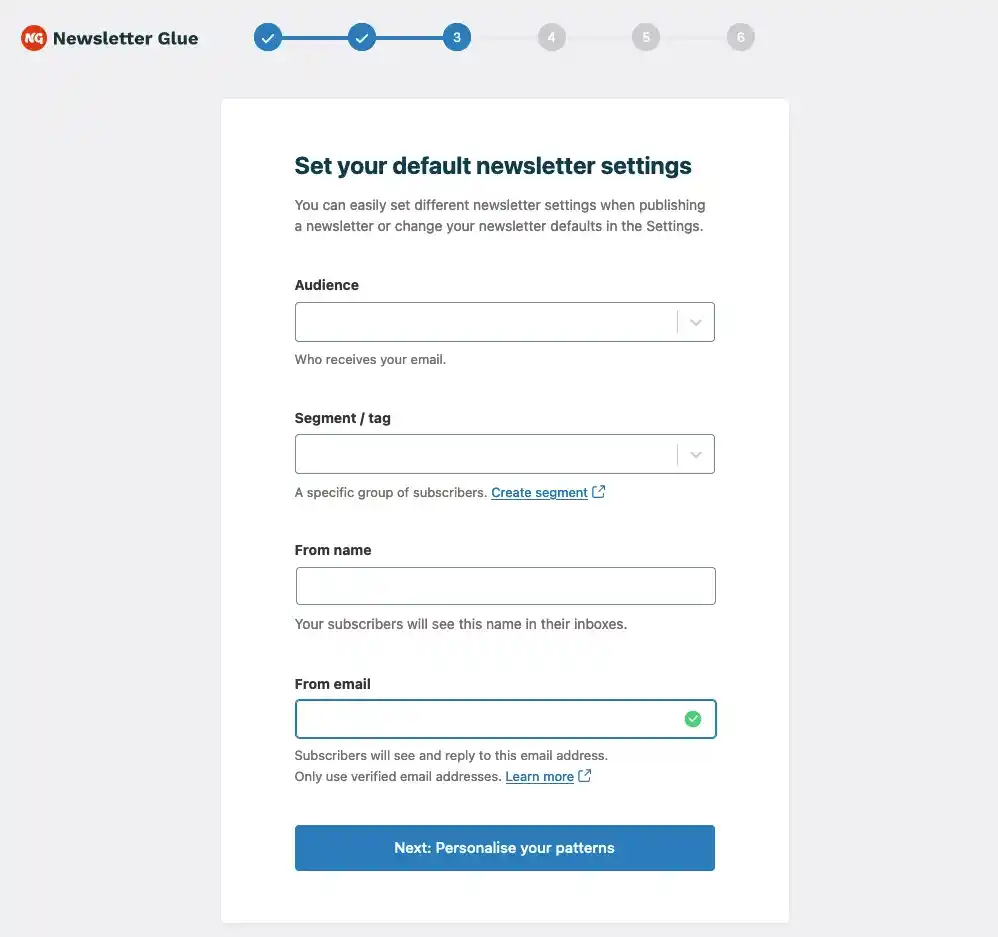
After setting up this page, click on the blue button and you will land on the next step of creating a newsletter in WordPress.
Step 4: Personalize Patterns
Here, you get to personalize the patterns for your newsletter. On this page, you will have to give your company’s name or your brand name and its actual address.
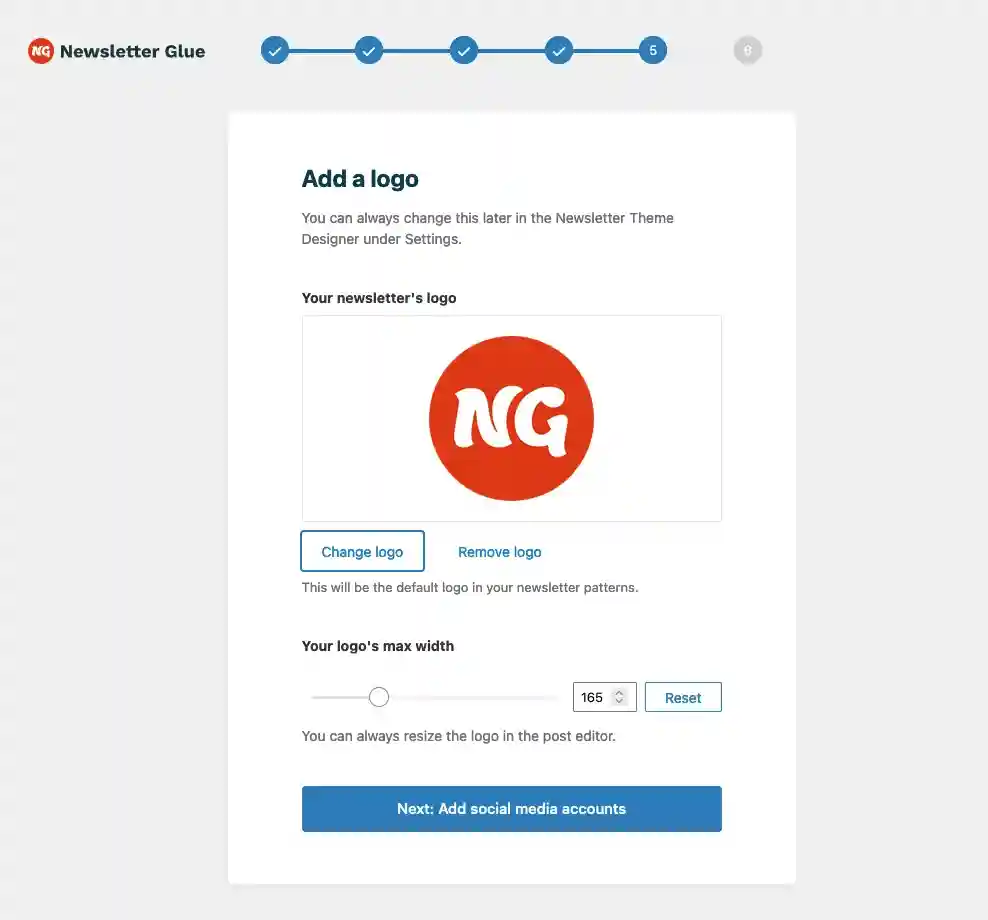
Step 5: Add a Logo
Once done with personalizing patterns, you will land on a page where you will have to add a logo. Here, you will find an option to upload your logo and adjust its maximum width which you want to present in the newsletter.
Step 6: Add Social Media
The last step to sending a newsletter in WordPress is adding social media URLs. You will finally have to add the social media URLs of your business. Add the respective links in the fields given and complete your onboarding.
And there your plugin is all set to send the newsletter. Now, you can easily add a WordPress newsletter and send it to your audience.
Wrapping Up
That’s all for this blog. We hope this blog has helped you send the newsletter to WordPress. If you are new to WordPress, this might take some time to configure but once you get how to set up a system, it will hardly take time.
With Newsletter Glue, it becomes very easy, even for new beginners to manage their newsletter. You can easily segment your audience and send them a newsletter that aligns with their interests. It is a feature-rich plugin with amazing template builders and many more cool features.
Since a newsletter can generate funds for your business, do try it and increase your engagement rate. With Newsletter Glue, you can also link your social media. So, by that, you also get a chance to increase your social media engagement.
If you like this blog, you may also read our step-by-step guide on How to unpublish a WordPress site and How to back up a WordPress website.
[wbcr_html_snippet id=”4204″]


Stuck Somewhere?
Connect With JustHyre
Hire WordPress Engineers for custom jobs like Website Customization, SEO Optimization, Clearing a Hacked Website, Installation & Configuration & more.
Connnect with JustHyre
0 Comments