How to Export/Import Menu in WordPress? (2 Easy Methods)
Have you ever found yourself scratching your head wishing there was a simpler way to move your WordPress menus from one site to another?
Whether it’s for site migration or just for backup, there is an ocean of reasons why you might need an export/import menu option in WordPress. Exporting and importing menus in WordPress is easy and simple if done correctly.
Here, in this blog, we have shown you an easy way to export/import a menu in WordPress.
What Is the Export/Import Feature in WordPress?
Let’s suppose you have created a hamburger menu on your WordPress website with a Responsive plugin. Now if you have another website and want to use the same hamburger menu, then what is the solution? This is where the export/import menu comes into the picture. With a responsive menu, you can export the hamburger menu in WordPress and can import it easily into your new website.
But what if your menus are not created in the Responsive Menu plugin? Then, WordPress has a built-in export/import menu option with which you can use the navigation menus of one WordPress site to the other. If you are creating a new WordPress website and want to use the old website’s navigation features of the old website then this feature gives you the ability to export your navigation menus from the old website and import them to the new one.
WordPress allows you to export all your content, including navigation menus, posts, pages, comments, custom fields, terms, and custom posts, or you can export posts, pages, or media. But what if you want to export pages and posts but not all the content?
If that is the case with you, you can use plugins and the export/import menu that you want.

How to Export/Import Menu in WordPress?
Method 1: Export/Import Menu with Responsive Menu
This method will work if you have created your navigation menus with the Responsive Menu plugin.
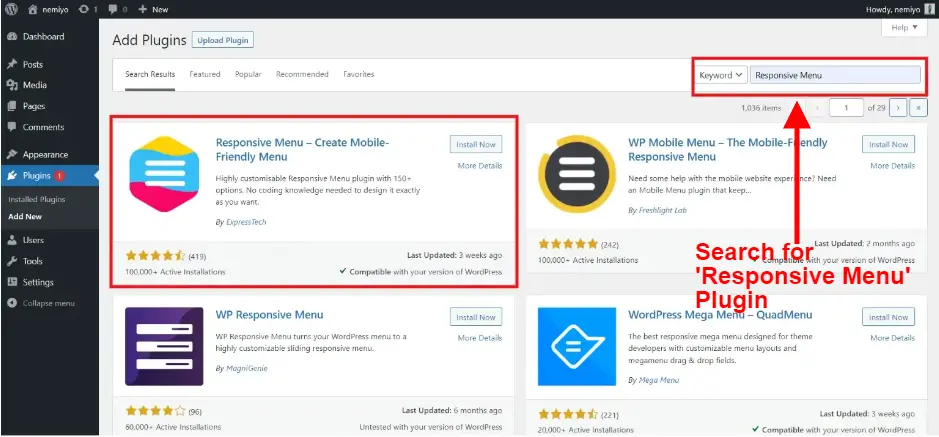
Step 1: Install the Responsive Menu
Go to the plugins and add “Responsive Menu” to your WordPress.
Step 2: Exporting the Menu
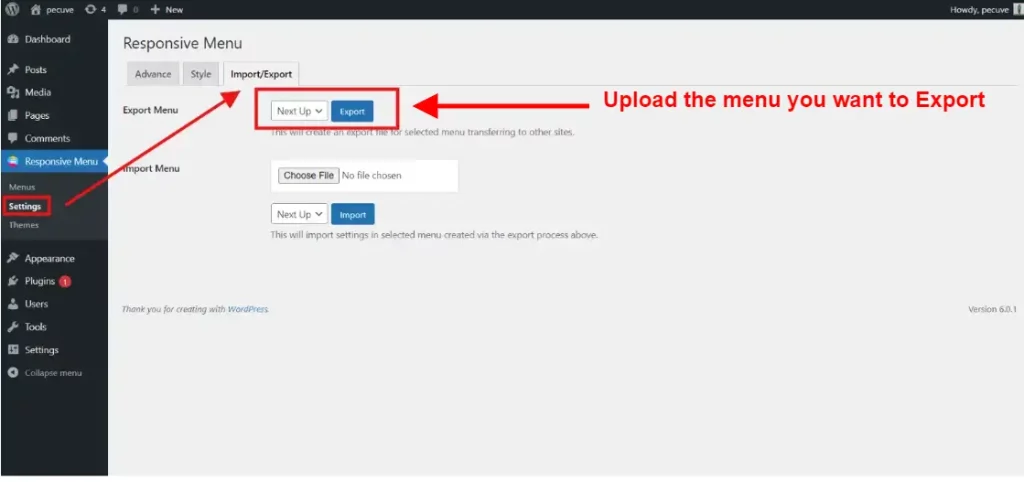
Once done with activation, go to the “Responsive Menu” on your admin sidebar. From here, you will first have to export the responsive menu.
Next, go to the “Settings” option. Here, you will find a tab for the export/import menu. Here, select the menus you want to export to the new website and then click on the “Export” button. Here, a .json file will be downloaded to your system.
Step 3: Importing the Menu
Go to the new website where you want to import your responsive menus. Here also, you will need to install the “Responsive Menu” plugin. Once done with activation, click on the “Responsive Menu” on the WordPress sidebar and go to the “Export/Import” tab.
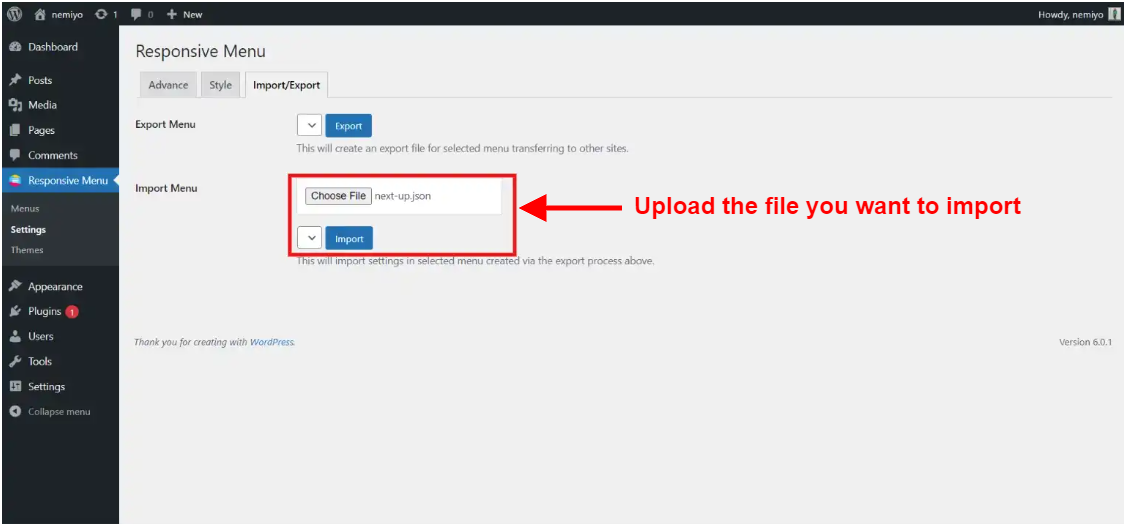
Here, aside from the “Import” option, upload the .json file you just downloaded from your new website. Finally, click on the “Import” button and there you will have your menus imported to the new WordPress website.
Method 2: Export/Import Default Menu in WordPress
If your menus are not created with the Responsive Menu plugin, then you can try this method.
Exporting Menus
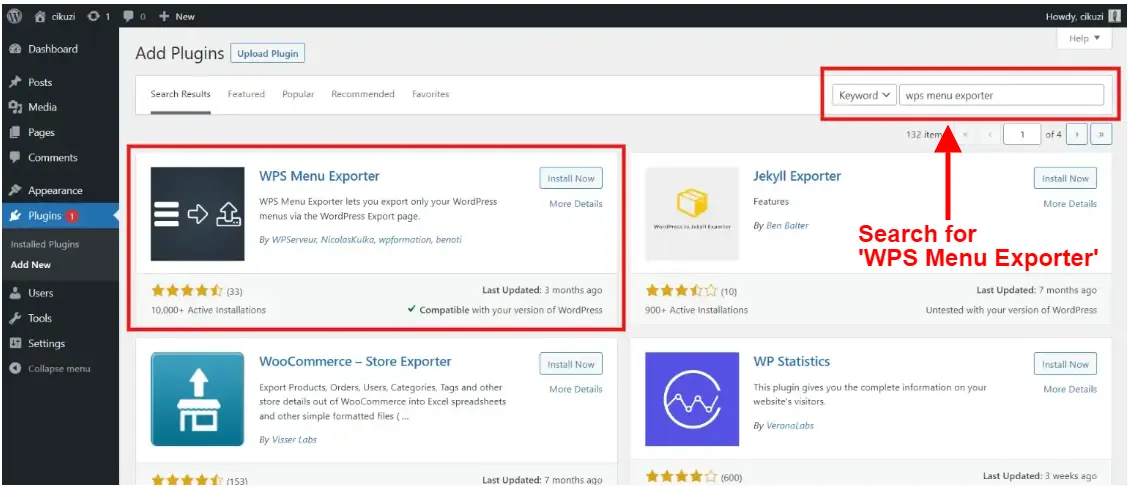
First, check the menus you want to export. On the WordPress dashboard, go to Appearances > Menus. Now, to export navigation menus from your WordPress site, you will first have to install the plugin. Here, in this tutorial, we are using the WPS Menu Explorer plugin.
To install the plugin, go to the “Plugins” on the WordPress dashboard sidebar. Then in the search field, search for “WPS Menu Explorer” and install it.
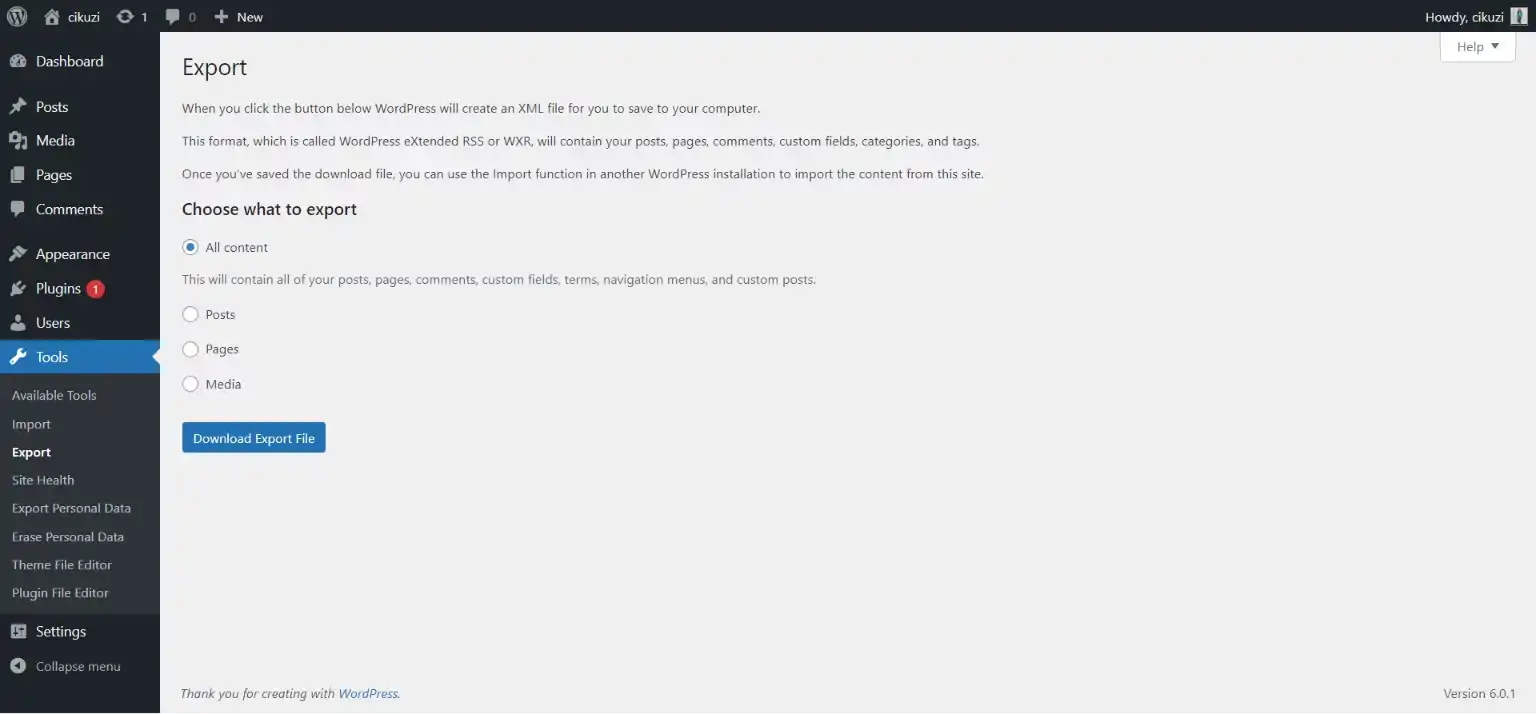
Once done with activation, go to the exports page from the “Tools” tab which you can find on the WordPress admin dashboard. Now, you will find a new option which is “Navigation Menu Items” in your export dashboard. This option includes the pages that are linked to your menu and also the comments or posts on the menu.
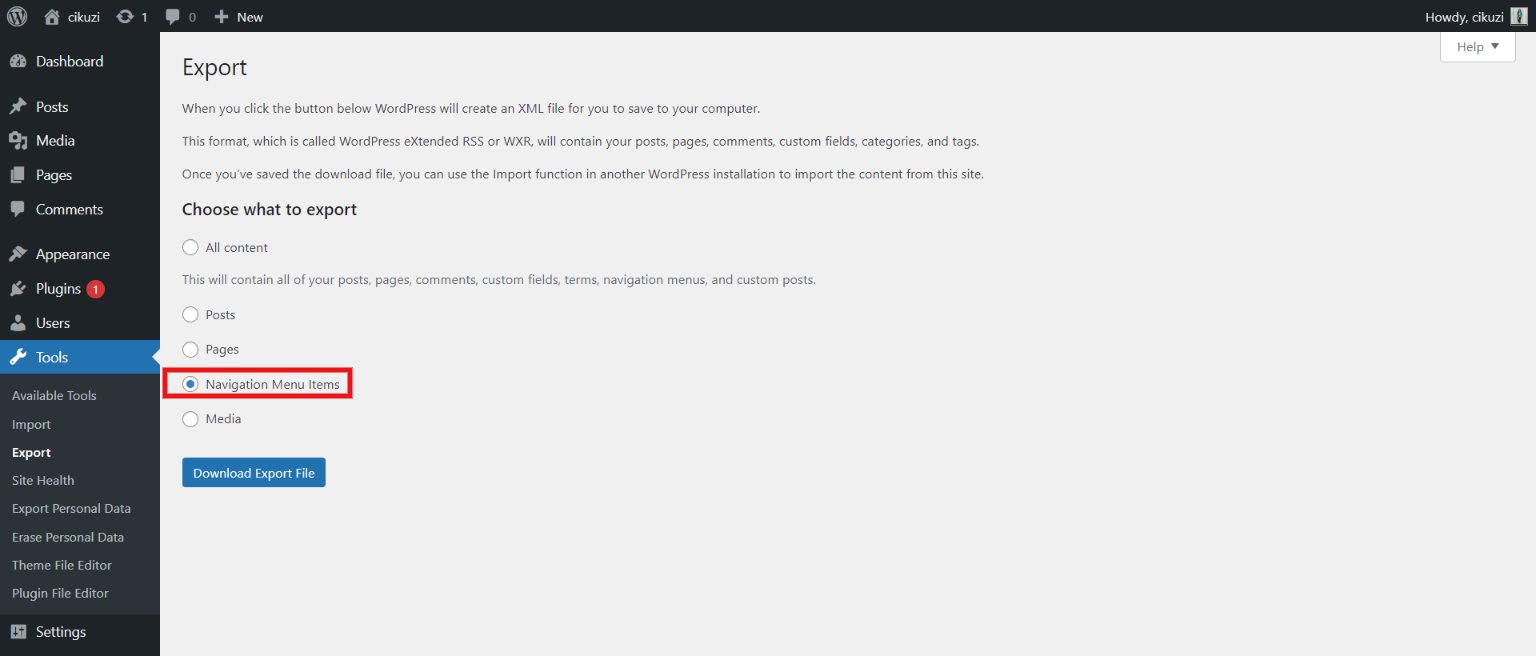
Check the “Navigation Menu Items” and click on the “Download Export File” button to export the menu. Now, you can see the downloaded file in .xml file format.
Importing Menus
Once you have downloaded the XML file, you can import the responsive menu through WordPress’s standard importing feature. It is very simple and easy to import the files to the new website by uploading the XML file.
But before importing the downloaded file, there are a few things you should take care of. Make sure that there is no existing page on the site you want to upload the menu with the same name as the upload file. Not even in the trash folder. If there is such a case then the import tool may not be able to import the menus correctly.
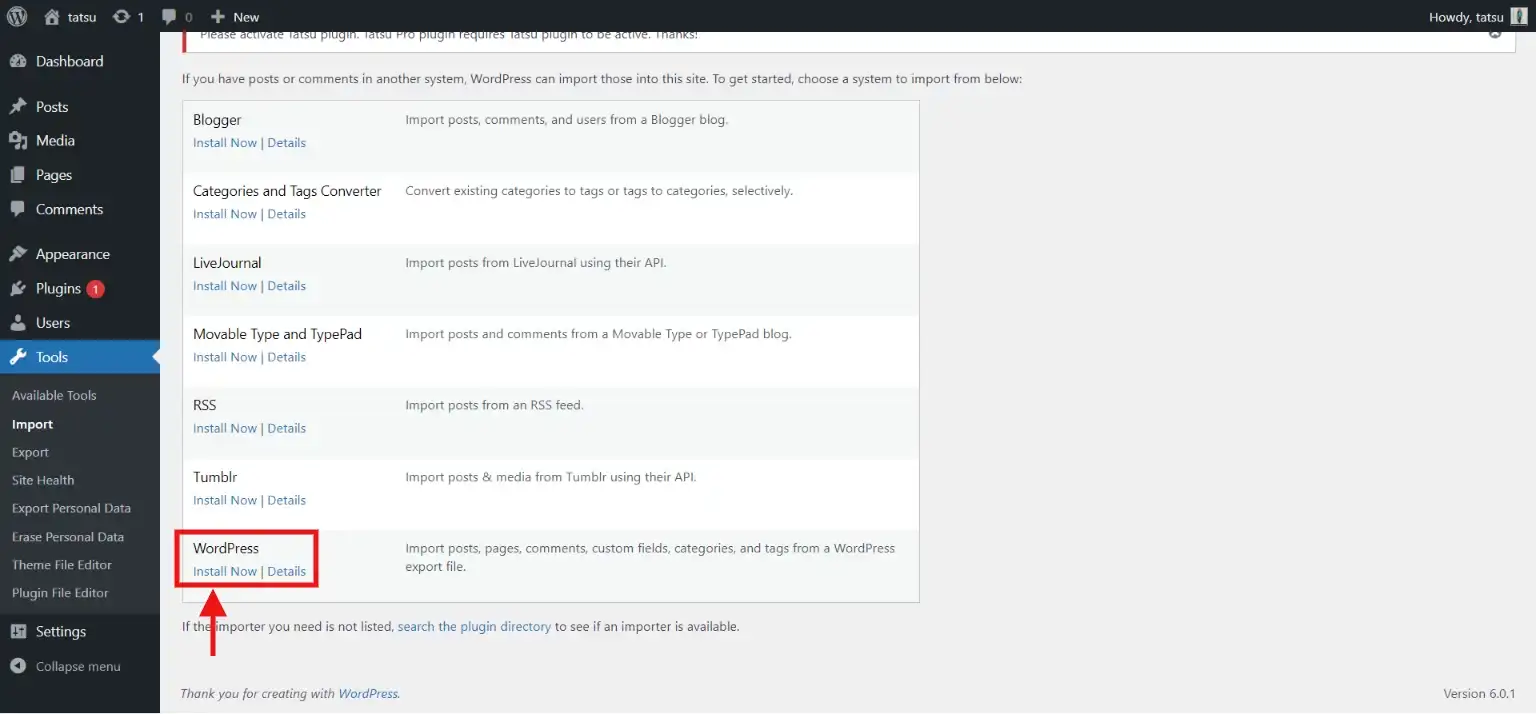
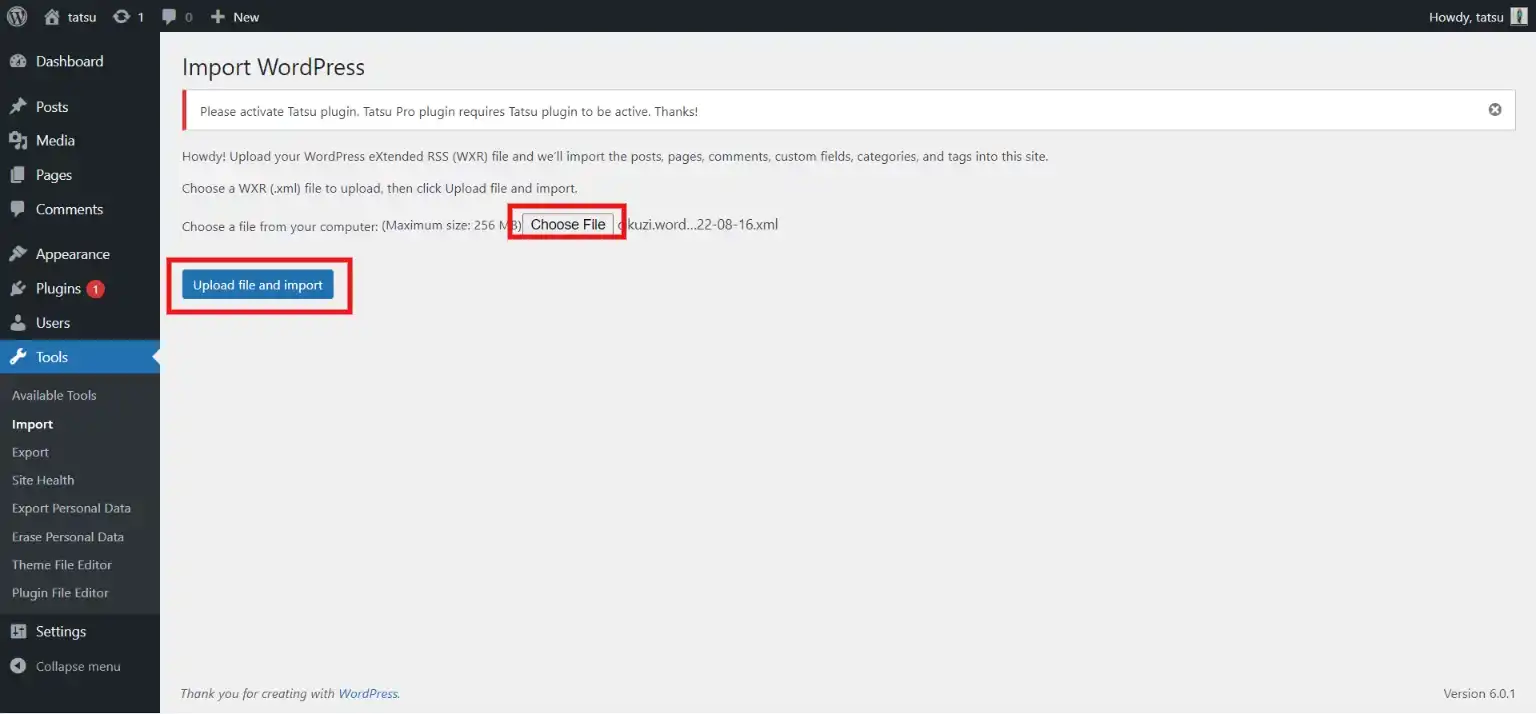
To import the menu in WordPress, first, log in to your new WordPress website and go to the dashboard. Then, from the sidebar, search for “Tools” and click on “Import”. On the Import dashboard, you will find various options to import posts or comments from different platforms. Here, you have to install WordPress Importer, so click on “Install Now” under the WordPress option.
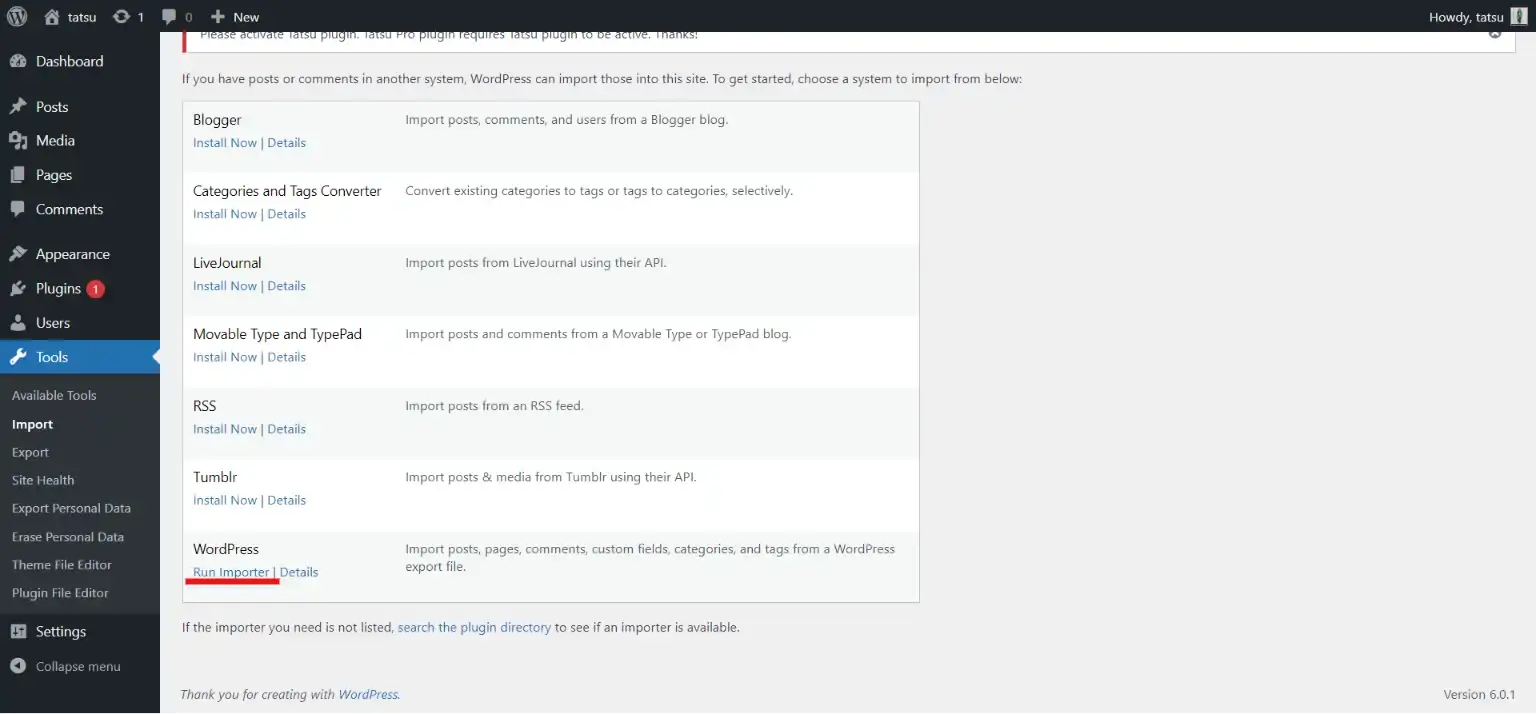
When your Importer is installed, you will find the “Run Importer” Option. Click on the button and you will be taken to a new screen where you can import the downloaded file. Click on “Choose File” and choose the download XML file from your system. Select that and upload it to your importer. Once the correct file is selected, click on the “upload file and import” button.
Now, you will need to assign authors to the next screen. The original author of the content is set as default, but you can assign the new author if you want. If you want to assign the new author from the existing user, you can do that from the dropdown menu. Make the necessary changes and go ahead with the process.
After done with the necessary edits, click on the “Submit” button and you will see a success pop-up message.
Viewing Imported Menus
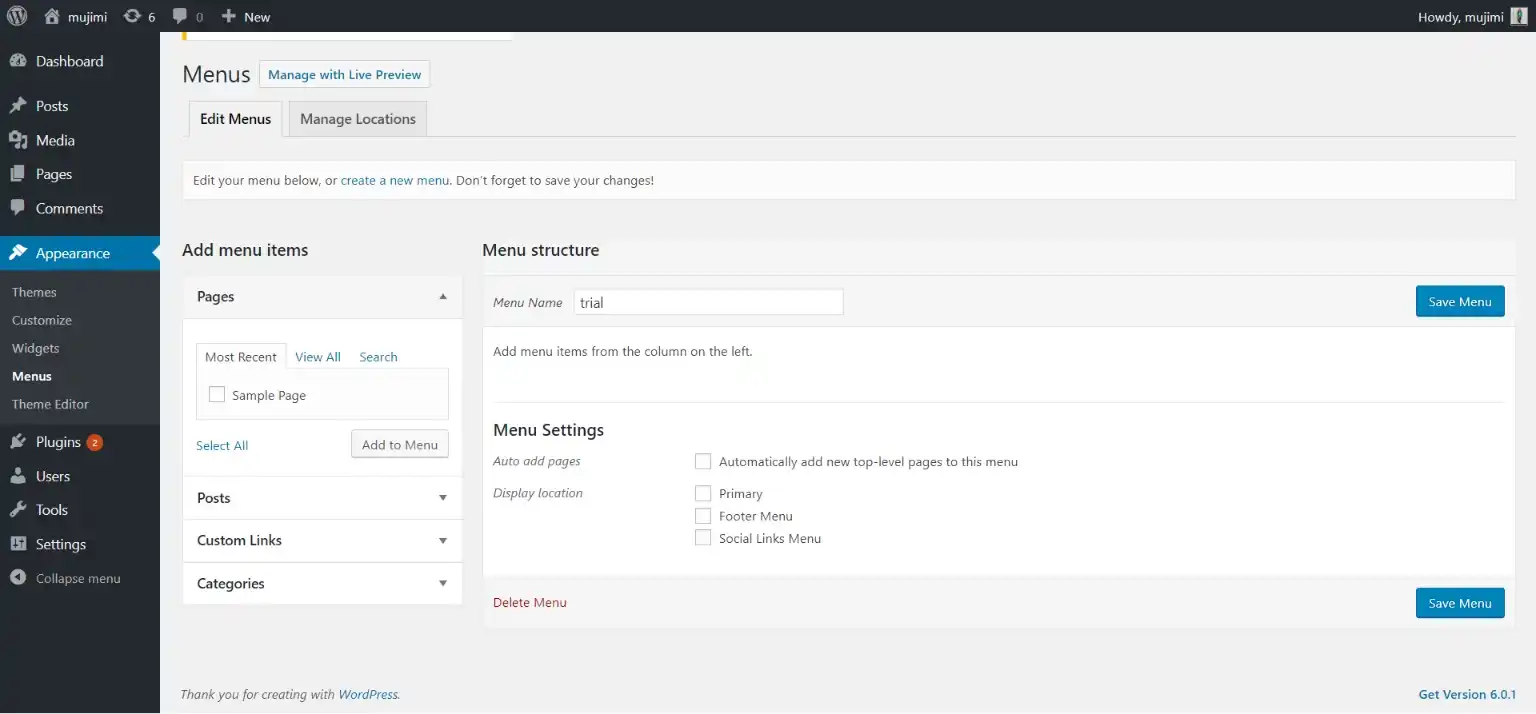
Once your export/import menu is done, you will now have to check whether the imported menus are in the desired place or not. On the admin dashboard, go to Appearances > Menus. Here, you can see the associated pages that have been imported with the menus.
You can also check the new pages from the “Pages” option on the admin dashboard sidebar. Once the import is successful, you can make the necessary edits as per your requirements.
To Summarize
That’s how you can successfully export/import the menu on your WordPress website. Whether it’s for migration or backup, there are plenty of reasons why you might need an export/import menu option in your WordPress.
We hope this article has helped you to export/import the menu into your new WordPress website. This was a detailed guide but if you have any issues while exporting or importing menus or pages, you can hire WordPress engineers from JustHyre.
If you like reading this blog, also read our blogs on How to Stop Emails Going to Spam – 5 Simple Fixes and How to Find the Hosting Company of a Website? (3 Easy Ways).


Stuck Somewhere?
Connect With JustHyre
Hire WordPress Engineers for custom jobs like Website Customization, SEO Optimization, Clearing a Hacked Website, Installation & Configuration & more.
Connnect with JustHyre
0 Comments