Ultimate Guide for WordPress DNS Configuration (6 Easy Steps)
Looking to change or edit the WordPress DNS configuration?
Have you ever asked yourself why it is so easy to access your favorite websites such as WordPress blogs just by clicking? Hidden behind the scenes is a basic core backbone named DNS, which stands for Domain Name System.
DNS is the internet’s telephone guide system that converts domain names into IP addresses. However, understanding and setting up DNS for your WordPress site can initially seem like a formidable task. Fear not!
Here, in this blog, we will show you an easy way to change or edit your WordPress DNS configuration.
What Is WordPress DNS?
The term WordPress DNS refers to the Domain Name System settings that allow your website to run on a WordPress platform being brought into use online. DNS is similar to a directory that translates human-readable domain names (for example www.yourwebsite.com) into machine-readable IP addresses such as 192.0.2 Titles By configuring the WordPress DNS, you are telling the Internet where your website is hosted and pointing free traffic to servers housing WP files.
WordPress DNS configuration involves changing the within your domain registrar or hosting provider. This usually involves creating an ‘A record’ to link your domain name to the IP of your web server and setting up “CNAME records” for subdomains or other services such as email.
Effective management of your WordPress DNS configuration guarantees that visitors can easily locate and view the site without problems; thereby, this is an integral part of its online presence to ensure full operation for a WordPress website.

How Does DNS Work?
DNS, or the Domain Name System, is a decentralized version of an internet phonebook. When you enter a domain name (say www.example.com) into your web browser, the first thing that happens is that it tries to check its local DNS cache if this device already knows what IP address corresponds with these domains on the ‘www’ parameter in our example here we have two points: Local point – Cache which can be found inside of computer only remote server/cache where information about.
If it doesn’t have the data locally, then contact a DNS resolver through usually your internet service provider (ISP) or third-party DNS services.
The DNS resolver proceeds to carry out the process of mapping a domain name into an IP Address by questioning authoritative servers. Such authoritative servers hold the formal documentation for certain domains. From that point, the resolver bootstraps itself from root DNS servers which then routes it towards relevant top-level domain (TLD)servers such as .com .org, and so on.
It starts from there and descends the chain until it specifically touches on the Authoritative Server that is in charge of a given domain name queried. Once the IP address is determined, it’s forwarded back to your device whereby your browser can connect to this web server and download the website you requested. In the back end, DNS works through domain name to IP address and makes way for smooth surfing on the internet.
How to Change the WordPress DNS Configuration
WordPress DNS configuration is changed or edited through the web hosting. Here, in this blog, we will be demonstrating through GoDaddy. All the other web hosts have similar steps to follow to change the WordPress DNS configuration.
Step 1: Finding Server IP Address
The very first step to change or edit the WordPress DNS configuration is to find the server IP address. The server IP address is an identification number for the computer that holds up your site. This is the information most web hosting providers add to their welcome email when you register for them.
In the case of TMDHosting, for instance, your server IP will have a dedicated subsection in the welcome email indicating this kind of information.
Want to create a Gravatar for WordPress? Read, How to Create a Gravatar for WordPress?( A Simplified Guide)
Step 2: Go to Your Go Daddy Client Area and Log Into It
To deal with the domain settings, you have access to your GoDaddy Client Area. First, open the browser and navigate to GoDaddy where you can browse through a list of features offered including the ‘Sign In’ option in the top right-hand corner.
On clicking on this sign time users will have options like being registered or signing up as new customers while for subsequent login process, they need only enter credentials from the previous session which had already been saved by the platform such are password management programs
Step 3: Select ‘Manage My Domain’
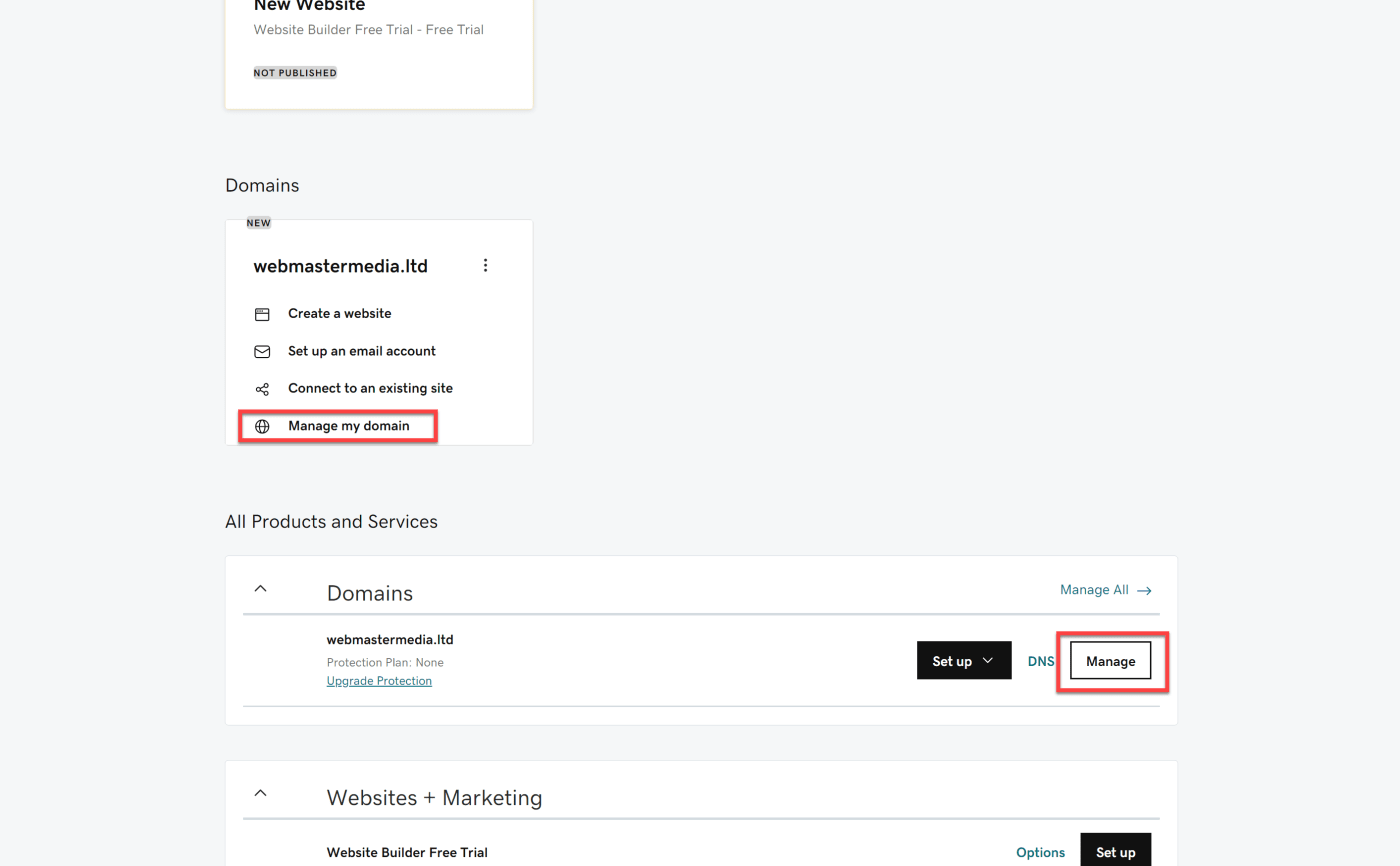
After logging in to your GoDaddy Client Area, go to the ‘Domains’ section and click on Manage my domain from it. You will be redirected here so that you can configure the DNS record for the selected domain name.
Struggling to choose the ideal WordPress theme? Read, How to Choose a WordPress Theme? (7 Easy Steps).
Step 4: Select ‘Manage DNS’
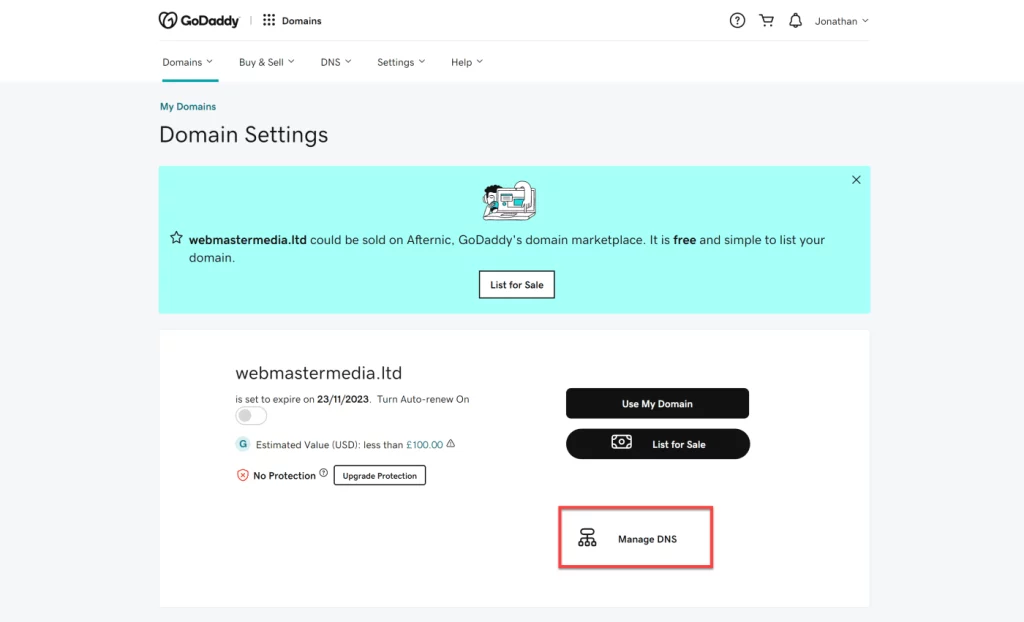
Under the domain management interface, you will find several functions regarding managing your domain settings. Find the option with ‘Manage DNS’ written on it and click thereon. By doing this, you will be directed to the page for DNS management in which changes can then be made to your Domain’s DNS records.
Step 5: Edit Your ‘A Record’ Within the DNS Records Section
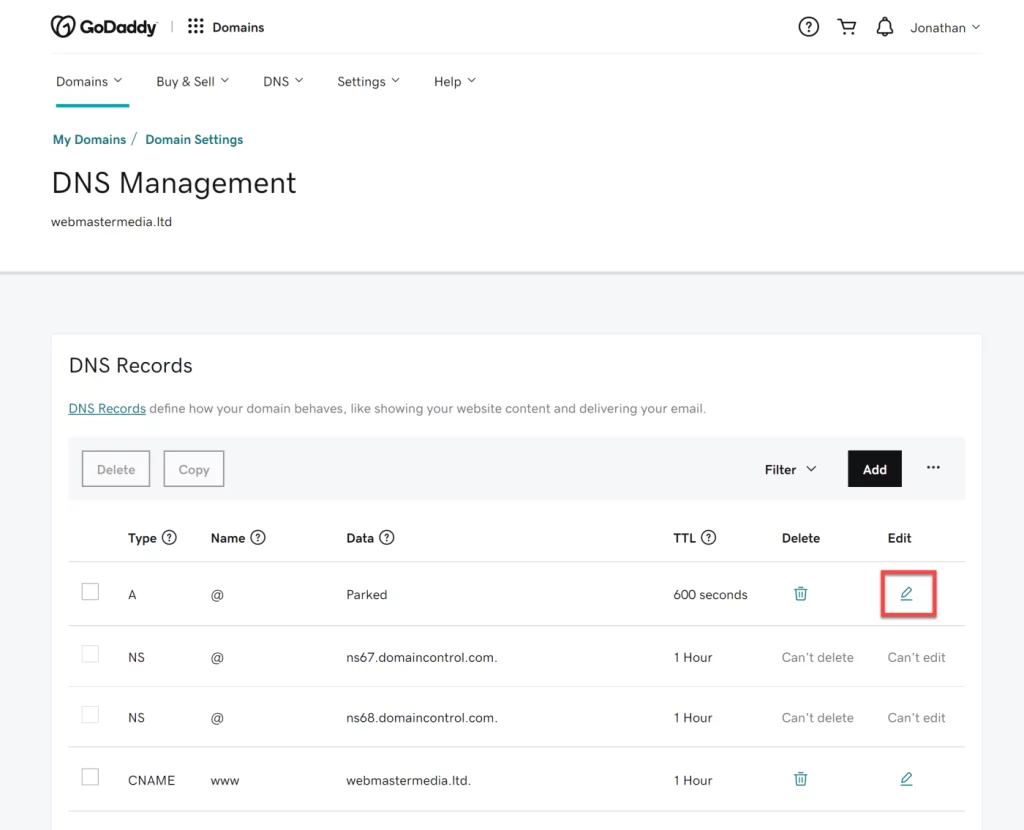
The ‘A Record’ stands as a DNS record indicating that the IP address corresponds to your domain name. Search for the ‘A Record’ portion on your DNS management page where there is a specific record for your ordinary domain (@). Click on this record edit icon Next, enter your server IP address into the “Value” field and click on ‘Save changes’.
Step 6: Wait for the DNS Records to Update
Lastly, to change or edit the WordPress DNS configuration, you may need to wait for some time. It may take some time for internet propagation after updates to your DNS records.
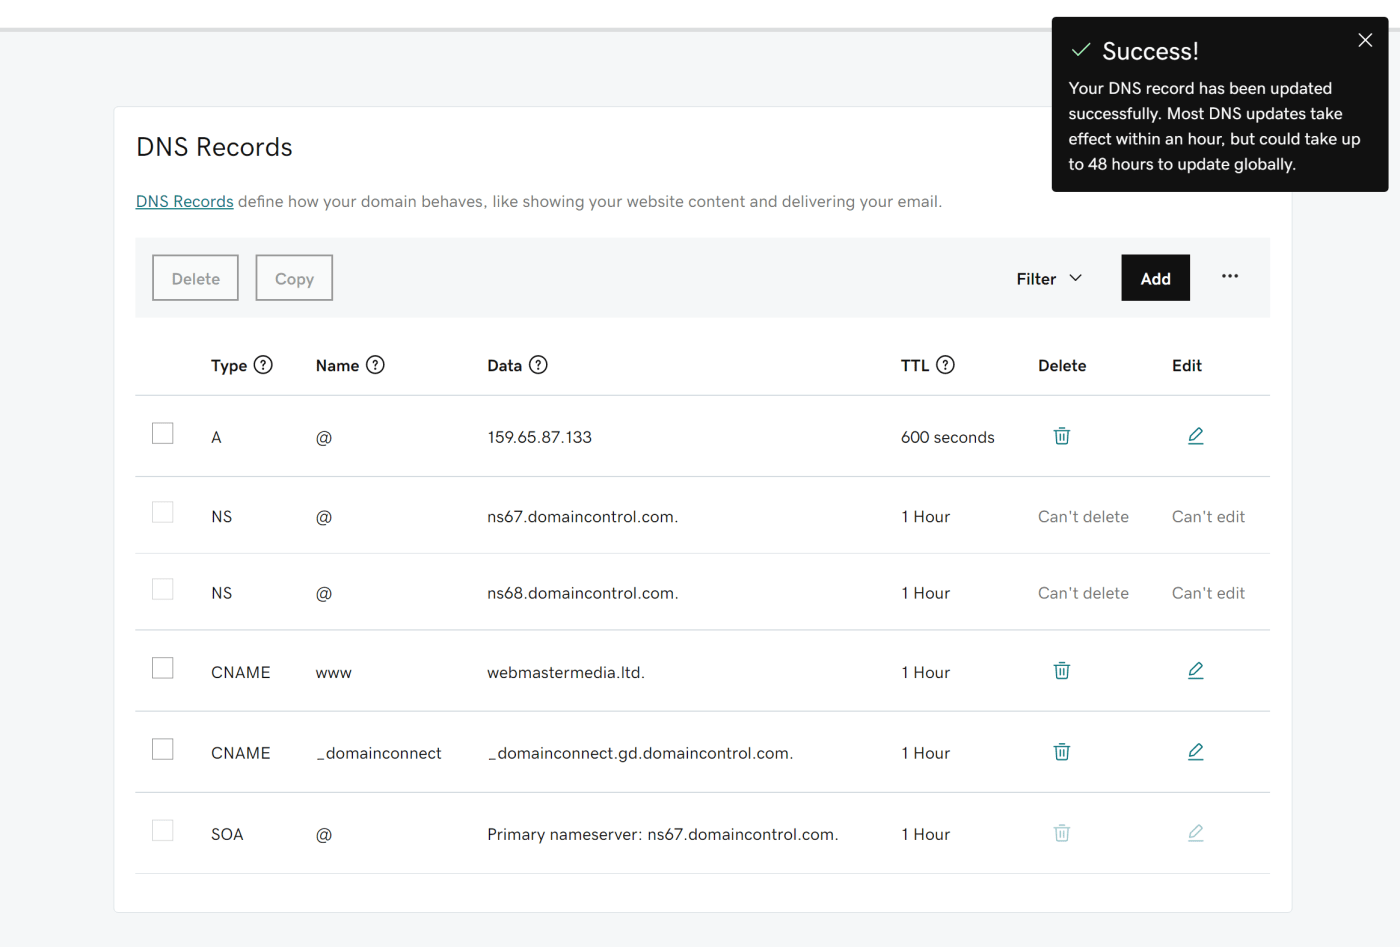
In most cases, these propagation times pertain to the maximum DNS TTL setting at 48 hours. But TTL to A record specifies that updates can happen after 600 seconds. As the DNS records update, be patient as new information is propagated across servers worldwide.
Want to add a PDF download button using Elementor? Read, How To Add PDF Download Button Using Elementor? (6 Easy Steps)
In a Nutshell
WordPress DNS configuration is very straightforward and important for your website. With the knowledge about how DNS works, and translating domain names to IP addresses, you will be able to direct more traffic to your website.
DNS is among the foundational systems powering the World Wide Web today. DNS responds quickly to the requests and it takes only a few seconds to locate your website. It provides compatibility with search engines and helps you gain better visibility.
If you like reading this blog about how to change or edit the WordPress DNS configuration, also read our detailed guide on How to Display “This Site Uses Cookies” Cookie Notice in WordPress? and How to Log Into WordPress Admin? 2 Easy Approaches.


Stuck Somewhere?
Connect With JustHyre
Hire WordPress Engineers for custom jobs like Website Customization, SEO Optimization, Clearing a Hacked Website, Installation & Configuration & more.
Connnect with JustHyre
0 Comments