How to Add Text on Images in WordPress? (3 Easy Methods)
Looking for a way to add text on images in WordPress? This article is just for you.
A text overlay on a featured image lets you add some context to your posts and in addition to that, if done correctly, it makes your WordPress website edgier.
In this blog, we are going to show you how you can easily add text to images on your WordPress website using 3 different methods. So without further ado, let’s dive in.
Why add text on images
Text on pictures in a WordPress website can benefit your site in multiple ways, both aesthetically and functionally. Whether you are adding extra information, making images visually appealing, or optimizing pictures for search engines, images with text can be more impactful with your content.
Here are a few reasons why you should add text to images in WordPress.
- Enhanced Visual Communication: Text on images aids in conveying a message clearly, elating your viewers and guiding them through the content.
- Improved Accessibility: By including text your content will remain accessible to everyone including people with visual disabilities who use screen readers as their main tool.
- SEO Optimization: Keywords in image captions enhance search engine presence, this allows your content to appear more often in search engine results.
- Increased Engagement: Text overlays facilitate engagement through calls to action, requests for more information or prompts for social media sharing.
- Aesthetic Appeal: Stylish typography and well-designed text overlays can do aesthetic wonder to your website and make it more visually elaborate.
Method 1: Add Text on Images Using Cover Block
The very first method to add text to an image is by using the cover block. Each element that you place on your WordPress website is in the form of a block, like an image block, text block, button block, and likewise. One such block is the cover block. Using a cover block, you can add an image and then add text over it.
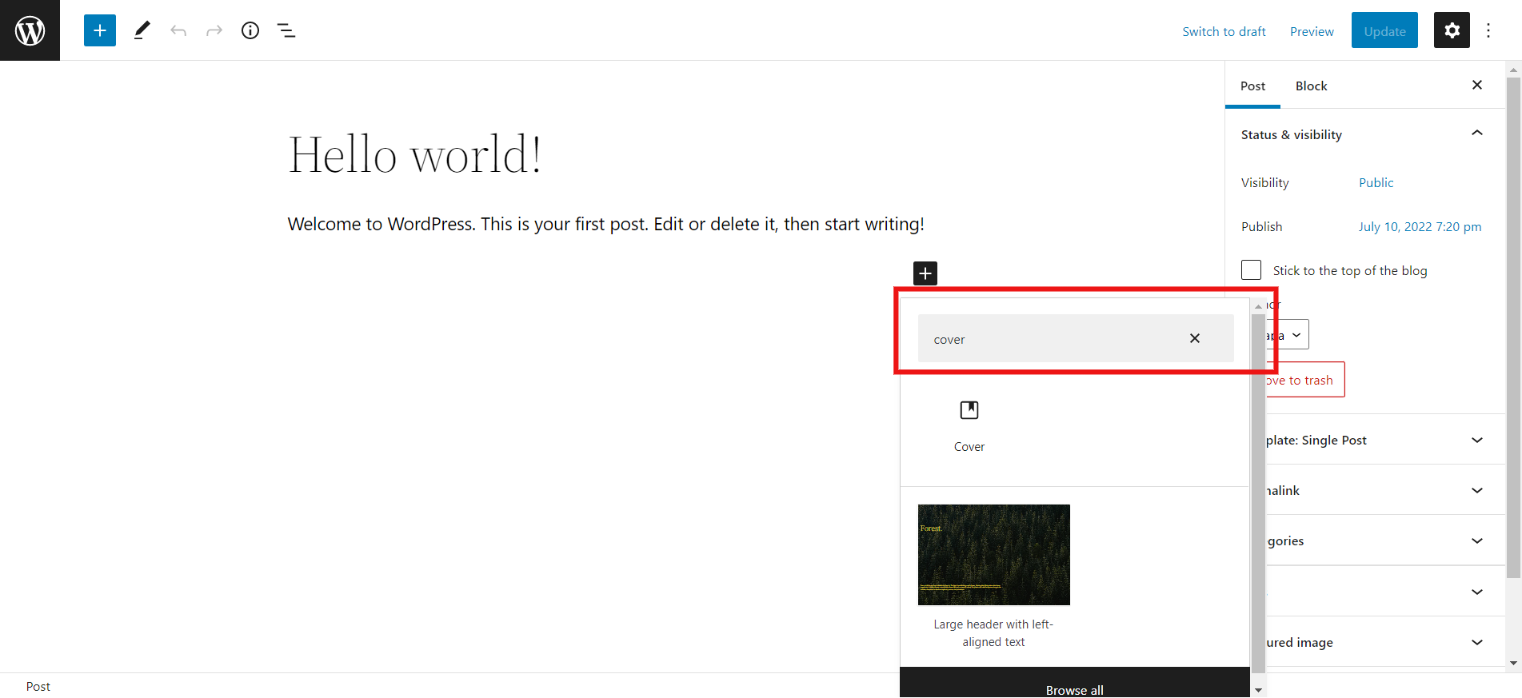
Just like we add all the other blocks, click on the plus button to add a new block and then search for “Cover”. This block has a default image and some default text which you can edit and change according to your requirements. To change the image, click on the image and you will find an option to replace it.
Here, you get two options from where you wish to select your image. First, if you want to use an image that is already uploaded to your WordPress media library, then simply click on “Open Media Library”. There, you will have all the existing images uploaded to your WordPress website. And if you want to upload a new image, click on “Upload” to add an image.
Once you upload the image, you can now edit the block through block settings. By overlay option, you can add color to the overall image, and by using the opacity slider, you can customize its opacity.
Also read, How to Add a PayPal Payment Form in WordPress? (4 Easy Steps)
Now, by default, the text is in the form of a heading and a paragraph block. To add text to an image, simply click on any of the heading or paragraph blocks and edit it. To customize the text in your heading or paragraph block, you use all the options which pop up when you edit any of the blocks.
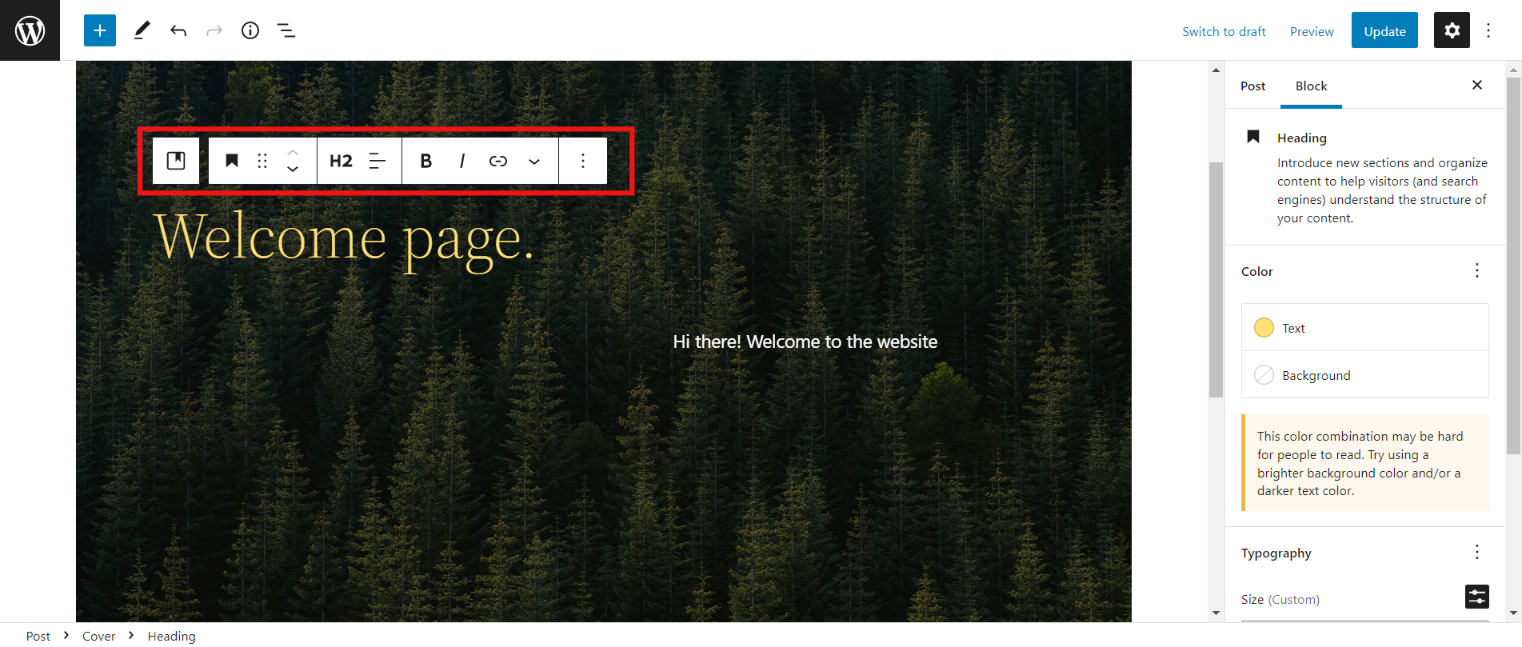
Sometimes, it can be hard to read the text above the image, if the image is too loud or the text is too thin. You can change the color of the text from the right menu on your interface. Click on “Text” and select the theme. Another way to make your text readable above the image is by adding a background.
To edit the typography, on the right side of the interface, click on “Typography”. Generally, WordPress has a standard size for different headings. But you can customize it from the “Typography” option. You can also edit your text’s appearance and letter case with this.
And this is how you add text to an image using a cover block. Once done with all the edits, check the preview and see if the result comes out as you expected. If not, you can always go back and edit it according to your needs. Once done with edits, you can publish them by clicking on “Publish”.

Method 2: Add Text on Images Using Image Block
The cover block works best to add images to text for creating headers and banners of a website. But if you don’t find that method convenient or you want to add text to the already uploaded image, you can use this method. You can also add text to the image using the text block.
First, to place the image behind the text in WordPress, add the image block just like we add all the other blocks, and there also, you have two options, i.e. you can add the image that is in your WordPress library or you can upload it from your system.
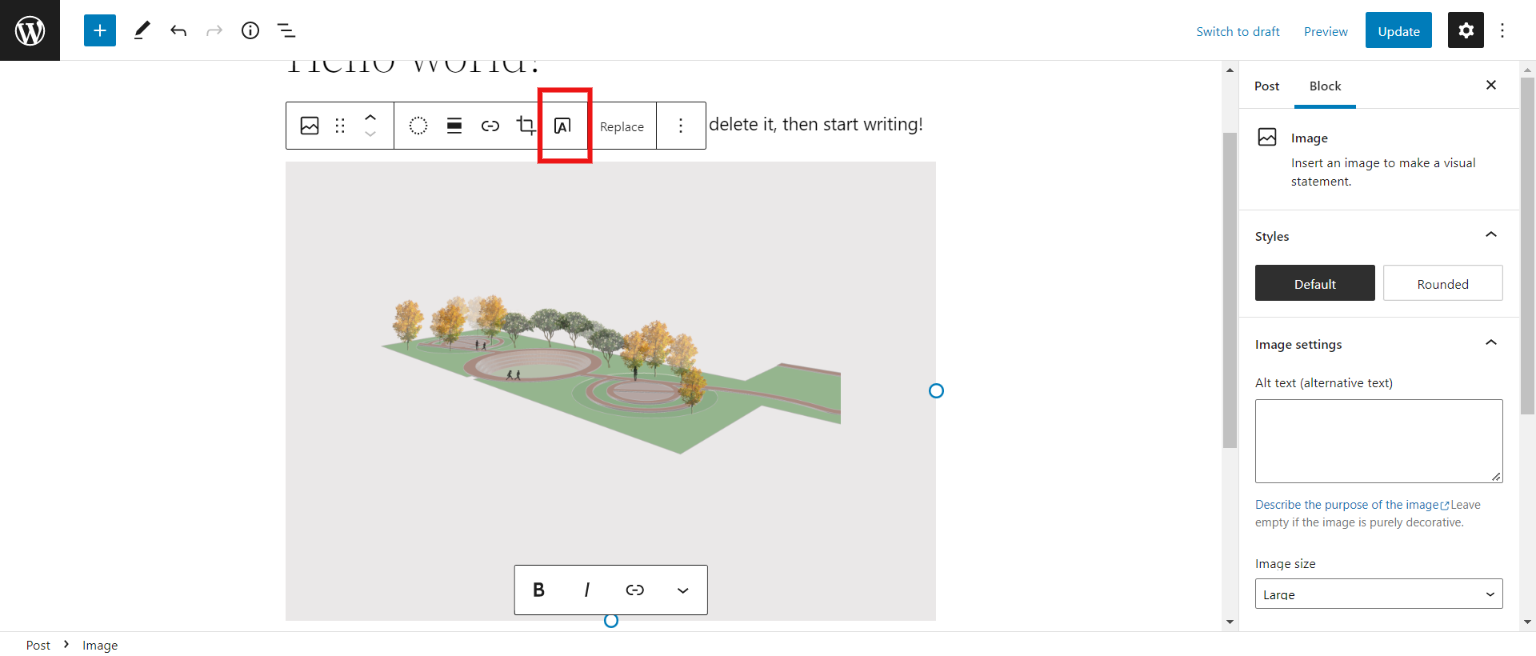
After uploading the image, click on the button provided to add text on images, and best the alignment, link, and crop options. This will create an area for you to add text images. Now to edit the text, simply click on the text and write your content.
You can overlay a new color on the image and change its opacity just like the above method. Now, as mentioned earlier, if your image is too loud or the text is too light, it might not be convenient for the user to read it.
Under the “Block” tab, you can edit the image’s color, typography, and size. Adjust the text color and background in such a way that your content is readable and it should merge with your overall interface of the website.
Here also, we suggest you preview the results by clicking on the “Preview” button on the top-right side of the interface. Check if everything goes as per your need and if it’s a green signal, then go ahead and publish it by clicking on the “Publish” button. If not, then you can always go back and make the necessary edits.
Want to know how you can easily add a Bitcoin payment gateway to WordPress, read How to Add a Bitcoin Payment Gateway to a WordPress Website? (4 Easy Steps)
Method 3: Add Text on Images Using Elementor
Elementor is a fantastic visual WordPress website builder that helps you create websites that attract visitors attraction and leave a mark on them.
To add text to the image using Elementor is simple. Go to your post/page and click on “Edit with Elementor”. If you don’t have Elementor, you can download it from the “Plugins”.
Add a section to the page and under the “Style’ tab on the left side of the Elementor interface, you will find an option to edit the background.
Click on that and you will find three options to add images to your WordPress website. First, you can upload the image from the system through, the “Upload” option. Next, use “Media Library” to upload the image from your WordPress media library. And lastly, Elementor gives you the privilege to use images from Pixabay.
You can give details about the image like alt text, title, caption, and description. Elementor is a highly customizable page builder. You can edit the position, attachment, and size of the image from the “Style” tab.
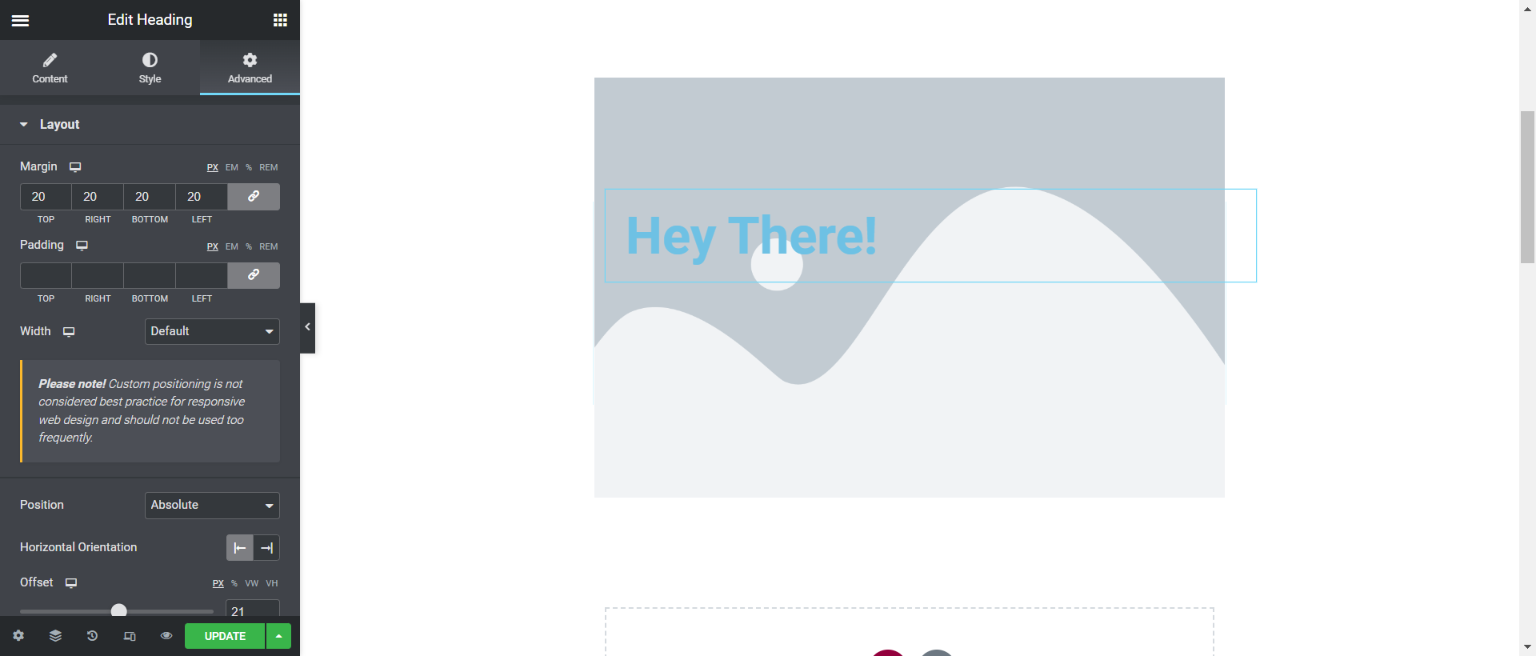
Now, to add text on images, click on “+”, and drag and drop “ Heading” to it. You will find a text section over the image which you can edit and put the content according to your needs. You can also add “Text Editor” if you can add paragraphs and can edit the content from the “Style” tab.
Wrapping Up
And that’s it for this article. We hope this article has helped you to add text to images. We have covered 3 different methods to add text to images in WordPress content. If you are still stuck and can’t figure out how to add text to an image, then you can hire WordPress engineers from JustHyre for the job.
If you like this blog, also read our expert’s pick on How to Fix the “File Type Is Not Permitted” WordPress Error with Easy Methods and How to import and export WordPress users in an easy way? (Exporting WordPress users within 5 minutes)
FAQs
1. How do you add text over an image in WordPress?
Add text over an image in WordPress by using image editing tools or plugins that allow for overlaying text on images directly within the WordPress editor.
2. How do you add text under an image in WordPress?
Add text under an image in WordPress by inserting a caption in the media library or using HTML to position text beneath the image in your post or page.
3. How do I add text to a gallery image in WordPress?
Add text to a gallery image in WordPress by editing each image individually within the gallery block or by using a plugin that enables captioning for gallery images.
4. How can you add text in an image file?
You can add text to an image file using image editing software such as Photoshop or GIMP, then upload the edited image to your WordPress media library.


Stuck Somewhere?
Connect With JustHyre
Hire WordPress Engineers for custom jobs like Website Customization, SEO Optimization, Clearing a Hacked Website, Installation & Configuration & more.
Connnect with JustHyre
0 Comments