How To Add Search Box In WordPress Menu? 2 Easy Ways
As we know if somebody visits a site to find, what he exactly looking for, he first looks for the search box on the site. That’s why it is very important to insert a search box in a proper place so that a visitor can find it quickly. One of the eye-catching places on any page is the top menu area, if you insert a search box in the WordPress menu area then it can be accessed very quickly by every visitor.
WordPress provides a default search widget that can be added to the footer or any widget-ready area. This default search widget has limited capabilities and a few customization options like limited places to add the search box. This article on how to add a search box in the WordPress menu is a step-by-step guide to adding a search box in the WordPress menu and also demonstrates how to add Google Search in WordPress.
Some Reasons To Add Search In Menu.
WordPress default search widget can be added to limited places like the sidebar or in the footer area. Suppose your theme doesn’t support a sidebar or if the search box in a mobile site is not appearing in the proper place, then it is a good practice to add a search icon in your site where a visitor can easily find it. Adding a search box in the WordPress menu bar section is very easier for a visitor to quickly find it.
How To Add Search Box In WordPress Menu Manually?
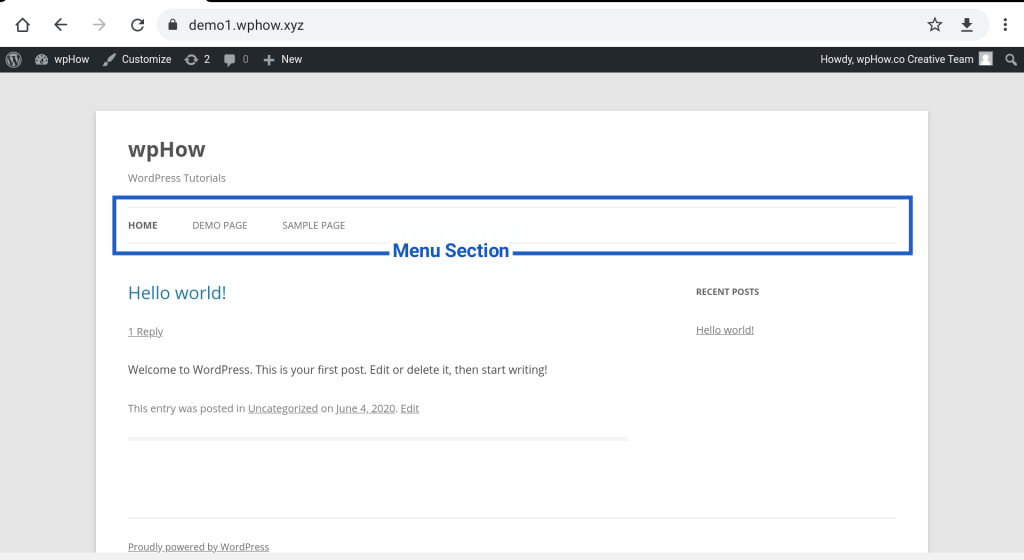
Every WordPress theme provides a top menu section, which appears at the top of the site. See the image below.
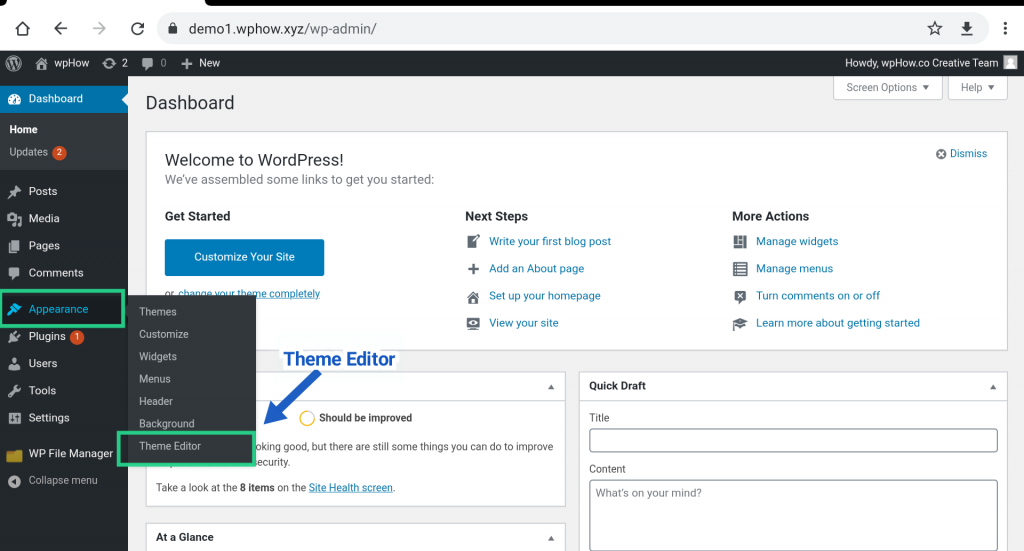
Step 1: Open header.php in Theme Editor.
Dashboard >> Appearance >> Theme Editor.
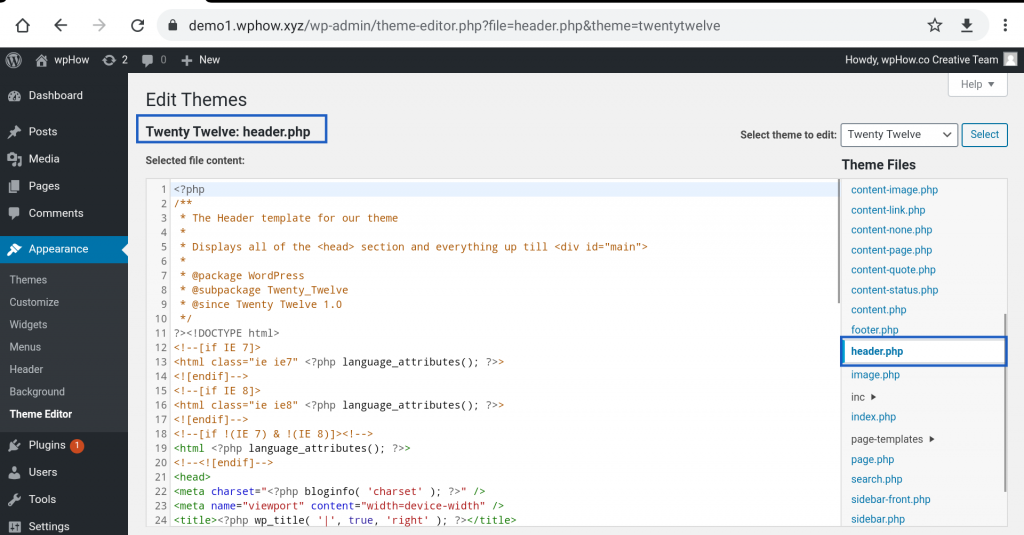
Step 2: Open header.php In Theme Editor.
All the theme files appear in the right-side file list box in the theme editor. Select header.php to edit. See the Image.
If you want to know more about how to edit WordPress theme files follow the link.
Step 3: Paste The Code.
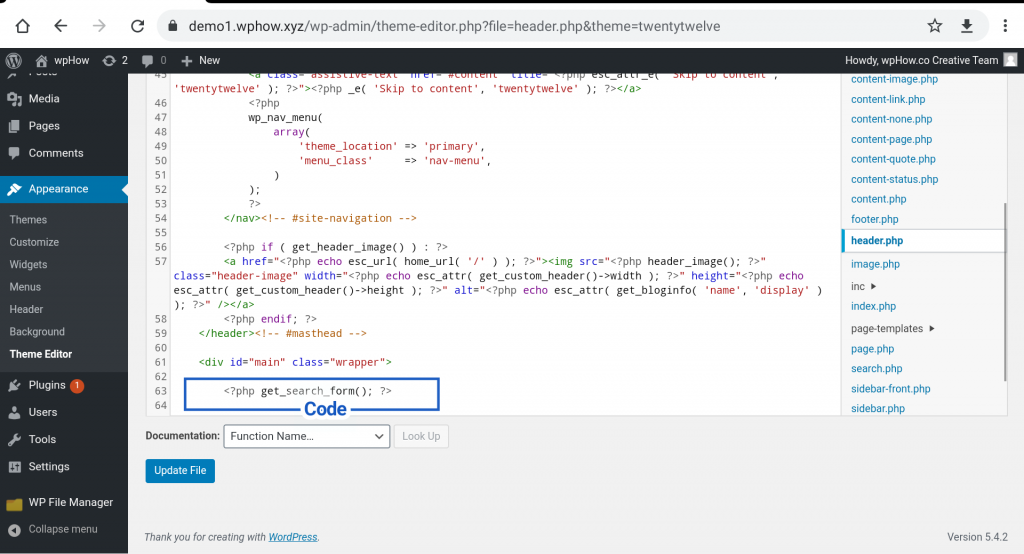
<?php get_search_form(); ?> Paste the code given above at the bottom of the header.php file. It will look like. (See the image)
Step 4: Click On Update File.
After pasting the code, click on update file.
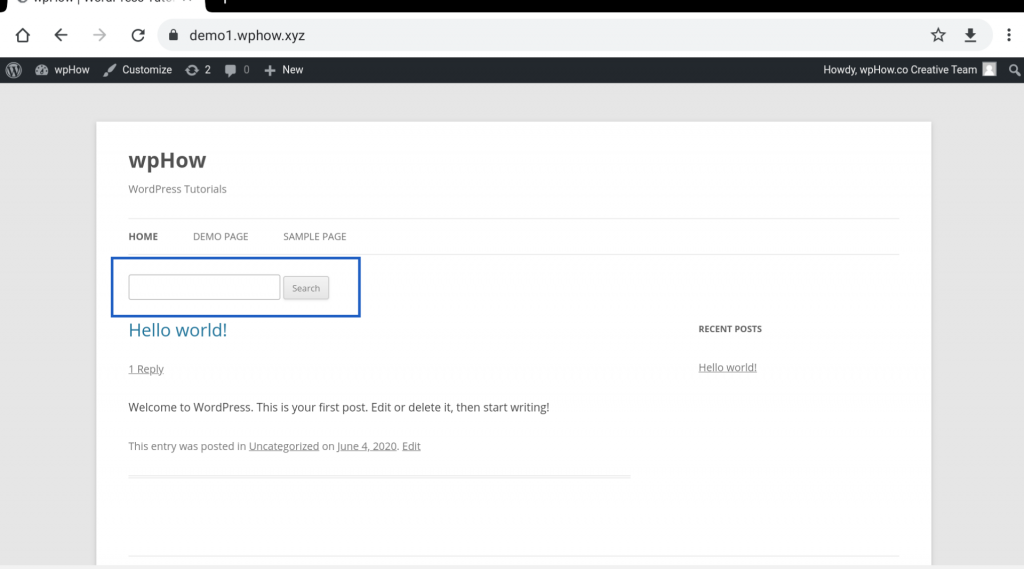
Now it’s time to test the effect of the code. You will get a search box in the top menu area.
How To Add Google Search in WordPress Using Plugin?
To add Google Search in WordPress, we need to search for a plugin in WordPress Plugin Store. Here we are using WP Google Search Plugin to add Google search in WordPress. The steps are as follows.
Step 1: Go To WordPress Plugin Store.
Dashboard >> Plugins >>Add New.
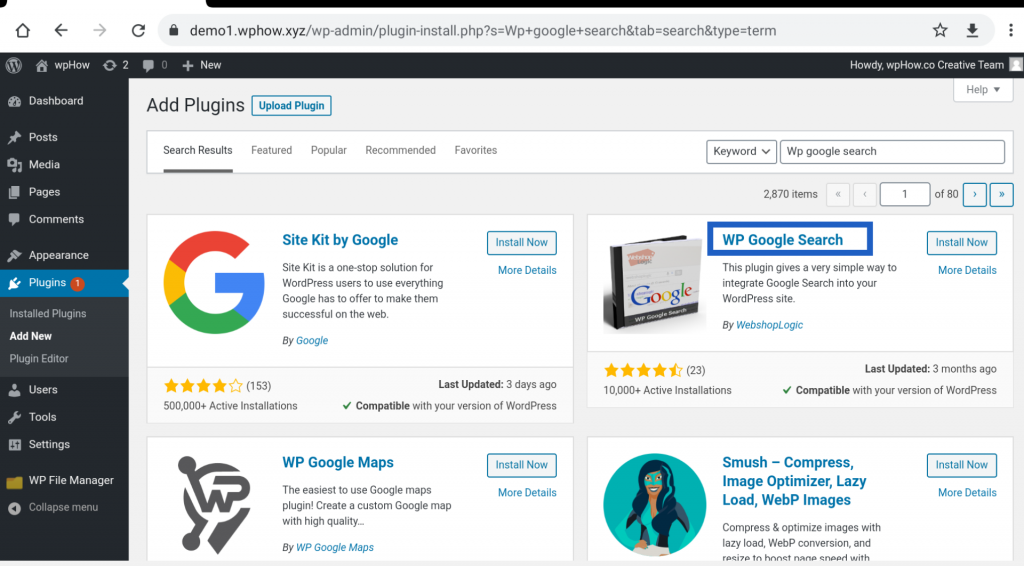
Step 1.2 Search the WP Google Search plugin.
We are adding a Plugin search result Page. See the image.
Step 2: Install The Plugin.
Click on Install Now button, the plugin will get installed in WordPress.
Step 3: Activate The Plugin.
Go to Dashboard >>Plugins, search WP Google Search Plugin and activate it.
Step 4: Go For Plugin Setting.
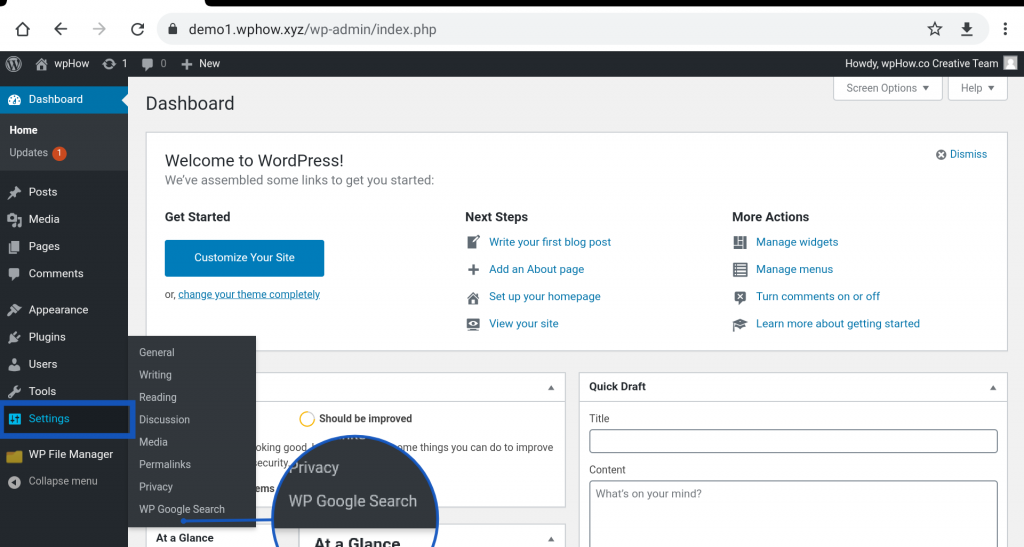
This plugin can be found under the Dashboard >> Settings option. See the image.
Step 5: Finding General Settings.
Click on the WP Google Search option under Settings. It will open the plugin’s General Setting page.
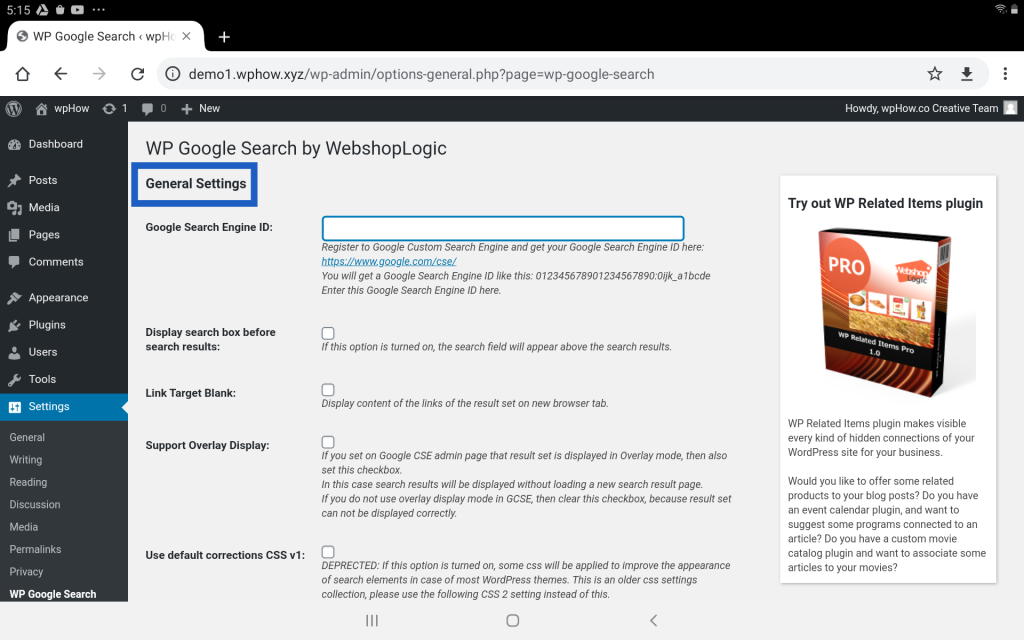
There are many options given on the General setting page. Now we have to enter Google search engine ID. In order to find the Google Search Engine ID, we have to follow the following steps after getting the ID, just paste it into the Google Search Engine Id box.
Step 5.1: Click On The Link.
The first setting option in General Settings is Google Search Engine ID. Click on the link https://www.google.com/cse/ given just beneath it. You will be headed to the Programmable Search page. It also needs your google login credentials, if you are already logged in to Google then you will be headed to the page otherwise you will have to log in first. The Programmable Search page image is given below.
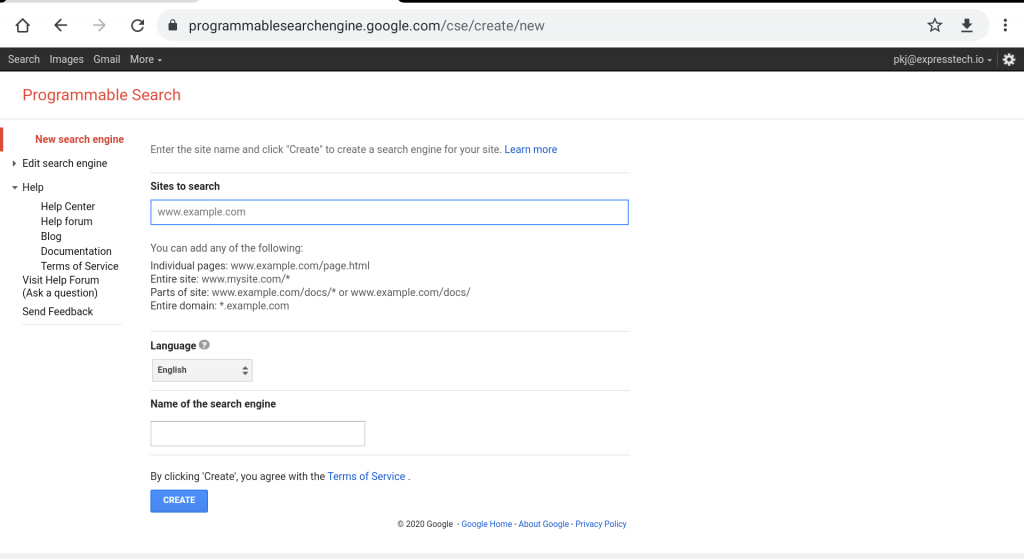
In the option Sites to search, here we are going to add an example site address Demo1.wphow.xyz. Even though we have other options like any individual page or a domain address. After Entering the address click on CREATE button.
Step 5.2 Enter the Site Address.
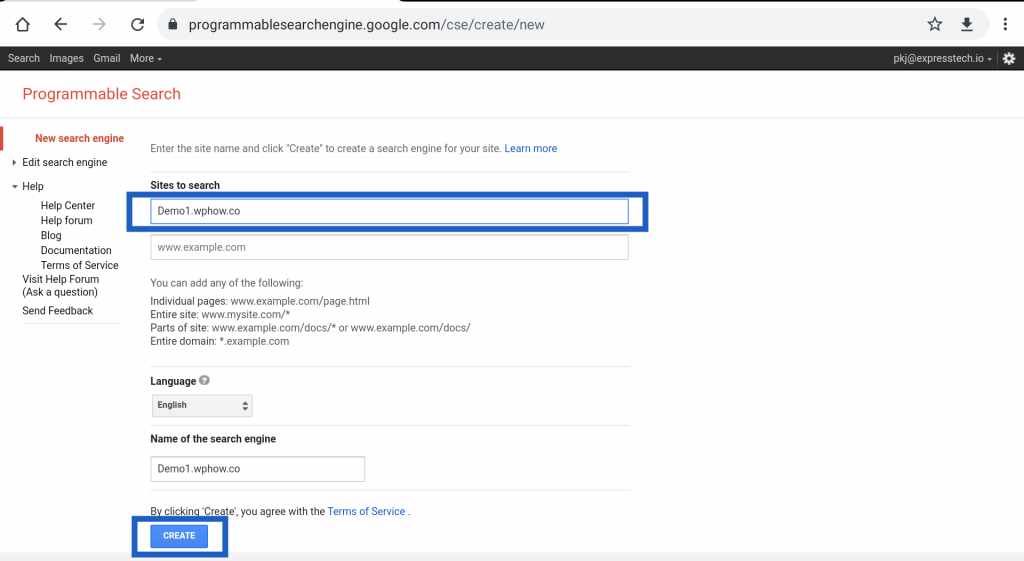
After clicking on CREATE button you will be headed to a new page. This page also has many options.
Step 5.3 Click On Control Panel Button.
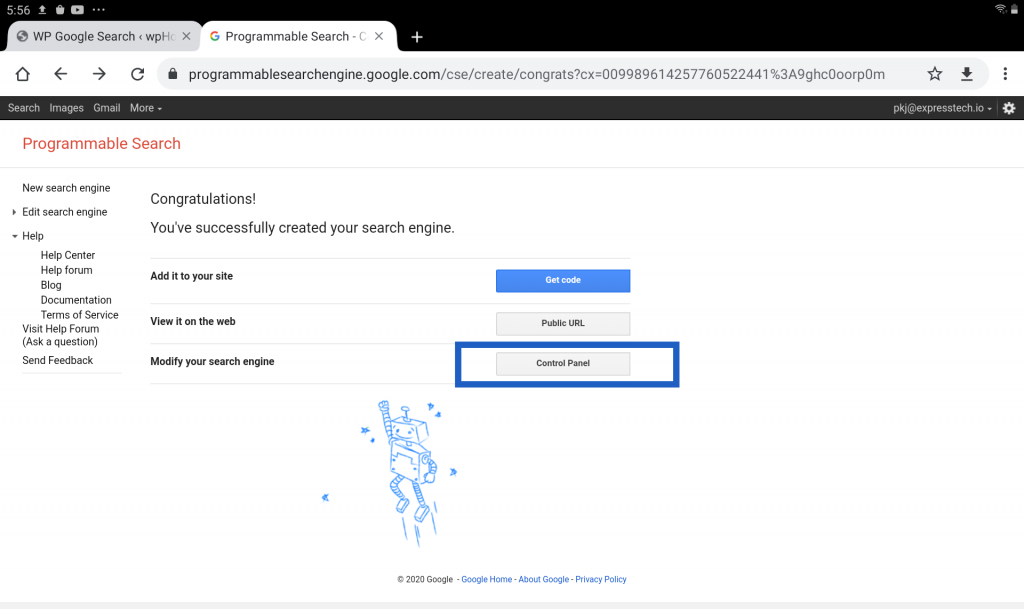
You will be now headed to another new page. This page has 4 tabs. Under the Basics tab, find the Search engine ID and copy it. We have to paste this ID in the Google Search Engine ID option of WP Google Search Plugin’s General Settings Screen.
Step 5.4 Getting ID.
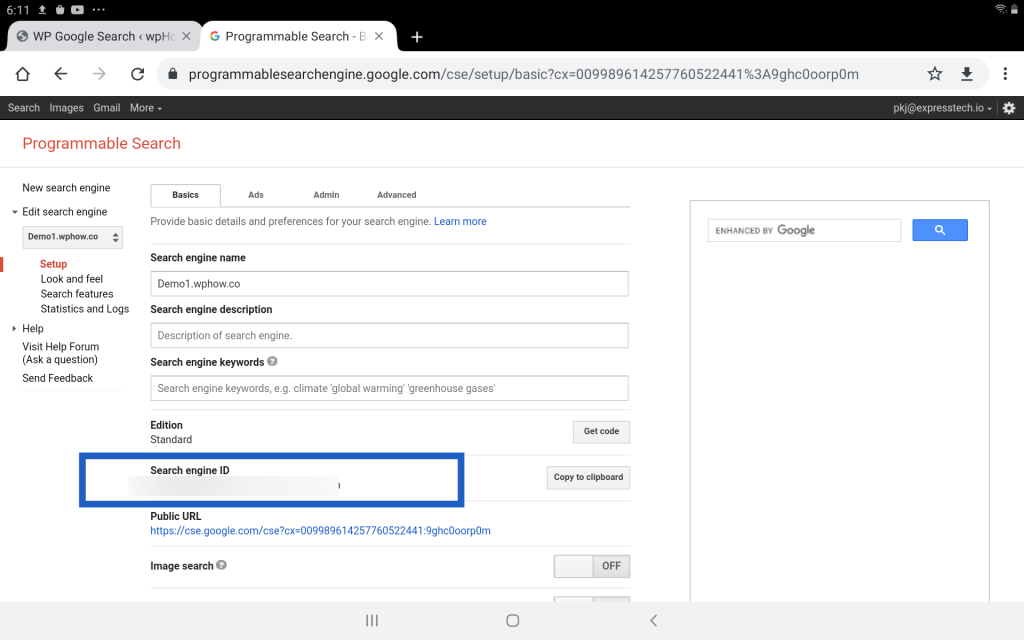
Step 5.4 Paste The ID.
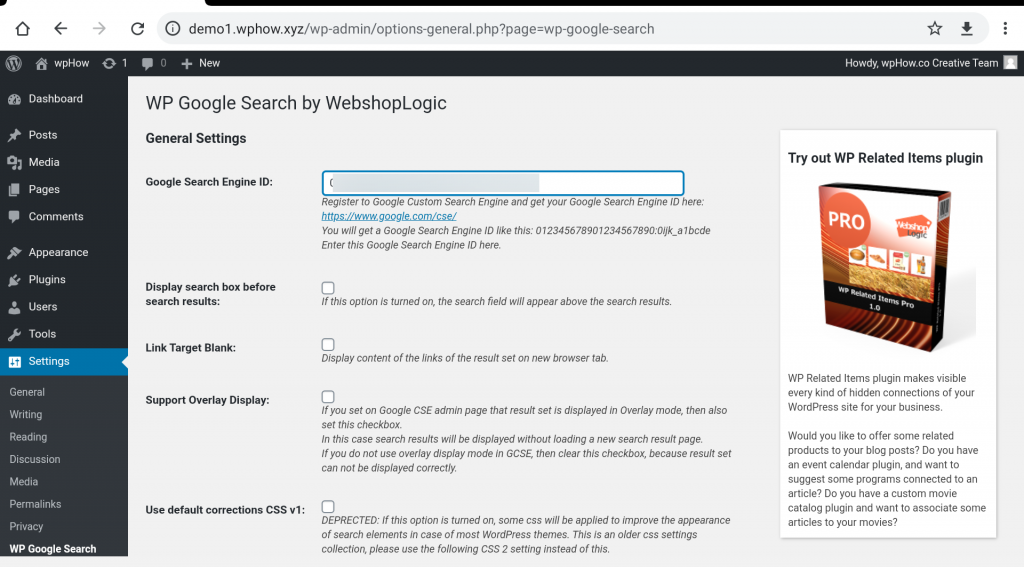
Step 5.4 Click On Save Changes Button.
After entering the ID scroll down the screen and press Save Changes.
Now it is time to place the Google Search box on our site. Google Search box appears as a Widget, so we have to insert this Widget in any Widget ready section of the theme. The steps are as follows.
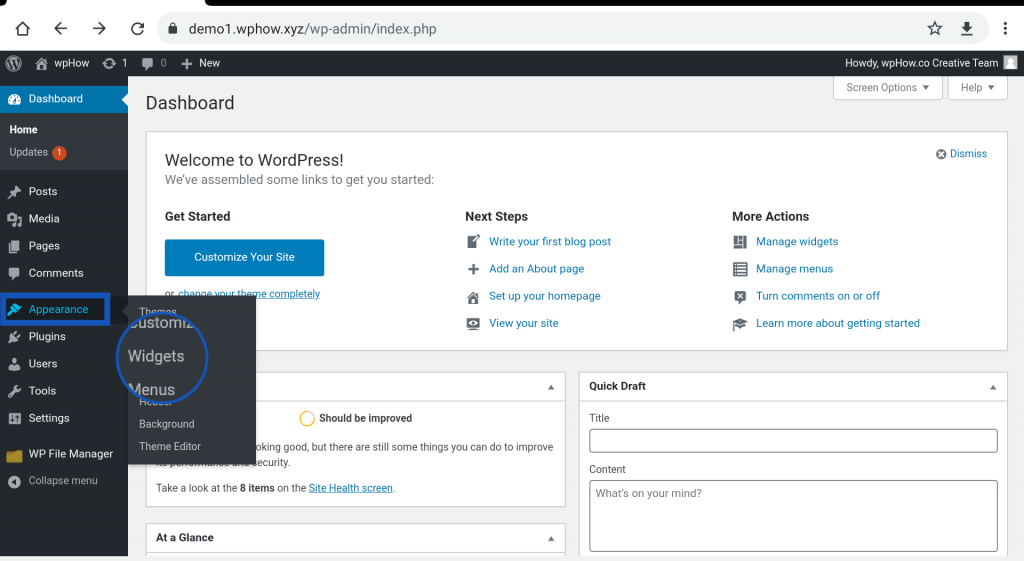
Step 6: Click On the Widgets Option.
You can find the Widgets option as Dashboard >> Appearance >> Widgets.
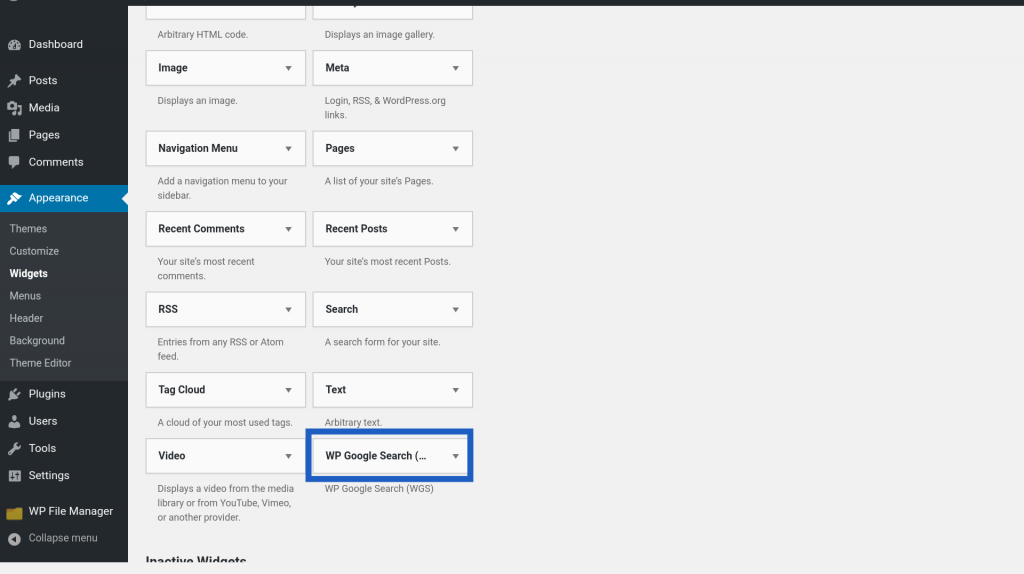
Step 6.1 Search The Widget.
As you scroll down the Widget screen, you will get WP Google Search Widget.
Step 6.2 Set The Widget.
Now we have to set the Widget in any Widget ready section of the theme. Twenty Twelve example themes have Main Sidebar, Front Page Widget Area, and Second footer Page Widget Area. Other themes may have different options, you can customize them according to your theme. We are placing the Widget in the Main Sidebar Widget section. Just click and drag the Widget and drop it to the Main Sidebar section.
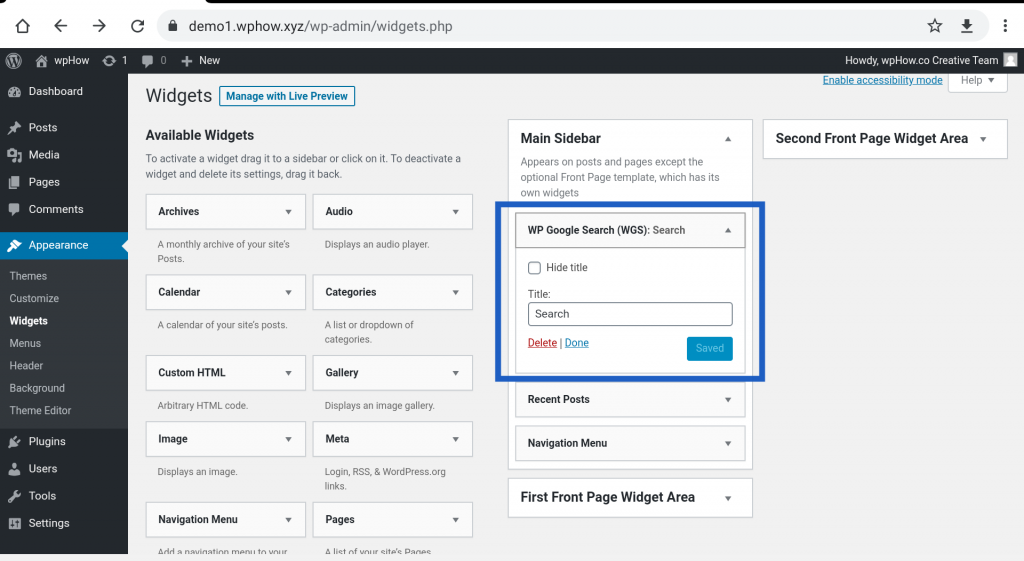
There is also a Title option where you can enter a title for the search box.
Now it’s time to see the effect. See the image.
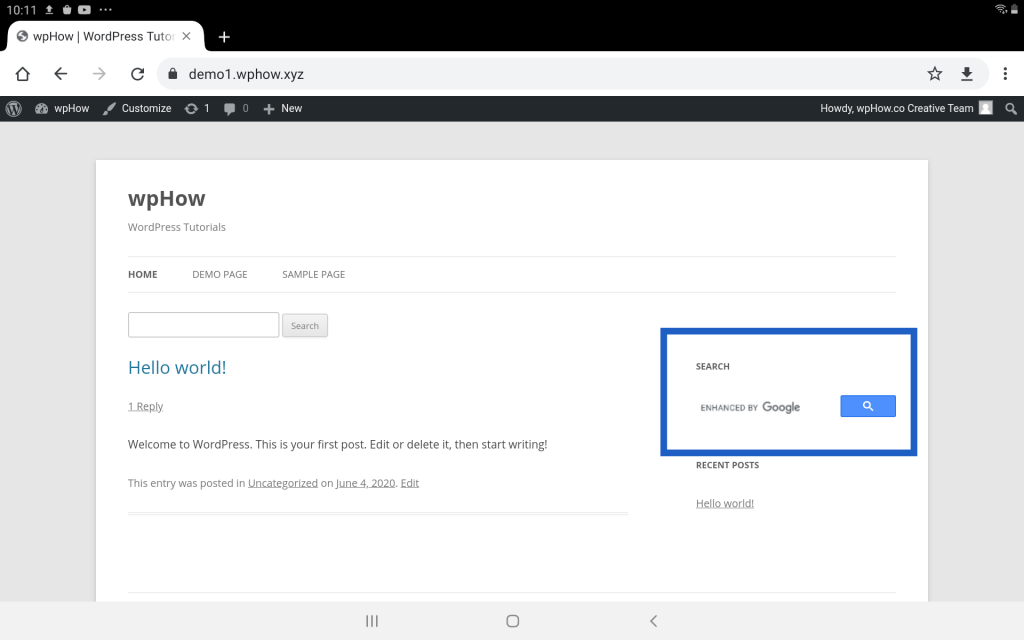
That’s how you can insert a Google Search into a WordPress site.
Stuck Somewhere?
Connect With JustHyre
Hire WordPress Engineers for custom jobs like Website Customization, SEO Optimization, Clearing a Hacked Website, Installation & Configuration & more.
Connnect with JustHyre


0 Comments