How to Create a Custom Menu in WordPress? (7 Easy Steps)
Wondering how you can create a custom menu in WordPress?
A WordPress menu is the link to the pages of your website. Every WordPress theme comes with a menu system also known as a navigation menu, navigation bar, or main menu. Here we are using Menu Editor to add a menu in WordPress. There are different locations on your site depending on your theme to display a menu.
We are using the Twenty Twenty WordPress theme as our example theme. It provides us with up to five menus to display in different locations on our site. It means that you can place a menu in five different places on your site or you can place up to five menus in five different locations.
Here in this blog, we will take you through a detailed guide to how you can easily create a custom menu in WordPress.

Steps to Create a Custom Menu in WordPress
WordPress provides a Menu Editor with a drag-and-drop interface to create or edit menus. You can access it via Dashboard > Appearance > Menus.
Step 1: Navigate Menus
Navigate Dashboard >> Appearance >> Menus.
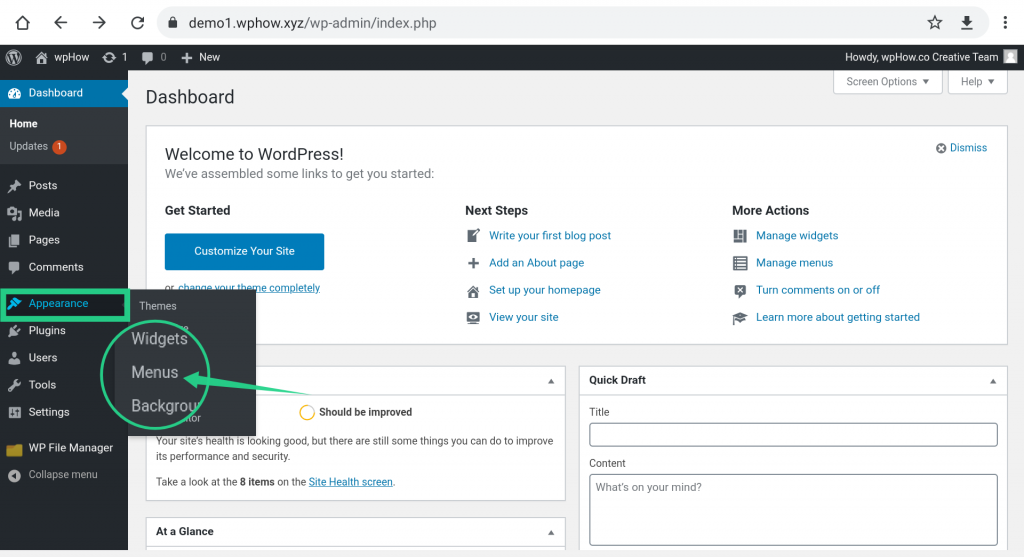
Clicking on the Menus option brings up the Menus Screen. There are many options available to create a custom menu under the Edit Menus tab.
Step 2: Edit Menus
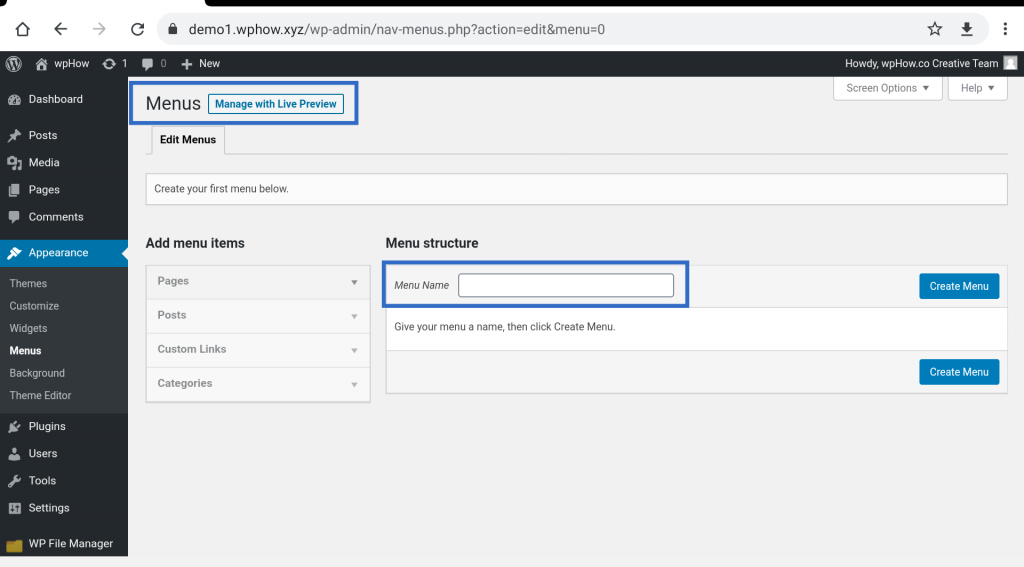
The Edit Menu tab has two options Add Menu Items and Menu Structure. Under the options Menu Structure, enter the name of your menu in the Menu Name Box. Give a unique name to each menu. The option Add Menu Items has four items to add to a menu.
Let’s create an Example menu say Top Menu. The steps are given below.
Step 3: Enter the Menu Name
The next step to create a custom menu in WordPress in to enter the menu name. Top Menu will be the name of our example menu, so under the options Menu Structure, enter Top Menu in the Menu Name Box and press the Save Menu button.
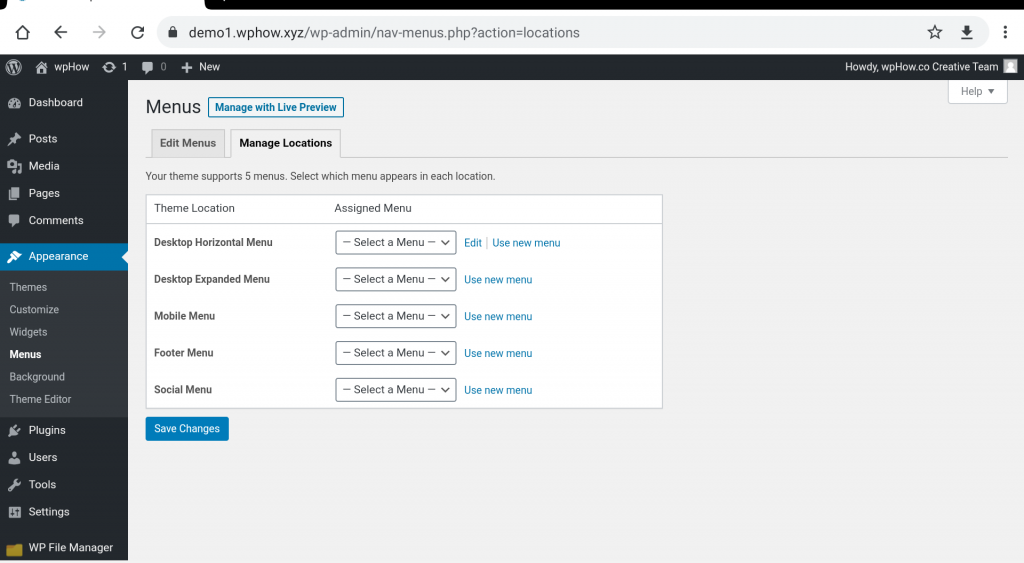
As you press the Save Menu Button, an updated Menus Screen will appear with a new Tab Manage Locations. As we are using the Twenty Twenty theme to create a WordPress menu in WordPress, this theme offers five locations to display menus. You can create as many menus as you want, and any five of them can be displayed in different locations given in the Manage Locations option.
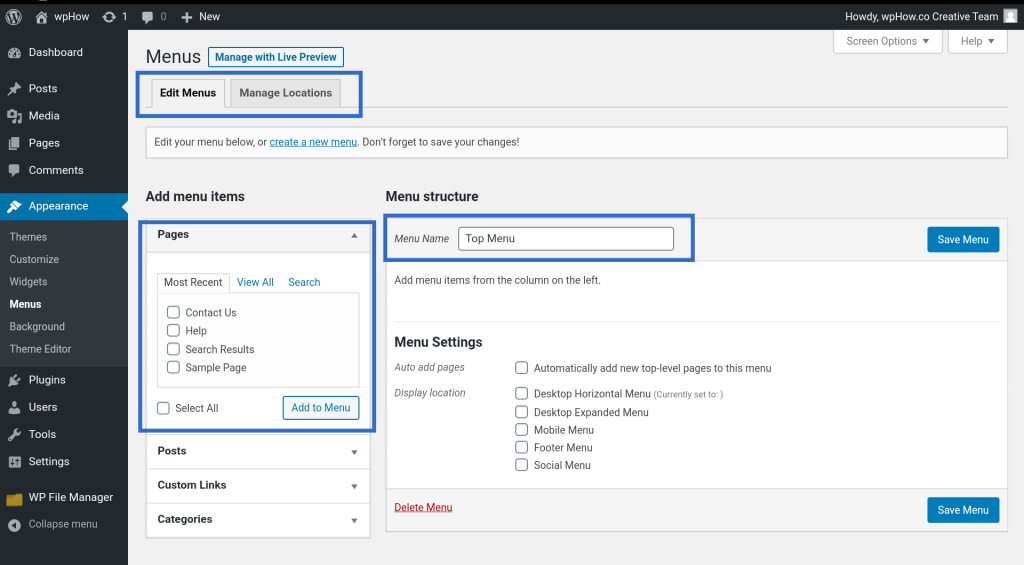
Step 4: Add Menu Items
The option Add Menu Items under Edit Menus has four items to add to a menu, you can either add all types of items or add any one of them. All four options are explained below.
- Pages:
It shows all the published pages to add to a menu. You can select as many as many pages as you want to add to your newly created Top Menu. The Select All option is also available to select all the pages in your menu. - Add to Menu Button:
It adds all the selected pages to the menu.
Posts :
It is similar to the Pages option, you can add your published posts to your menu.
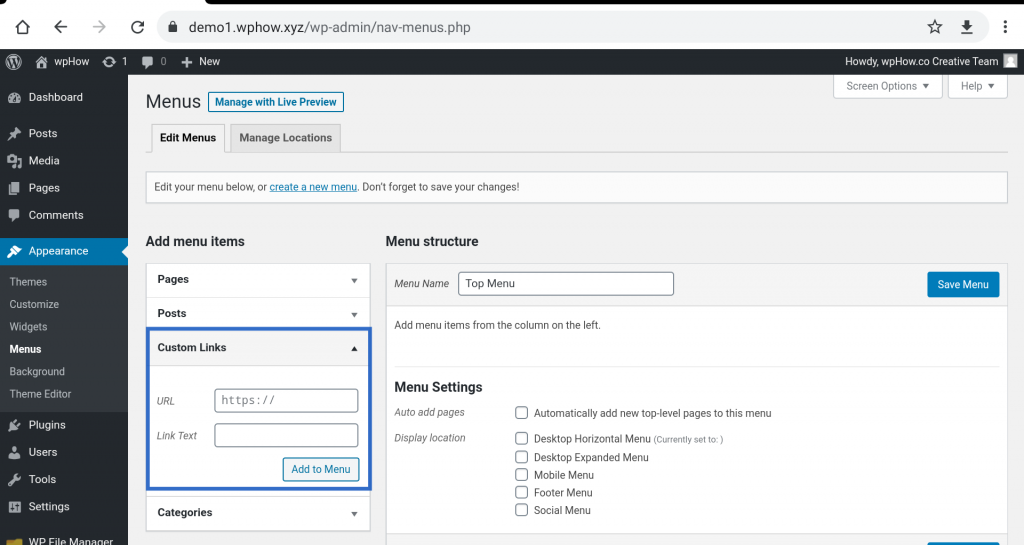
Custom Link:
You can also add a link as a menu item in your menu. This option has two boxes one is for a link and the other is for link text which will appear as a menu item.
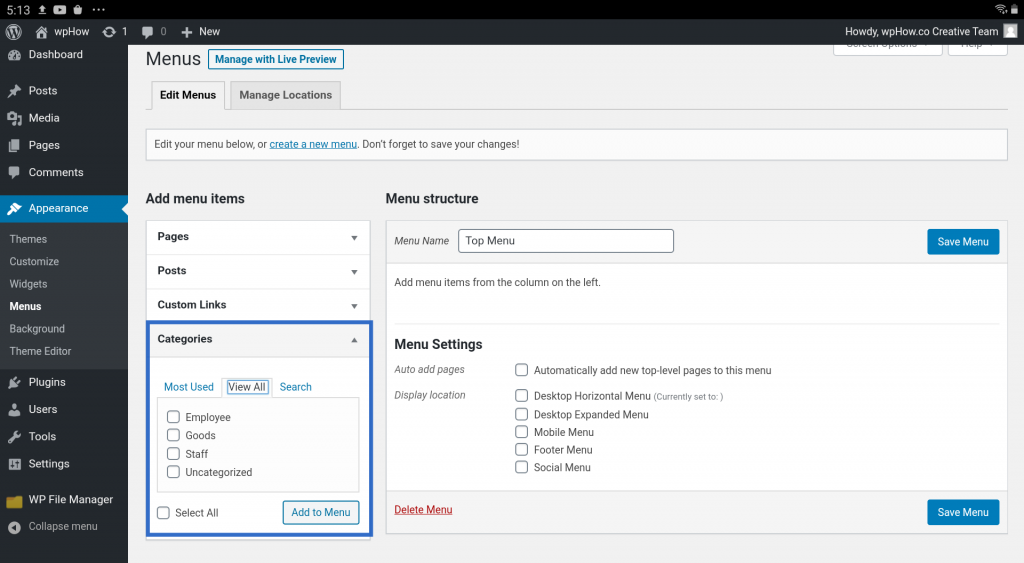
Categories:
You can also add categories as menu items in your menu. The process of adding categories is similar to the Posts or Pages option.
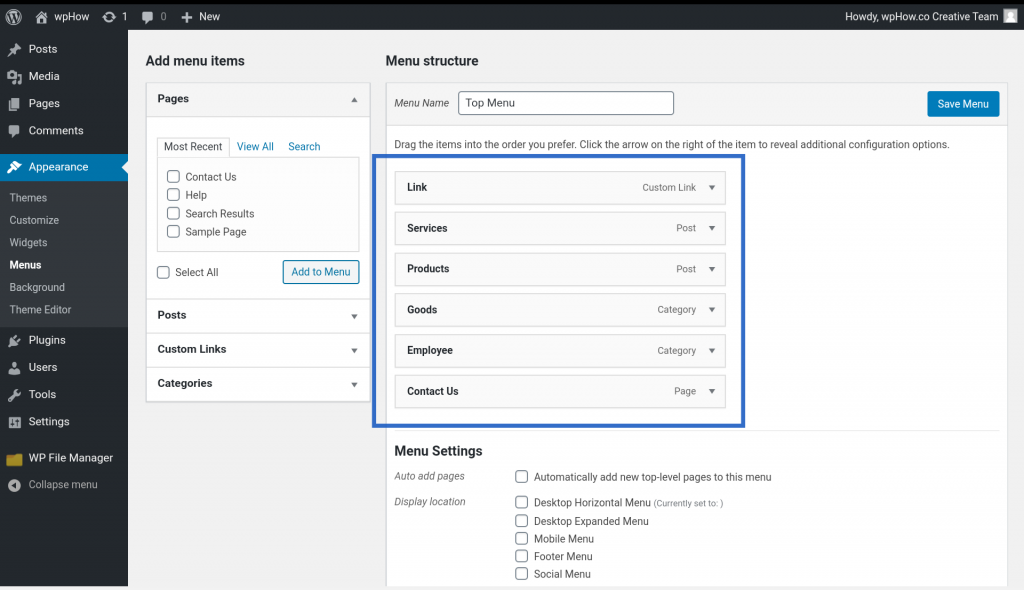
Step 5: Adding Items To the Menu
Next, to create a custom menu in WordPress, you will need to add items to the menu. Top Menu is the name of our example menu and we are going to add 2 posts, a Contact Us page, a link to wpHow.co site and 2 Categories using Add Menu Items option. Here you can rearrange menu items according to your choice.
Step 6: Menu Settings
We are using Example Theme Twenty Twenty and this theme provides five places to add a menu. You can select any Display location(s) for your menu.
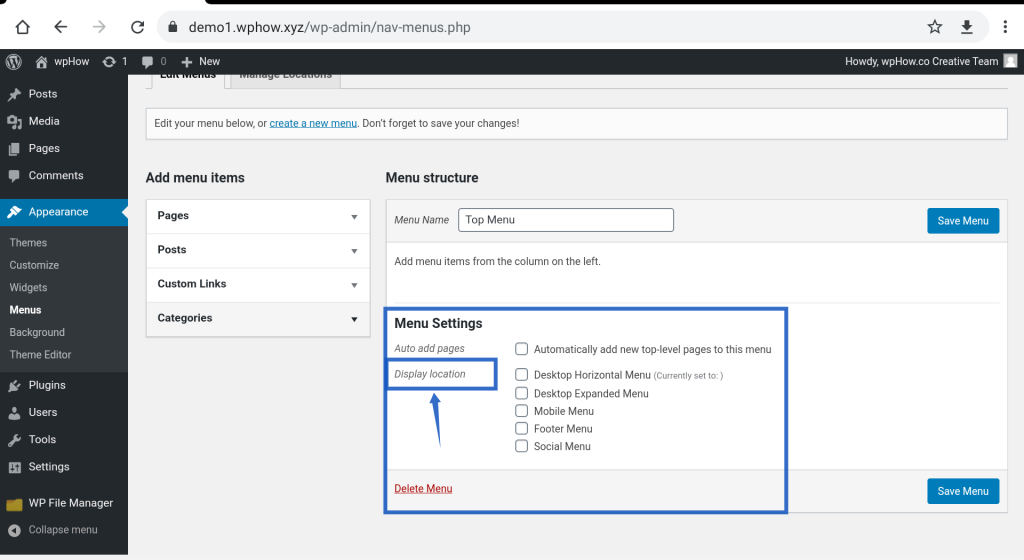
An explanation of each option is given below.
Automatically add new top-level pages to this menu:
If you opt for this option all-new top-level pages get added to your menu automatically.
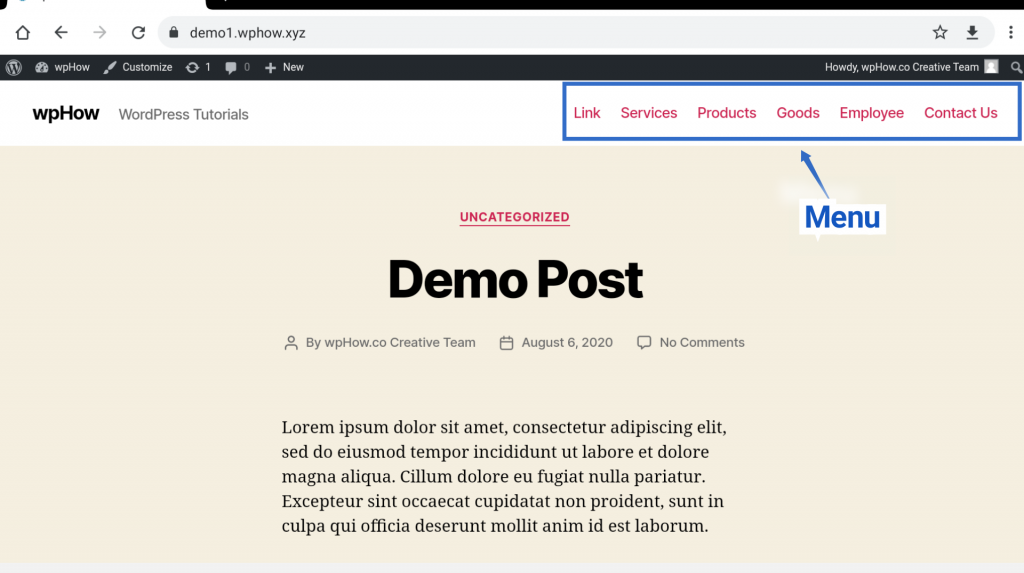
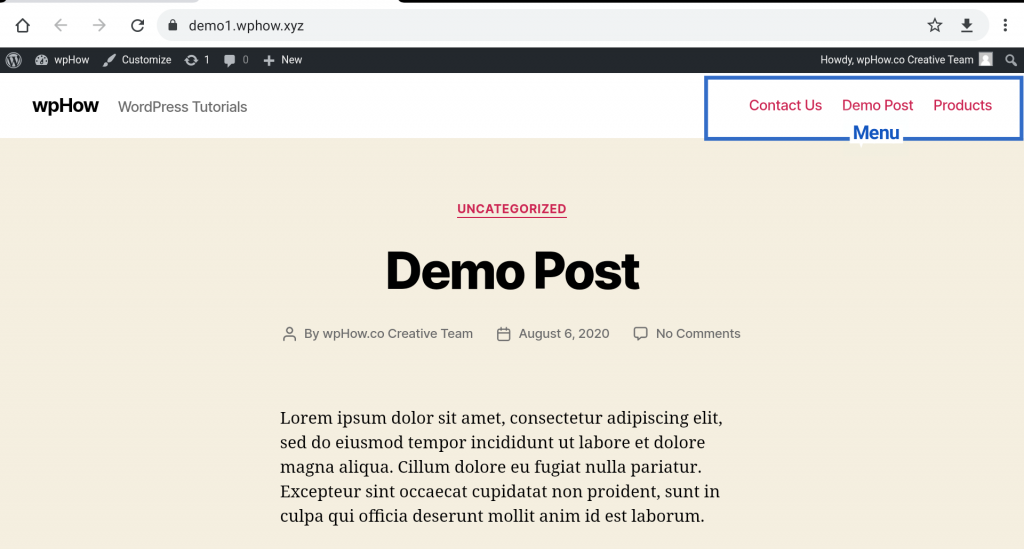
Desktop Horizontal Menu:
If you select this option, your menu will appear at the top menu area of the theme. See the image.
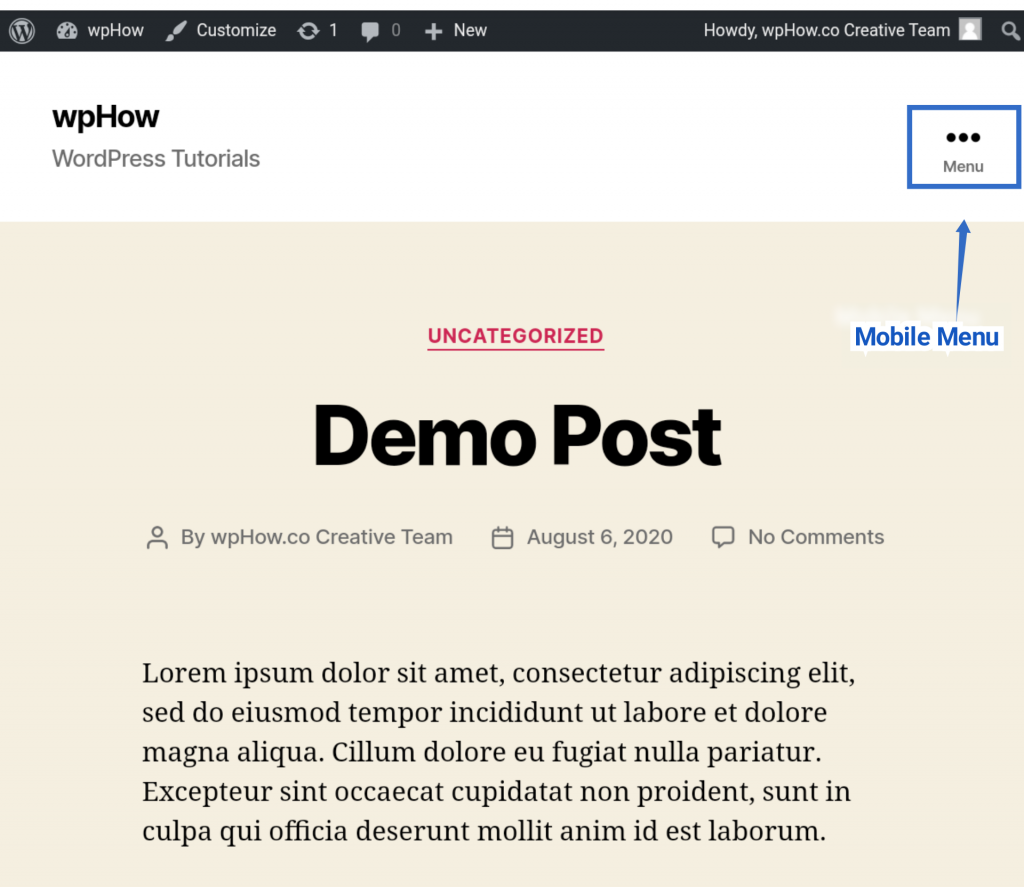
Desktop Expanded Menu:
Your menu will appear on the page as shown in the image
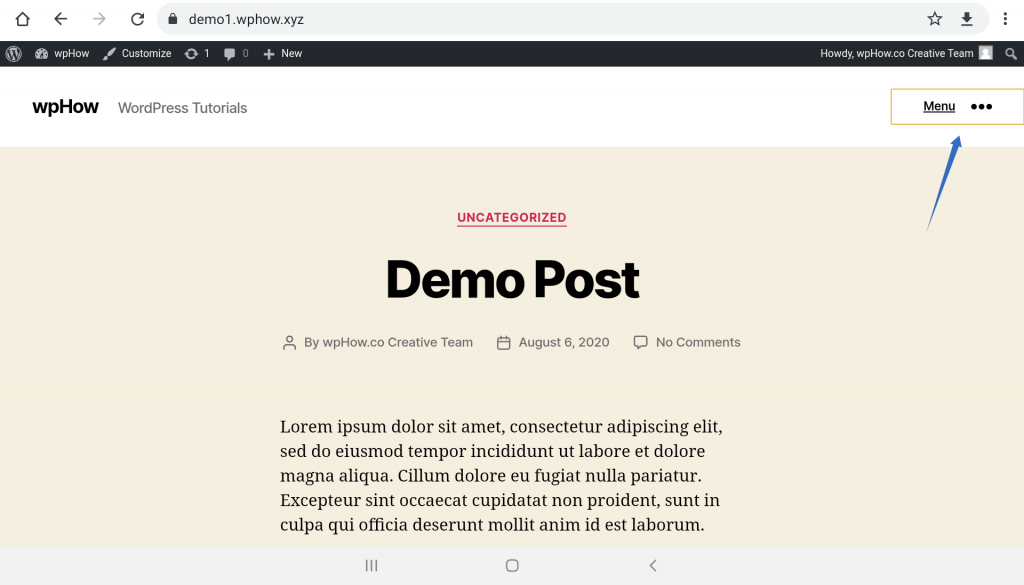
Mobile Menu:
The appearance of your menu will be mobile-friendly menu type.
Footer Menu:
The menu will appear in the footer section area.

Social Menu:
The menu will be displayed in the Social Media section area.

Step 7: Click On the Save menu Button
As you click on the Save Menu Button, You will get your menu activated on your site.
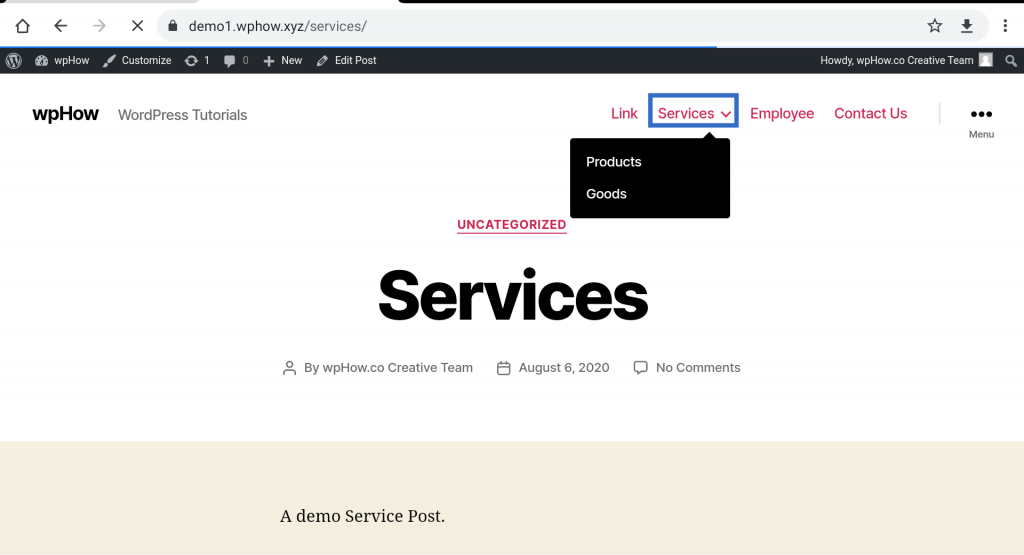
How To Create A Multi-Level Menu In WordPress?
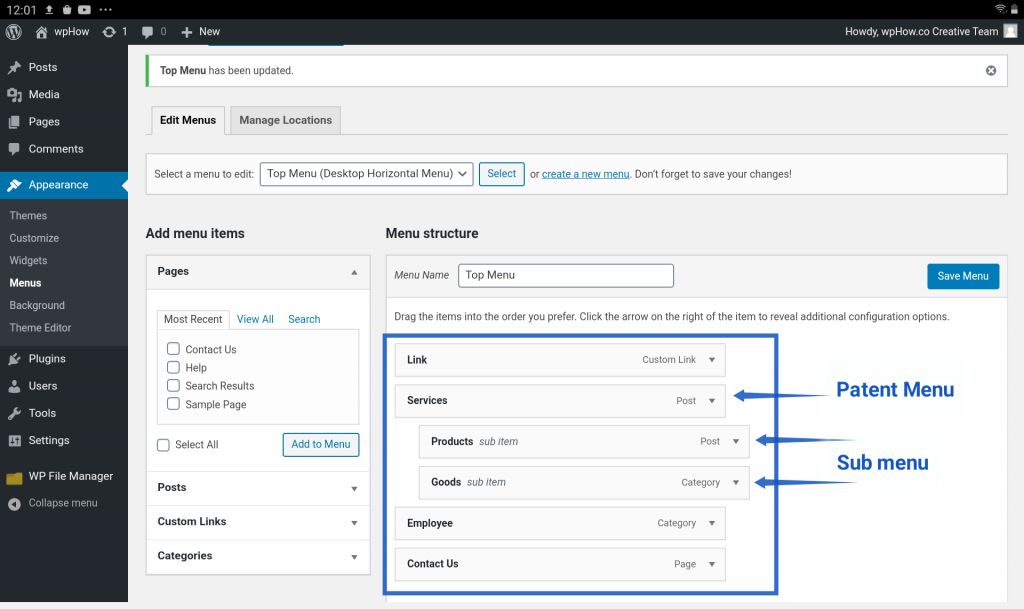
WordPress has a very simple drag-and-drop interface in the Menu editor to rearrange and create a multi-level menu system. In order to create a sub-level menu, just drag it slightly right from its position. It will appear as a sub-menu within its just up-level parent menu.
We are placing Products and Goods as a sub-level menu under the parent menu Services. See the Image.
Let’s see the appearance of a multi-level menu on our site.
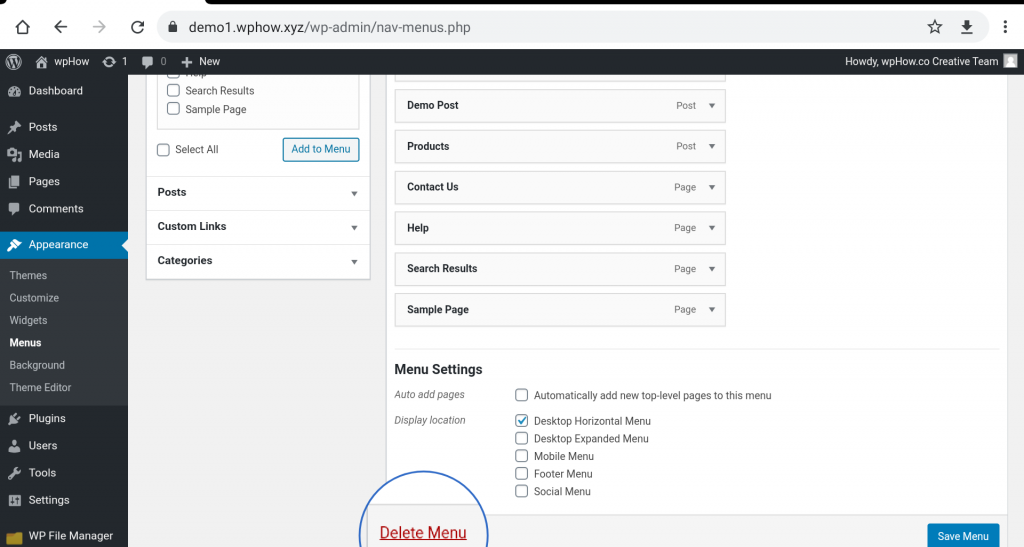
How To Delete A Menu In WordPress?
Menu Editor provides the Delete Menu option. Clicking on this option brings up a menu deletion confirmation dialog box. If you opt for the ‘Yes’ option then your menu will get deleted permanently otherwise no action will be taken if you choose ‘No’.
How To Add Menu In WordPress Using Customizer?
We can also create or edit menus using WordPress Customizer. The process of creating a menu using Customizer is almost the same as the process described in the To Add Menu In WordPress Using Menus Screen section of the article. Here are the steps.
Step 1: Click On Customize
Dashboard >> Appearance >> Customize
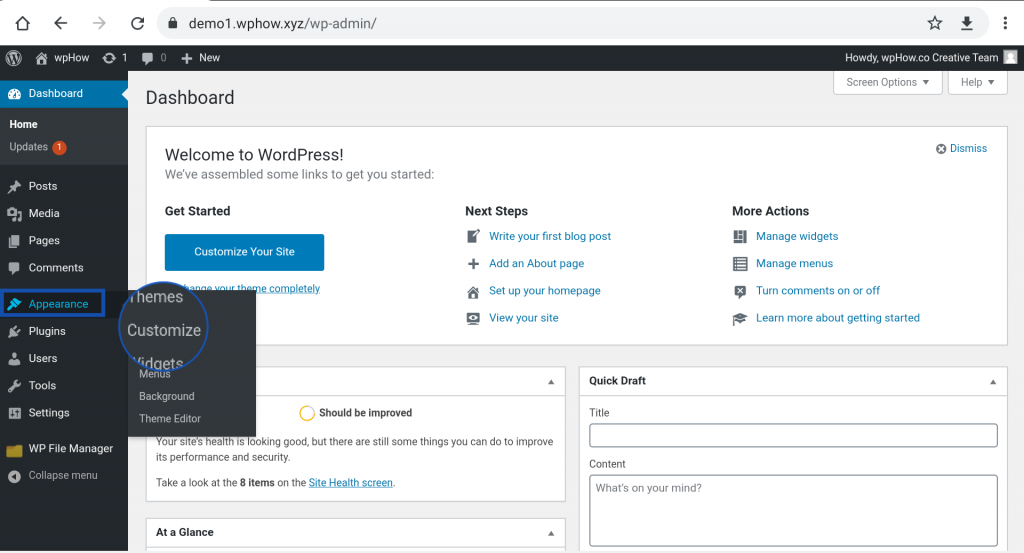
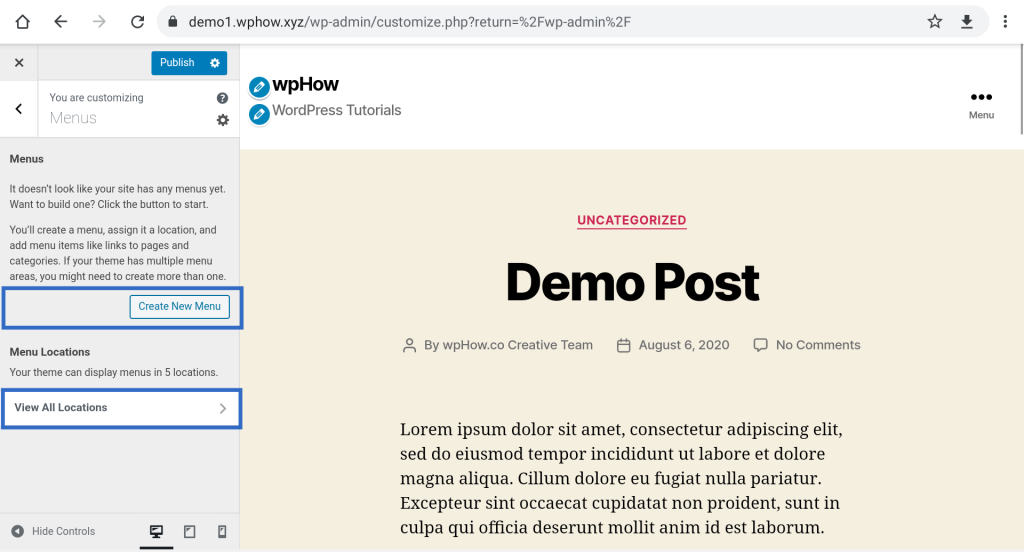
On clicking Customize, it brings up the Customizer screen with many options as shown in the image below.
Step 2: Click On the Menus Option
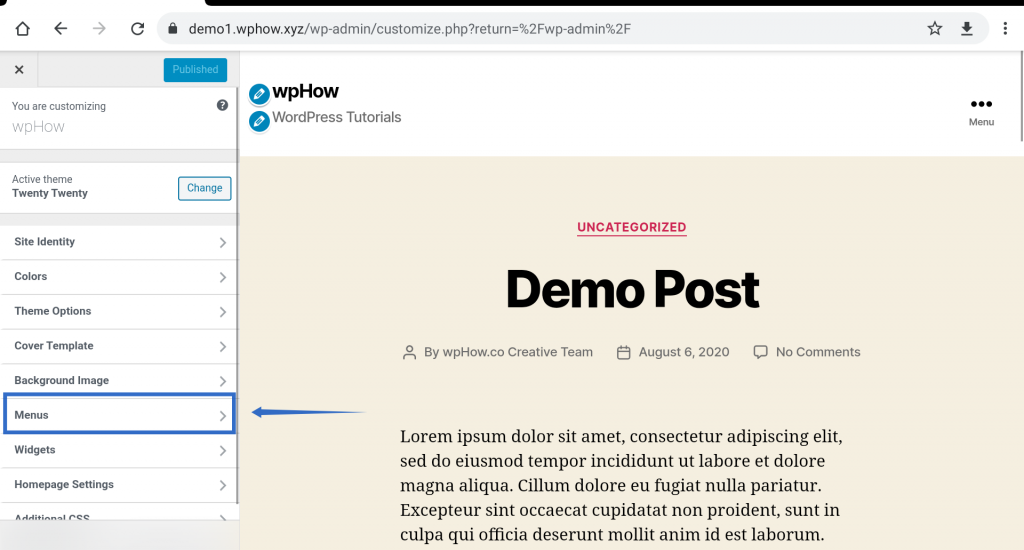
Step 3: Click On Create New Menu
Under the Menus Screen, there are two options one is Create New Menu and another option is View All Locations.
Here you can create a new menu using the Create New Menu option Button.
Step 4: Enter Menu Name And Select Location
The view ‘All Locations’ option is a theme-dependent option since we are using Twenty Twenty Theme. It provides five locations to display your menus. Let’s enter a menu name in Menu Name Box say My Menu and Choose Desktop Horizontal Menu as its location.
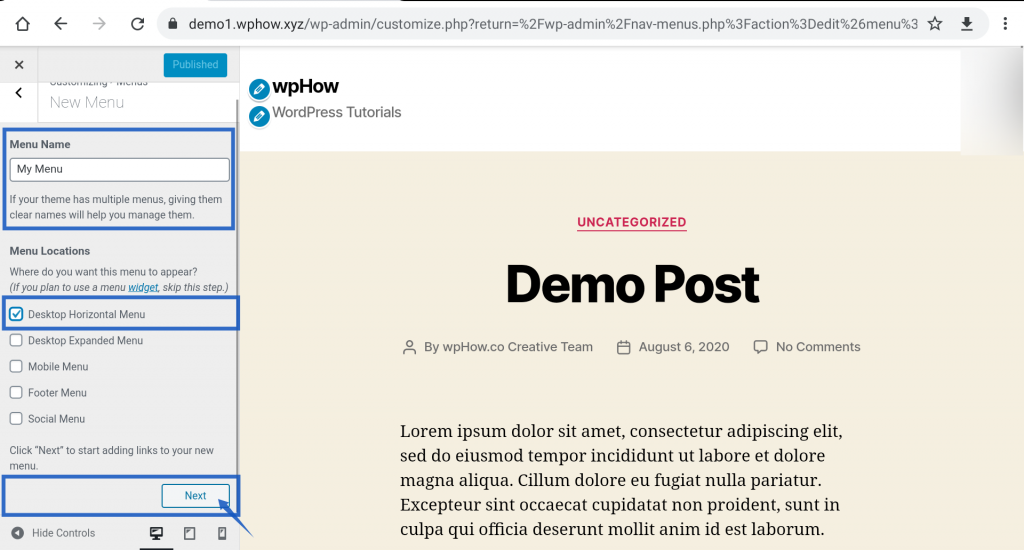
Step 5: Select Next
As you click on the Next Button, it will bring a new screen with Add Items option Button.
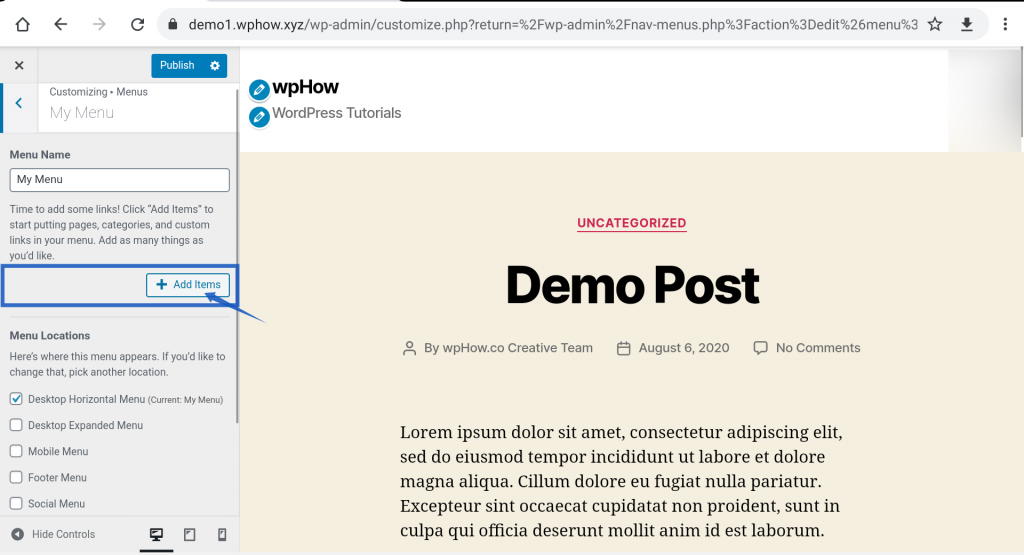
Step 6: Click On Add Items Button
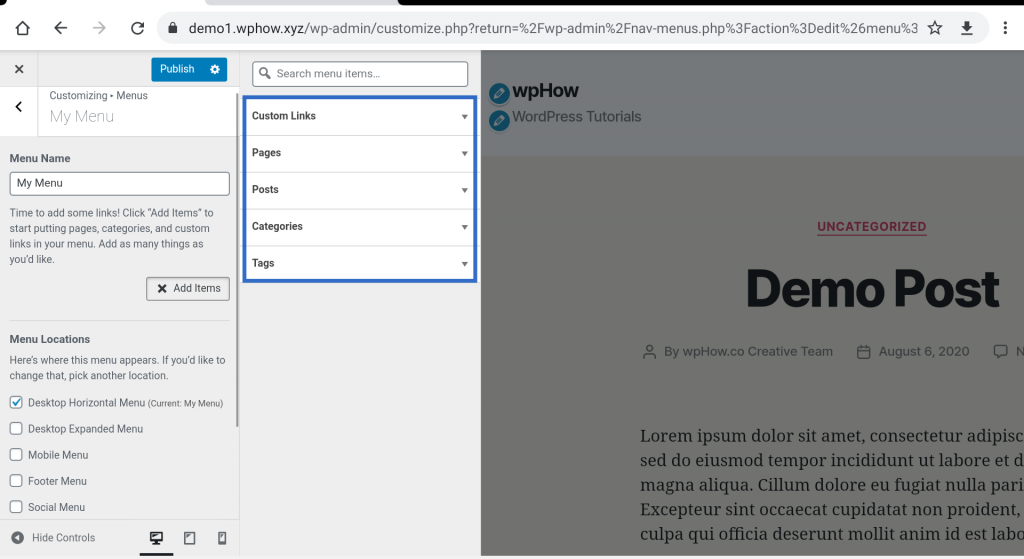
Adding items to the menu is similar to as described in Adding Items To Menu section of the article. Here we are adding two posts and one page as an example in our menu.
Step 7: Press Publish Button
After adding items Press Publish Button. Your menu will get activated and will appear in the top menu navigational area.
Let’s see what it looks like on our site.
Concluding Everything
This detailed guide on how to create a custom menu in WordPress will help you easily and simply create a custom menu in WordPress website without a single line of code. We suggest you to make it more dynamic by creating a multilevel custom menu like a drop-down menu or a mega menu. This helps users in navigation and easily find what they are looking for.
If you like reading this blog, also read How to Migrate WordPress From HTTP to HTTPS (Easy Beginner’s Guide), How to Create a WordPress Blog in 2024 (Beginner’s Guide) and Ultimate Guide for WordPress DNS Configuration (6 Easy Steps).


Stuck Somewhere?
Connect With JustHyre
Hire WordPress Engineers for custom jobs like Website Customization, SEO Optimization, Clearing a Hacked Website, Installation & Configuration & more.
Connnect with JustHyre
0 Comments