How To Add Classic Editor In WordPress? 6 Easy Steps.
This article is a step-by-step guide for How To Add a Classic Editor in WordPress. For new WordPress (after version 5.0) websites, Gutenberg editor is installed by default, however older editor (Classic Editor) can still be used, In fact, many prefer it over the default block-based Gutenberg editor. For a long Classic Editor is used for page editing, building, or cloning a page. As a matter of user preference and choice, the WordPress team introduced an official plugin known as Classic Editor Plugin, which is able to restore the Classic Editor in WordPress along with Gutenberg.
How To Add Classic Editor In WordPress? A Step By Step Guide For Beginners.
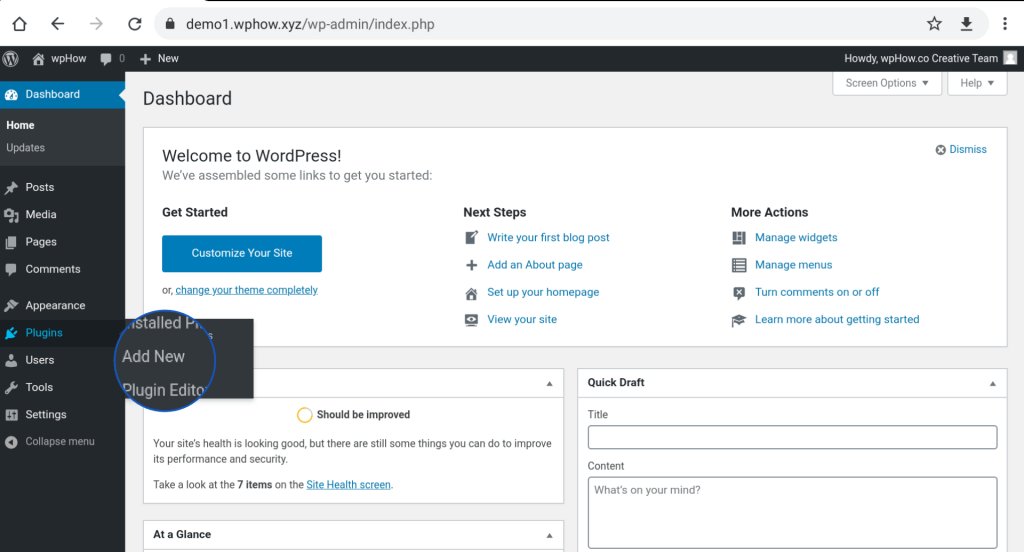
Step 1: Dashboard -> Plugins->Add New
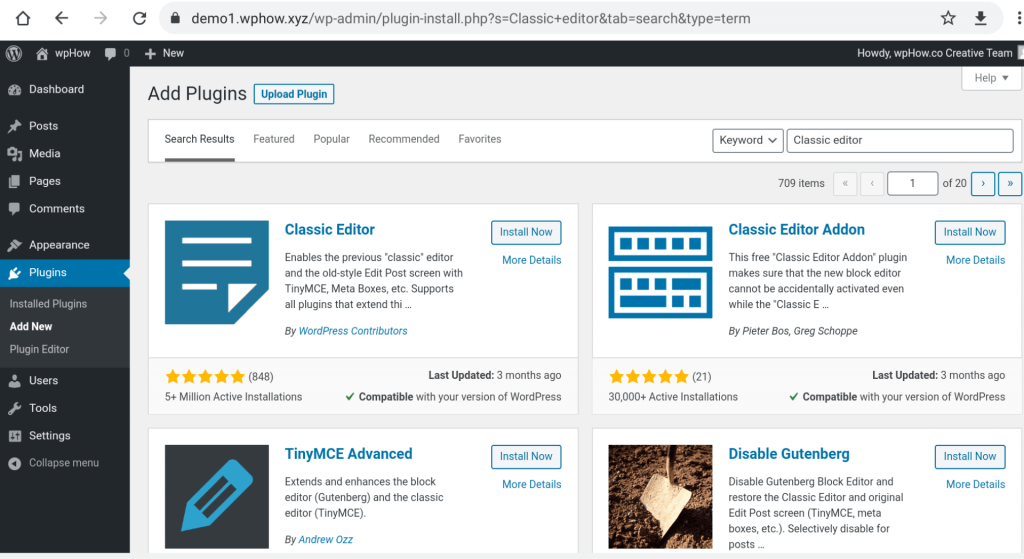
Step 2: Search Classic Editor Plugin
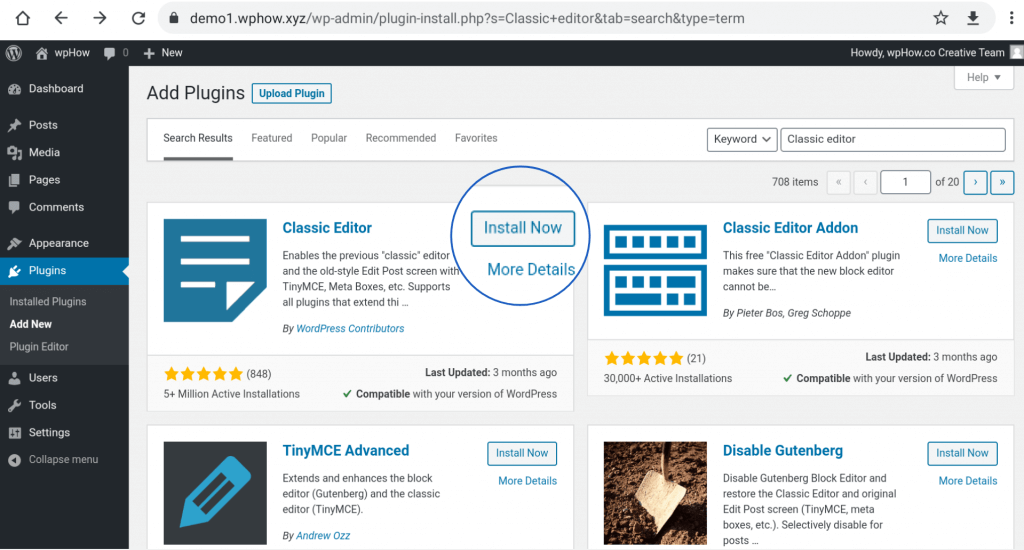
Step 3: Click on Install Now
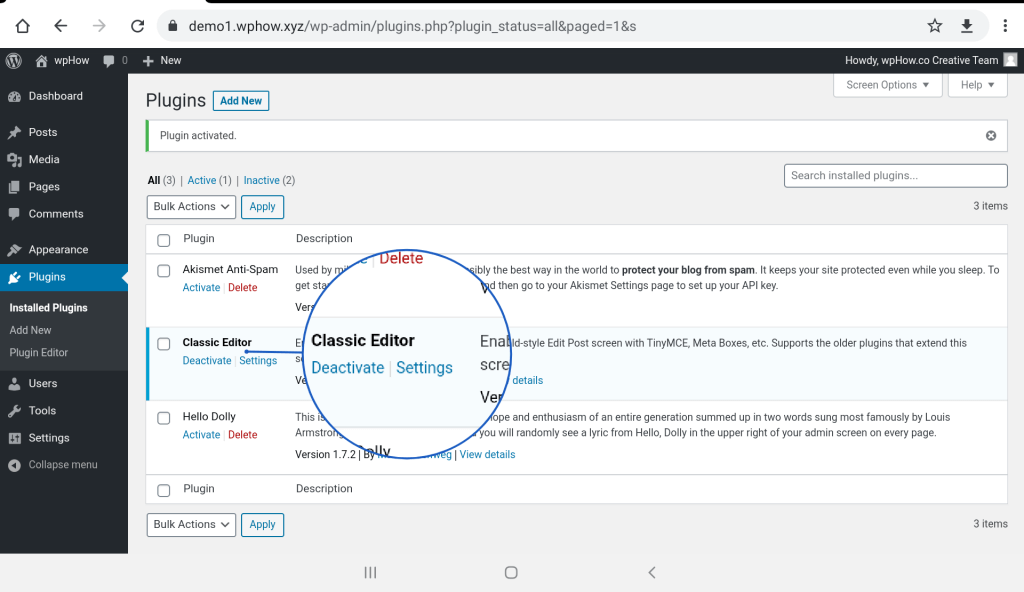
Step 4: Activate The Plugin
Dashboard >>Plugins>>Installed Plugins
Step 5: Click on Plugin Settings
On Activation, a setting link will appear [See the Image]
Step 6: Plugin Writing Setting Windows.
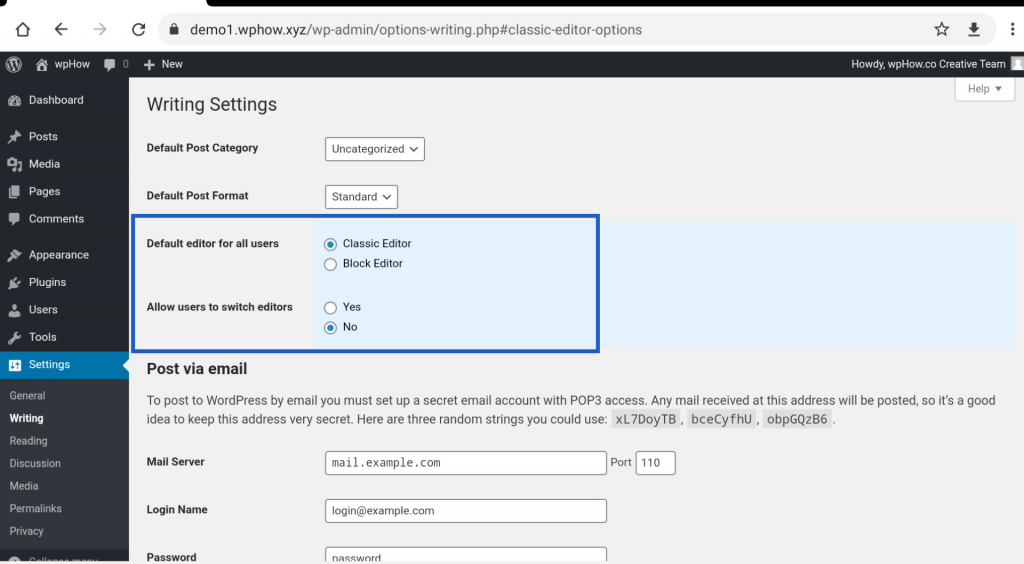
- Default Post Category: When A new post is created it goes under Default Post Category, set here.
- Default Post Format: For a New post set the format like chat, Image, Gallery, Standard, etc.
- The default editor for all users: Set the default editor for post-editing.
- Allows the user to switch editors: if Set Yes then both the editors will be available to edit the post [See the Image].
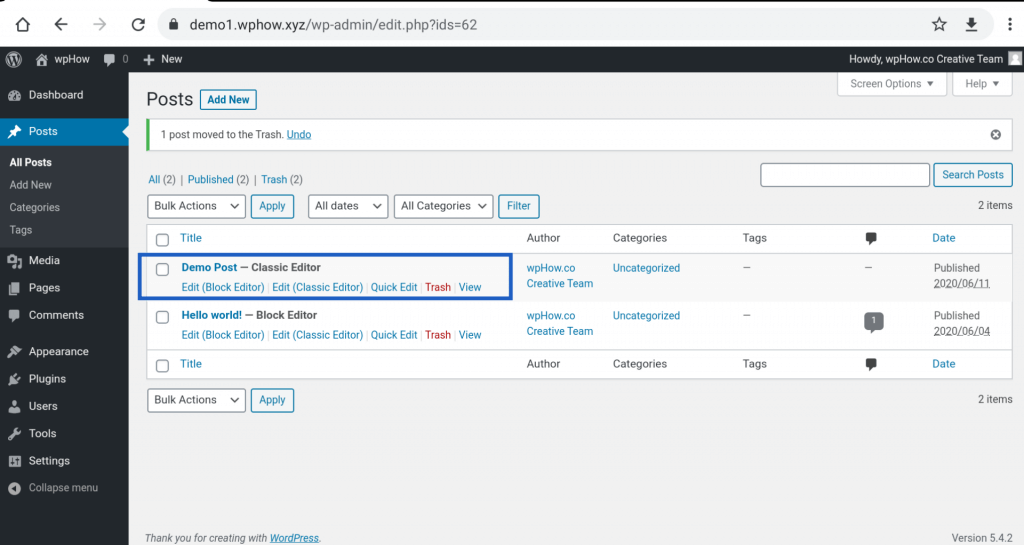
If set No then the default Editor will be available.
That’s how can you install the Classic Editor Plugin in WordPress.
Stuck Somewhere?
Connect With JustHyre
Hire WordPress Engineers for custom jobs like Website Customization, SEO Optimization, Clearing a Hacked Website, Installation & Configuration & more.
Connnect with JustHyre


0 Comments