Create a Password Protected WordPress Website – 5 min Guide Simplified
Creating A Password-Protected WordPress Site
There are various methods through which you can make your WordPress account password-protected. It can be achieved via settings, plugins, and a lot more internal settings. You can easily make your WordPress page a password-protected page.
Creating a Password-Protected Post on a WordPress Site
- Step One: Let us start with logging into your WordPress account and heading over toward your dashboard.
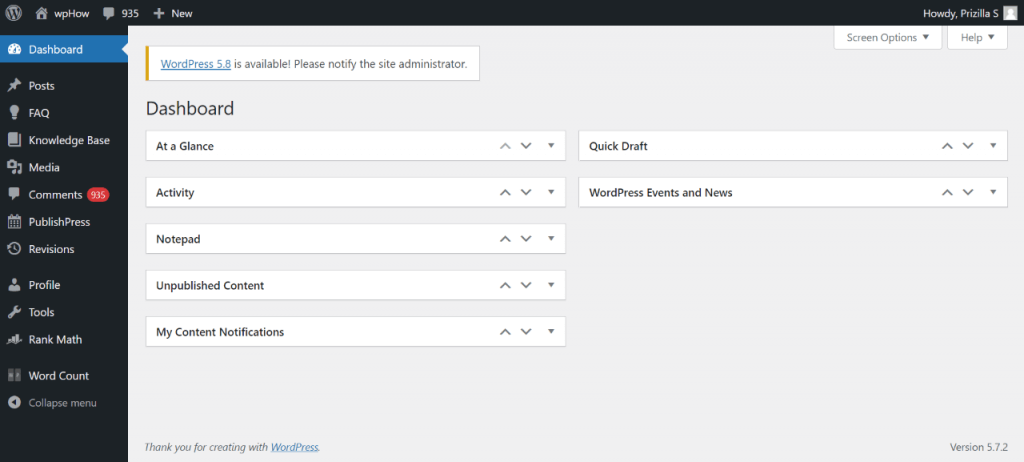
- Step Two: Go to posts and click on all posts.
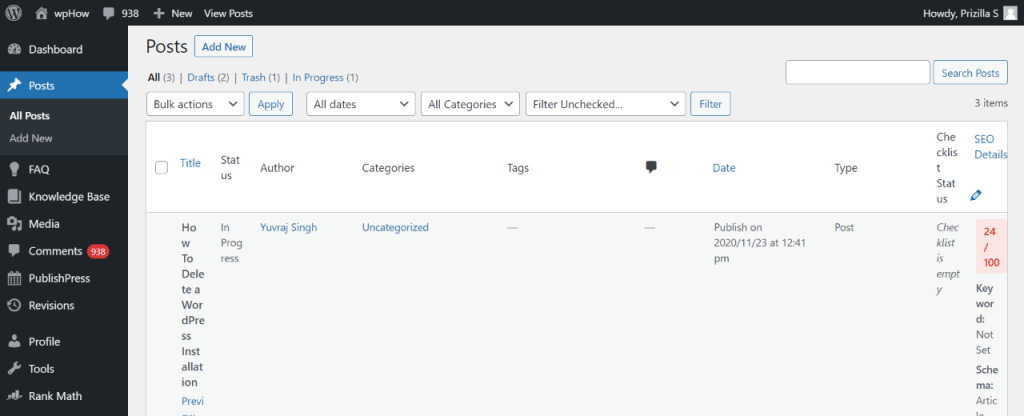
- Step Three: Click on Edit on a specific post or page.
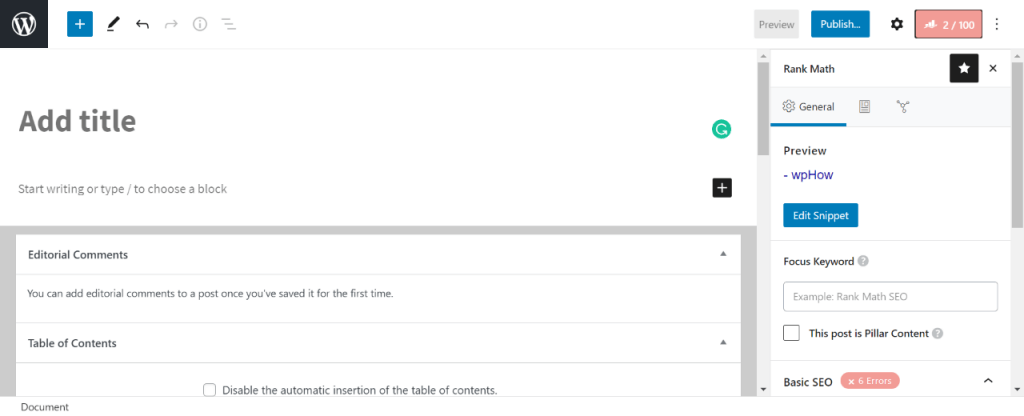
- Step Four: Using the published manual, change the post visibility to password protected and ensure that the settings are saved. Nor did the last kill create a password.
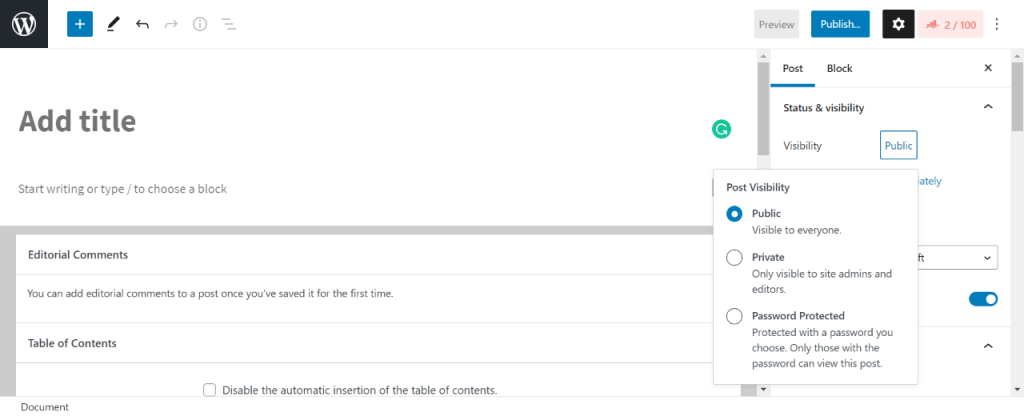
- Step Five: Enter a password.
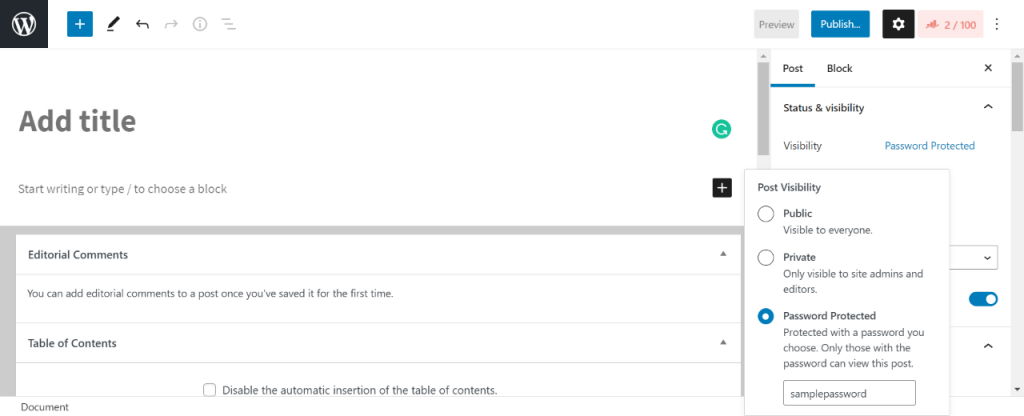
- Step Six: Publish your newly protected page onto your WordPress site.
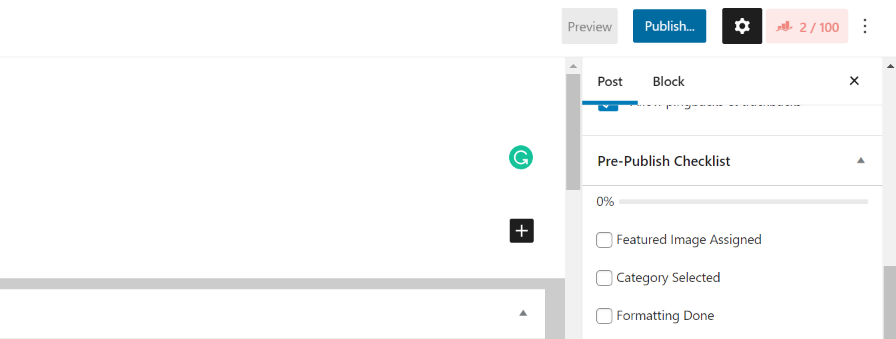
With these steps, your WordPress page has become password protected from now how do I create a password-protected web page? To
Make your WordPress Page Password-Protected
Follow the steps below:
- Step One: Click on pages on the left-hand side of the editor in the dashboard.
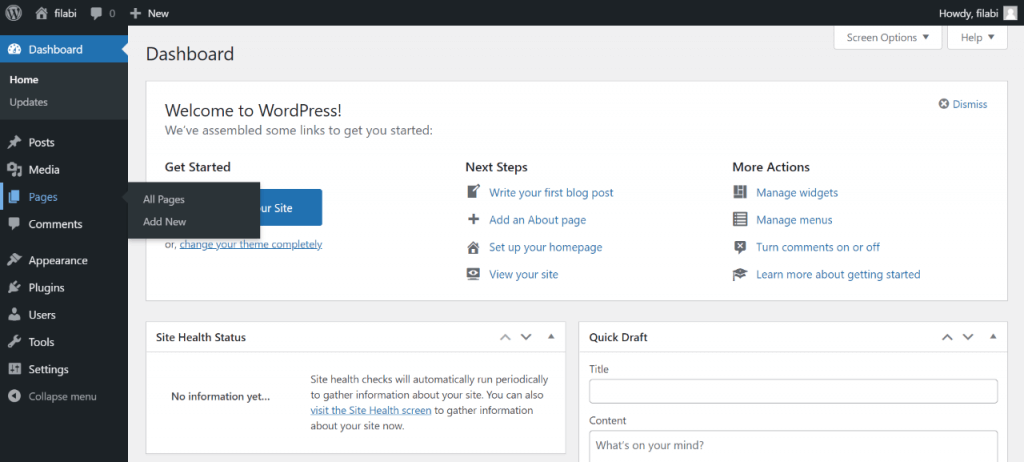
- Step two: Click on a relevant page where you want to change the settings.
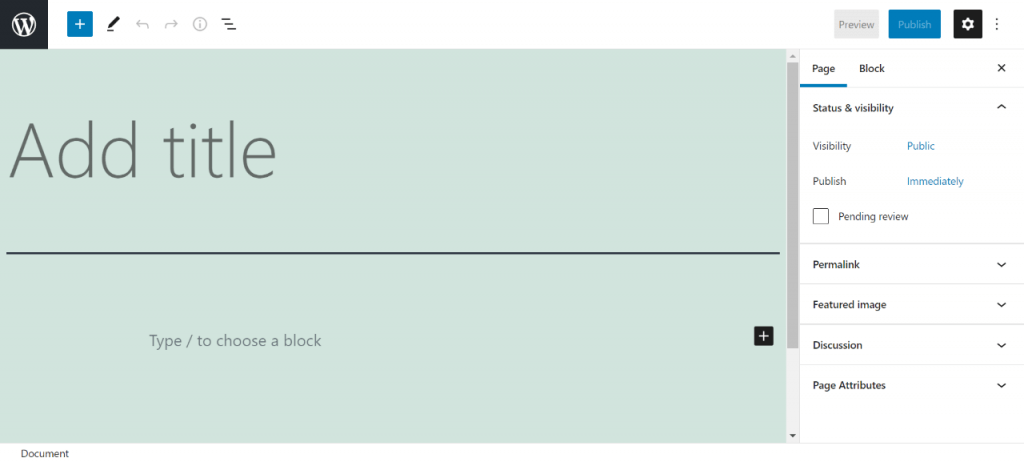
- Step three: Click on the Show More icon or the three-dotted icon symbol.
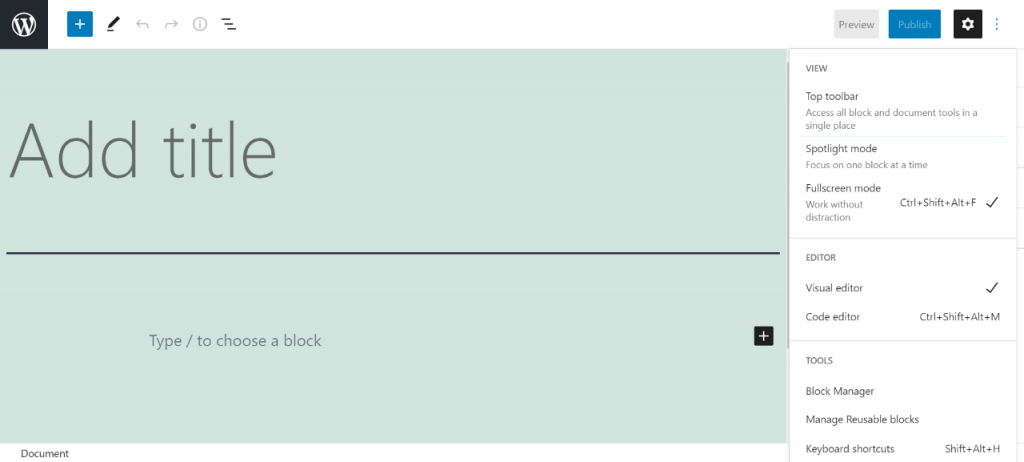
- Step four: Click on the password holders option.
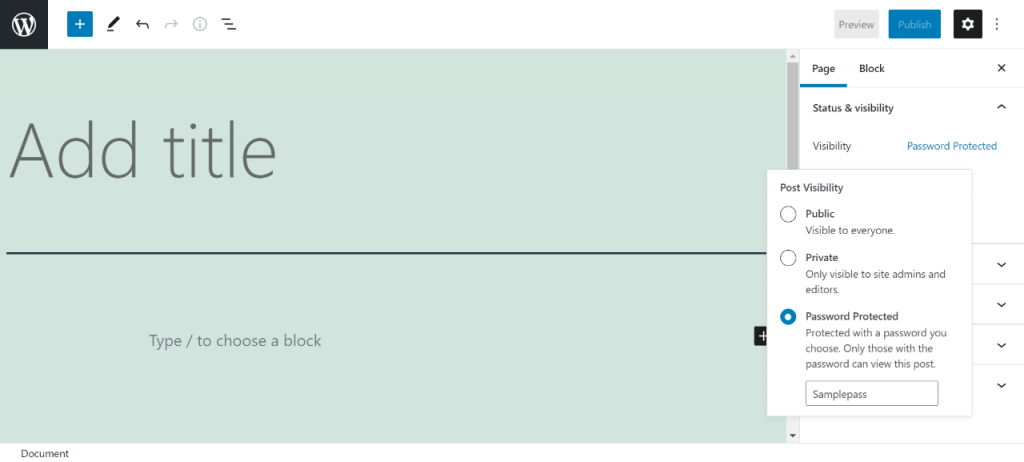
- Step five: Enter the passcode. And see now that you have passed what this page has become password-protected, and you can access the password anytime you aren’t alone.
How to customize your site in advance to make your pages and your site password-protected
Now, to make sure that this is possible, you’ll have to have basic CSS knowledge. Even if not, you can easily do these steps with the below code snippets and the embed samples that will completely guide you towards this process even without the knowledge of CSS How do I change a password-protected page in WordPress and customize my password-protected page? in WordPress, the steps Click on Settings and head over to the Permissions tab.
For this, you will have to head over to your pages in the dashboard and check for the post that is password protected. This means the post that you’ve already made a password-protected page. Now go to the websites page for that particular post. The last password is double-tap on the page and click on the inspecting option.
Now, search for a class in the CSS formatted file that says something about password protection from here we have ep_password_protected_form as a class and we are to format this particular class for our customization. Enter the code snippet given below onto the class and click on Enter to see the changes made on the Password Providence area.
Now, save the settings Do the child theme and head over to theme customizer just like how we saw mattered and customized to be In simple steps and has enhanced the Where the password protection system looks In the website, you can also customize themes here. For that, once you’ve entered theme customizer how to auto additional CSS and paste the same code that is similar to the image now that you have completely customized your set website along with password protection shield, being customized
How do I bypass password-protected WordPress posts and sites?
There are two types in which you can bypass your WordPress site and make it password protected. One way is bypassing the whole site and making it white, List specific user roles defined. To learn more about password protection add-ons and methods in WordPress click on the link below:
Some Plugins that enhance best password maintenance on your sites:
For more WordPress queries and activity guides in WordPress do check out this link:
- WordPress Marketing
- WordPress Configuration
To know more about the plugins and their functions or various types of optimizing the plugins, do check this:
Stuck Somewhere?
Connect With JustHyre
Hire WordPress Engineers for custom jobs like Website Customization, SEO Optimization, Clearing a Hacked Website, Installation & Configuration & more.
Connnect with JustHyre


0 Comments