How to Add Custom Fonts in WordPress? (3 Easy Ways)
Want to add custom fonts in WordPress?
Fonts are a critical part of any website as they are one of the most important aspects of how we interact with and perceive the website’s content. They have the power to set the tone, convey the message, and capture your audience’s attention. But what if the default fonts in WordPress just don’t align with your website’s design?
Adding font-face to your WordPress site is simple and takes a few steps to achieve. We will be looking at two different types of adding the custom font of your choice to the site. This includes:
- Adding the custom font to your website:
- via file manager
- via theme editor
- via style.css file
- Using the font in the website
Several websites contribute font development and different styles of fonts which you can simply download and opt for your personal website. Some example websites include Google Font, Font Squirrel, Adobe Fonts, and a lot more. Before starting to download the font you need, you will have to check whether the font belongs to a particular category.
Method 1: Add Custom Fonts in WordPress Using @font-face
Different font types basically compromise TTF or (true type fonts), OTF (or open type fonts), WOOF (or web open font format), WOOF 2 (or web open font format) 2.0, (EOT or embedded open type font). Each has specific functions and capabilities if running in different engines and browsers. Most every font comes under one of these categories.
When we choose modern websites that comprise the modern elements that we are currently working with, opting for TTF or OTF would be a good choice. Why because it’s easily available and affordable sometimes if you have to pay for the font package. You can always give your first preference to WOOF. But WOOF fonts are not widely available.
The basic tasks include:
- Find the front face you like and the font phase name.
- Installing zip file in wolf or TTF or OTF.
- Adding the custom font to your website.
- via file manager
- via theme editor
- via style.css file
Method 2: Add Custom Fonts in WordPress Without a Plugin
Finding the font face you like and the font face name
When you have chosen a font and you don’t know its name, here is something that you can use. You can actually right-click on the page and see the source code of the webpage in which you can actually find the details about the font that is being in use. If you find difficulty with finding the font, you can choose ‘What Font’. This will actually let you know which font is used on that particular website. Now that you know the name of the font, you are ready to search for the font and install it in your system to meet further needs.
Click on Font Squirrel’s link below to explore more! https://www.fontsquirrel.com/

Installing the zip file in WOFF (else TTP or OTF )
Now, all you need to do is find this particular font in WOOF TTF, or OTF format in font websites such as Google Fonts, Font Squirrel, Adobe Fonts, and many similar websites. Once you have downloaded the zip file of the particular font, there are two different steps through which you can update or upload this particular font to your website.
Adding the custom font to your website via the file manager
The first step is to upload fonts via file manager and the second kind of process is uploading the file through the theme editor in WordPress. With the first one, go to the c panel host and log in with the login credentials. From the dashboard,
- Go to the file manager,
- Navigate to wp-content >> themes >> upload the zip file and extract it.
- Note the file path.
Adding the custom font to your website via the theme editor
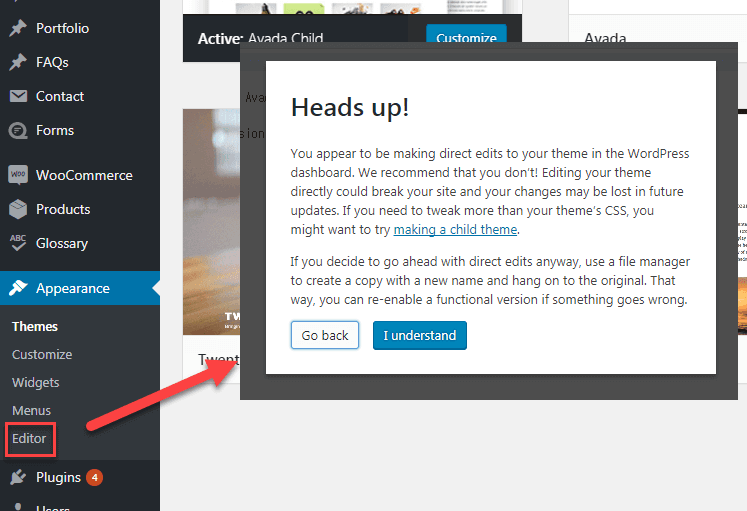
The second way of adding the font to WordPress is by editing the theme editor.
Head over to your WordPress dashboard, and navigate to Appearance >> Themes>> Theme Editor. Once the console is open, scroll down to find the font section in which you will have to add the following code snippet for WordPress to understand the font that you have used its location, and so on.
 Adding via theme editor - @fontface {
     Font-family: “AvenieNext”, sans-serif;
     Src: local(‘http:// location)
     Font- weight: normal;
 }
(Or)
 @font-face {
 font-family: Custom Font;
 src: url(public_html/cpanel-username/wp-content/themes/your-theme/fonts/CustomFont-Regular.ttf);
 font-weight: normal;
 }
Through this, you’ve activated the custom font inside your website and you can use it anytime when you want.
Adding the custom font to your website via the style.css file
Adding the fonts directly from the file manager to the styles.css file is another option through which you can add the font to your webpage. To do this, click on code edit and add the code snippet that we added previously in the theme editor.
 @font-face {
 font-family: Custom Font;
 src: url(public_html/cpanel-username/wp-content/themes/your-theme/fonts/CustomFont-Regular.ttf);
 font-weight: normal;
 }
How to change the font in WordPress
Using Custom font on the website
Now we’re going to look through how we can add the custom font that we have downloaded, uploaded, and activated right now to the website.
This is a very simple step. You can simply add any global element, such as a paragraph, a heading, or a button, and go to the font section to customize with the Custom font. Else add this particular code snippet to the text portion of the global element.
 body {
 font-family: "CustomFont";
 }
This is how you can add your desired custom font into the WordPress website to the web pages that you create and different elements that you insert in the webpage without adding a plugin to the site.
Method 3: Add Custom Fonts in WordPress Using a Plugin
You can also add custom fonts in WordPress using various plugins.
Some of the best plugins include wp-Typography, Simple Drop Cap, Typekit Fonts for WordPress, Google Font Manager, TinyMCE Advanced, Simple Pull Quote, Zeno Font Resize, and Easy Google Fonts.
Add Google fonts to WordPress Customizer
Speaking about Google fonts specifically, Google fonts navigate your font, downloaded directly to the WordPress site, which makes it customized and optimized with WordPress without doing much with the steps. For more with Google fonts, click the link below. https://fonts.google.com/
Points to Ponder:
- Keep a check on whether the theme update will make you lose your downloaded font.
- Always check whether you have given the right location in which the font is placed under src first when an error occurs.
Taking Everything Into Account,
By incorporating custom fonts, you can personalize your online presence and give your audience a memorable experience.
As you continue to experiment with different typefaces, remember that fonts are more than just words on a screen; they’re a reflection of your brand, your style, and your message. So customize it according to your branding.
If you like reading this blog about how to add custom fonts in WordPress, also consider reading, How to Create a Survey in WordPress? (6 Easy Steps) and How to Setup WordPress Multisite Domain Mapping? (4 Easy Steps)


Stuck Somewhere?
Connect With JustHyre
Hire WordPress Engineers for custom jobs like Website Customization, SEO Optimization, Clearing a Hacked Website, Installation & Configuration & more.
Connnect with JustHyre
0 Comments