How to Recover Your Old Sitemap After a Website Redesign
A website redesign touches almost everything: layout, URLs, navigation, and page structure. In most cases, the sitemap gets broken, overwritten, or left behind entirely. If your organic traffic dropped after a redesign, a missing or broken sitemap is likely part of the problem. Search engines depend on your sitemap to know what pages exist and where to find them, so even a short gap in sitemap accuracy can quietly set back your indexing.
This guide walks you through exactly how to recover your old sitemap and get your site back in front of search engines.
Why Your Sitemap Breaks During a Redesign
An XML sitemap is a file that tells search engines which pages exist on your site and how to find them. When you redesign a site, URLs often change. Pages get removed, merged, or moved to different paths. In many cases, the sitemap file itself gets overwritten during migration, or the plugin that generated it gets deactivated and never turned back on.
The result is a sitemap that either points to pages that no longer exist or has no sitemap at all. Either way, search engines are left without a reliable map of your content, and your ability to recover your old sitemap data becomes harder the longer you wait.
What Happens If You Don’t Fix It
Search engines like Google rely on your sitemap to crawl and index your pages efficiently. Without an accurate sitemap, pages that exist on your redesigned site may not get crawled. Pages that no longer exist stay in Google’s index longer than they should. Over time, this leads to indexing gaps, keyword ranking drops, and reduced organic traffic.
The longer the problem goes unfixed, the more ground you lose. Sites can recover, but it takes time, and the delay is avoidable.
How to Recover Your Sitemap After a Website Redesign (Step by Step)
Step 1: Audit What You Had Before the Redesign
Before you can recover your old sitemap, you need to know what it contained. There are a few ways to find the sitemap of a website as it existed before the redesign. Check the Wayback Machine (web.archive.org) and search for your domain. If your sitemap was publicly accessible at a standard path like /sitemap.xml or /sitemap_index.xml, there is a good chance a version of it is archived there. This is one of the most reliable ways to recover your old sitemap when no local backup exists.
Google Search Console is another place to look, if you had it set up before the redesign. Navigate to the Sitemaps report under Index. If a sitemap was previously submitted, it will be listed there, along with its last fetch date and the number of URLs it contained. This gives you a baseline for how many pages your site had indexed before the changes.
If you have access to your old hosting environment, check the root directory of your WordPress installation for any saved sitemap files.
Step 2: Check Your Current Sitemap Status
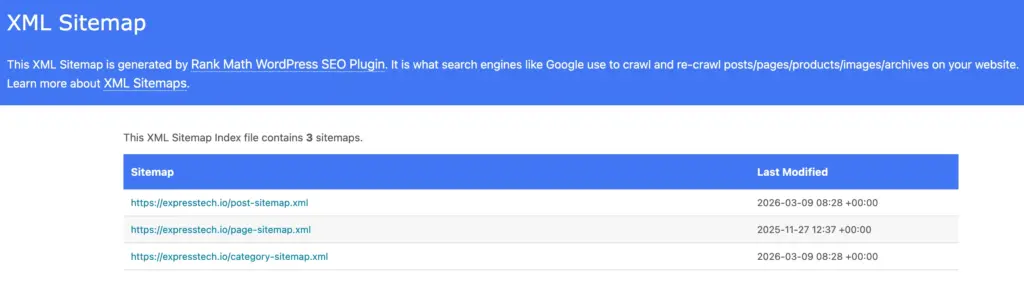
Type your domain followed by /sitemap.xml directly into your browser. If a sitemap loads, it is still active. A 404 error means your sitemap is missing and you need to recover your old sitemap or rebuild from scratch. If it loads but contains old or broken URLs, it needs to be rebuilt.
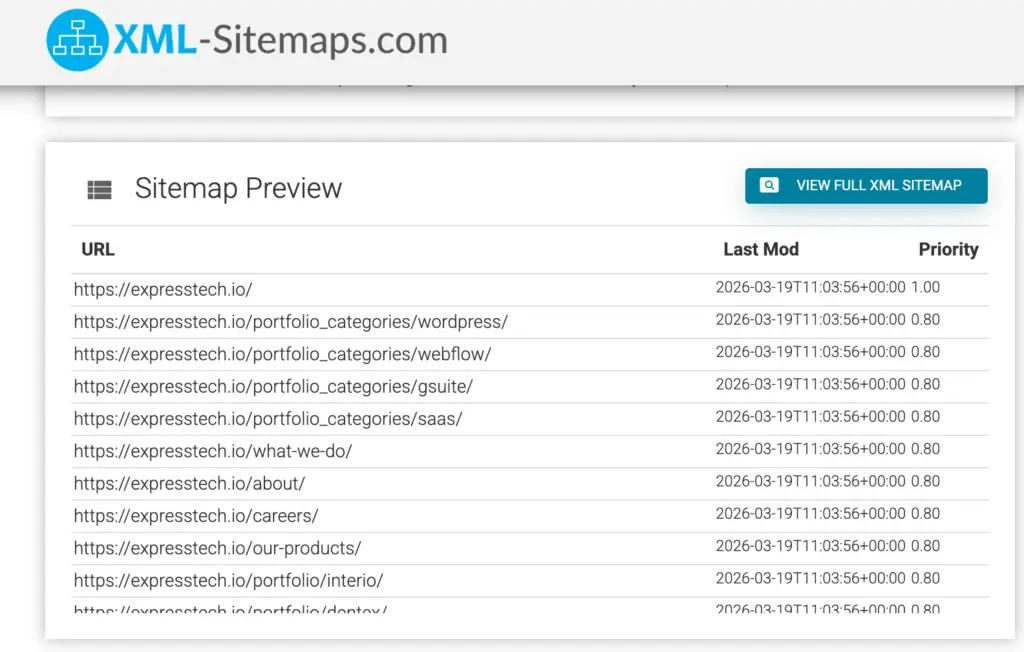
To see the sitemap of a website in more detail, paste the sitemap URL into Google Search Console under Index > Sitemaps, or run it through a free online sitemap validator to check for errors. If you want to know how I can find the sitemap of a website that belongs to a competitor or reference site, the same direct URL method applies. If you want to know how I can see the sitemap of a website inside Google Search Console, the Sitemaps report under Index shows every submitted URL along with its fetch status.
Step 3: Identify What’s Missing
Compare your current sitemap against the archived version you found in Step 1. Look for URLs that existed before the redesign but are no longer in your current sitemap. These are pages that either got dropped during the website migration or moved to new URLs without being tracked.
Make a list of these missing URLs. Some may need to be recreated as new pages. Others may have moved to a new path, in which case a redirect is the right fix.
Step 4: Set Up 301 Redirects for Changed URLs
Every old URL that gets traffic or links needs a 301 redirect pointing to its new location. A 301 redirect tells both browsers and search engines that a page has permanently moved and passes ranking signals from the old URL to the new one, which protects your SEO equity.
On WordPress, you can set up 301 redirects using plugins like Redirection or Yoast SEO Premium. Match each old URL from your audit to its new equivalent and add the redirect. This prevents crawl errors and preserves the authority your pages have built up over time.
Step 5: Regenerate or Restore Your Sitemap
If your WordPress SEO plugin is active, regenerating your sitemap takes only a few clicks. Yoast SEO, Rank Math, and All in One SEO all generate XML sitemaps automatically. Check your plugin settings to confirm the sitemap feature is enabled, then save your settings to trigger a regeneration. This is the fastest way to recover your old sitemap structure when your plugin was simply misconfigured or disabled during the redesign.
Once the sitemap is live, verify that it includes all the pages you want indexed and none that you do not, such as admin pages, tag archives, or thank-you pages. Most SEO plugins let you exclude specific post types or pages from the sitemap directly in the settings.
Step 6: Resubmit Your Sitemap to Google Search Console
With a fresh sitemap in place, open Google Search Console and go to the Sitemaps report. If outdated sitemap URLs are still listed, select them and use the “Remove sitemap” option to clear them out. This is how to remove old sitemap entries from Google Search Console, and the same process applies whether you are asking how to remove old sitemaps generally or how to remove a sitemap from Google Search Console for a specific URL.
The option to remove old sitemaps is available directly in the report for each submitted entry, and it covers how to remove sitemaps from Google Search Console at any point after submission. After you remove old sitemaps and clear outdated entries, submit your new sitemap URL. Google will begin fetching it, and the submission status will update in the report within a day or two.
Step 7: Monitor Crawl Errors and Indexing
Submitting your sitemap is not the last step. Open the Coverage report in Google Search Console and look for errors, warnings, and excluded pages. Errors indicate pages Google tried to crawl but could not access. Warnings often point to pages that are indexed but have minor issues. Excluded pages may signal that Google is finding pages through your sitemap but choosing not to index them.
Check this report weekly for the first month after your relaunch. It will show you whether the steps you took to recover your old sitemap are working, whether your redirects are functioning as expected, and whether any pages that should be indexed are getting missed.
Best Practices to Avoid Sitemap Loss in Future Redesigns
Sitemap problems after a redesign are almost always preventable. A few habits before the work begins will save you the audit, the redirects, and the recovery process entirely.
- Save a local copy of your current sitemap file before the redesign starts. Keeping a back sitemap log out of your live environment means you always have a reference for previously indexed URLs and can spot what changed after migration.
- Document your URL structure in a spreadsheet, with old URLs mapped to new ones, before making any changes.
- If you are switching SEO plugins, confirm the new plugin has sitemap generation enabled before deactivating the old one.
- Include sitemap continuity in your redesign brief if you are working with a developer or agency.
- Test your sitemap on a staging environment before going live to confirm no pages are missing, and exclusions are set correctly.
Before You Move On
The steps above cover everything from finding what you had before to rebuilding and resubmitting what you need now. The sooner you act to recover your old sitemap, the sooner Google gets an accurate picture of your site, and your search visibility starts to return. Use the monitoring steps consistently in the weeks after your relaunch, and you will catch most indexing issues before they compound into a longer-term traffic problem.
If your WordPress site needs more than plugin settings and manual fixes, JustHyre offers custom WordPress development for sites with complex requirements. The team handles everything from plugin builds and theme customization to platform migrations and WooCommerce integrations. If your redesign exposed deeper technical gaps that a standard SEO plugin cannot solve, JustHyre is worth a look.


Stuck Somewhere?
Connect With JustHyre
Hire WordPress Engineers for custom jobs like Website Customization, SEO Optimization, Clearing a Hacked Website, Installation & Configuration & more.
Connnect with JustHyre