How to Add a Sale Notification Banner on WordPress? (6 Easy Steps)
Ever wondered how to catch the eye of your website visitors and guide them toward your latest deals or announcements? Place a simple but attractive sale notification banner across the top or bottom of your site. This bar shines a light on updates, promotions, and product launches, amongst others. We investigate the what, why, and how of adding this clever component to your WordPress website in this manual.
Here in this blog, we will show you a simple and super-fast way to display a sale notification banner on WordPress.
What Is a Sale Notification Banner?
A sale notification banner is also referred to as a website notification bar. It is a narrow strip that appears either in the bottom or top portion of the website to alert visitors about a certain update or announcement. Such ads are normally for a running sale, the next campaign, new product characteristics, and so on.
The banners will work fine for displaying generic info, huge sales, forthcoming shows, salutations, and new product releases among other issues.
These are some of the popular user experience design elements that help visitors to be engaged and sent to particular actions or offerings.
You can add a sale notification banner on your WordPress site through plugins such as NotificationX, Easy Notification Bar, OptinMonster, or Thrive Leads or write it by yourself via HTML, CSS, and Javascript.
Through these ways, a sale notification banner can be added to your WordPress website.
Want to know how you can add ChatGPT to WordPress? Read, How to Integrate ChatGPT Into the WordPress Website? (4 Easy Steps).
Why Add a Sale Banner in WordPress?
1. Promote Sales and Special Offers
An informational sale notification banner can be used to notify visitors about ongoing promotions, discounts, or special offers. As a result, it attracts their attention and entices them to check out your products or services.
2. Increase Conversions
Sale notification banners create a feeling of urgency and could increase conversion rates. Limited and time-bound sales motivate customers because they understand it is going away.
3. Highlight Important Information
Highlight new product launches, limited-time offers, and other crucial announcements using the banner. This will make sure that the visitors find out about such updates even before they step on your pages and sites.
4. Improve User Engagement
Banners as one of the interactive elements on your website are good for increasing visitors’ attraction and involvement. Potential customers need to interact with informative and aesthetically pleasing banners before accessing your website.
5. Enhance User Experience
Sale notification banners, if well designed, give crucial information that enhances a good user experience. Transparency coupled with clear and timely promotion information is a value addition appreciated by users.
6. Encourage Repeat Visits
Visitors will visit your website often if they realize that there are always sales and promotions offered on it. This can encourage customers’ loyalty.
7. Customization and Branding
The sale notification banners can take colors that suit your website’s designs and brand. Brand consistency promotes positive customer confidence in your product.
How to Add a Sale Banner in WordPress?
Here, we are using the NotificationX plugin which is a WordPress sale banner plugin. To add a sales notification bar to your WordPress website using the NotificationX plugin, follow these detailed steps:
Step 1: Install and Activate NotificationX Plugin
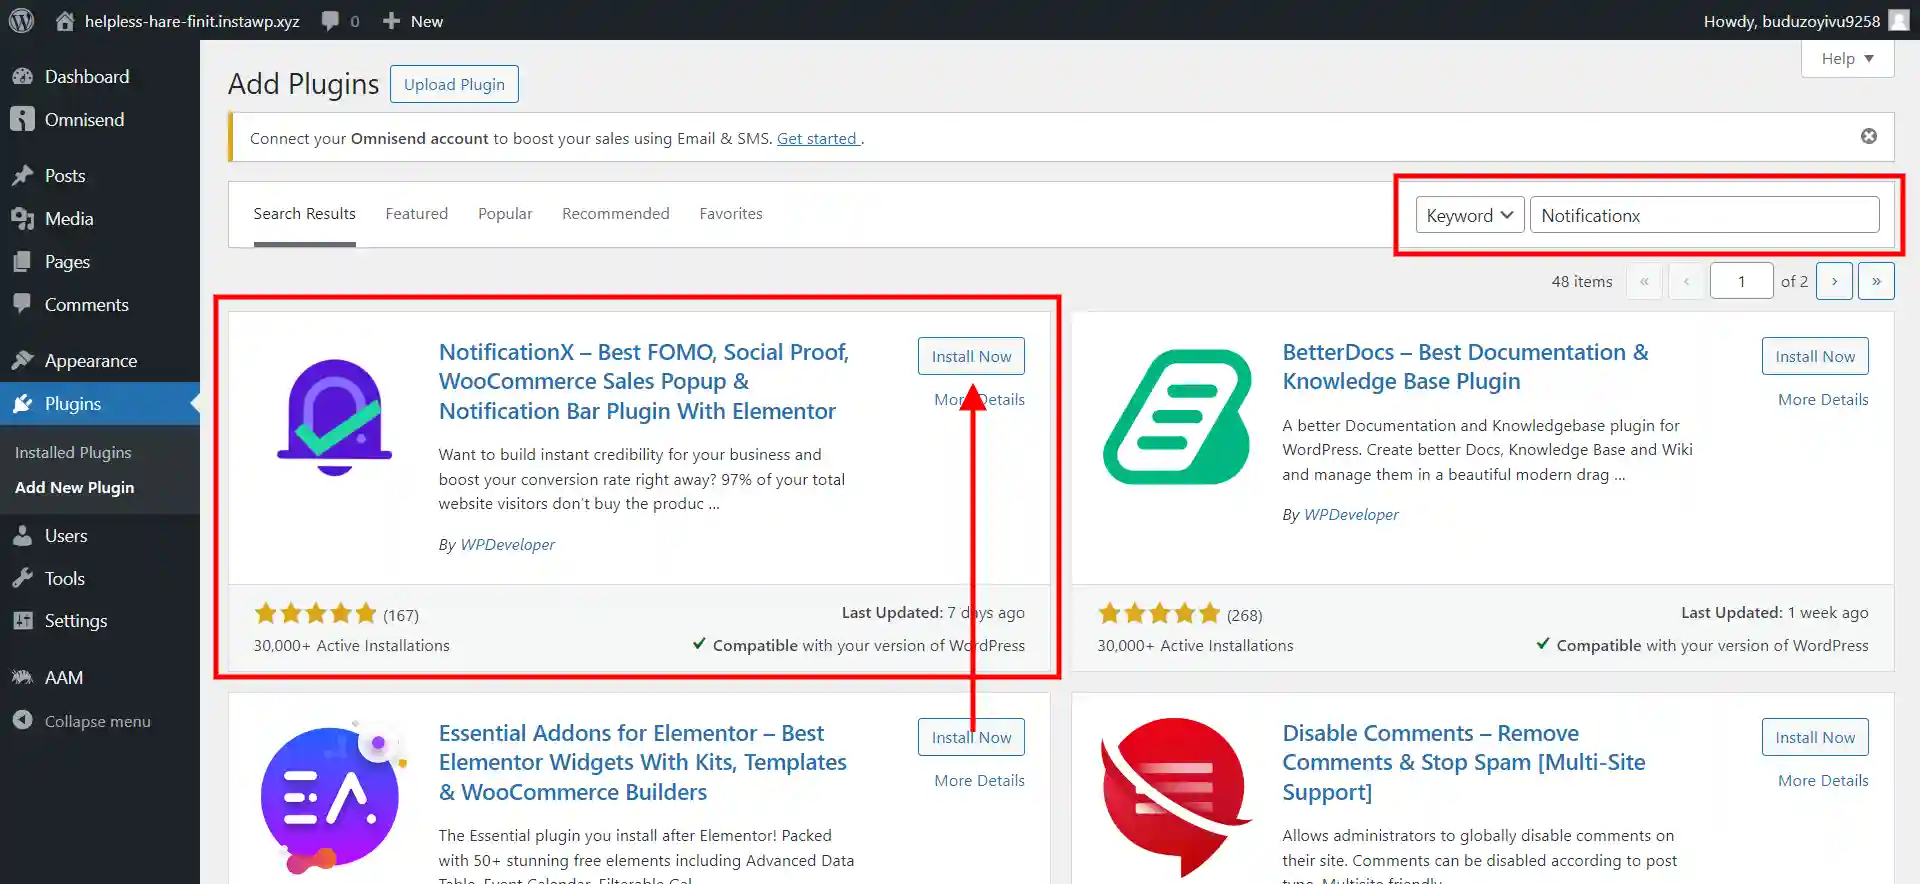
- Start by going to the WordPress admin panel.
- Select “Plugins” > “Add New.”
- Go to your WordPress search bar and input “Notificationx”. Install and activate the WordPress banner plugin by WPDeveloper.
Step 2: Create a New Notification Bar
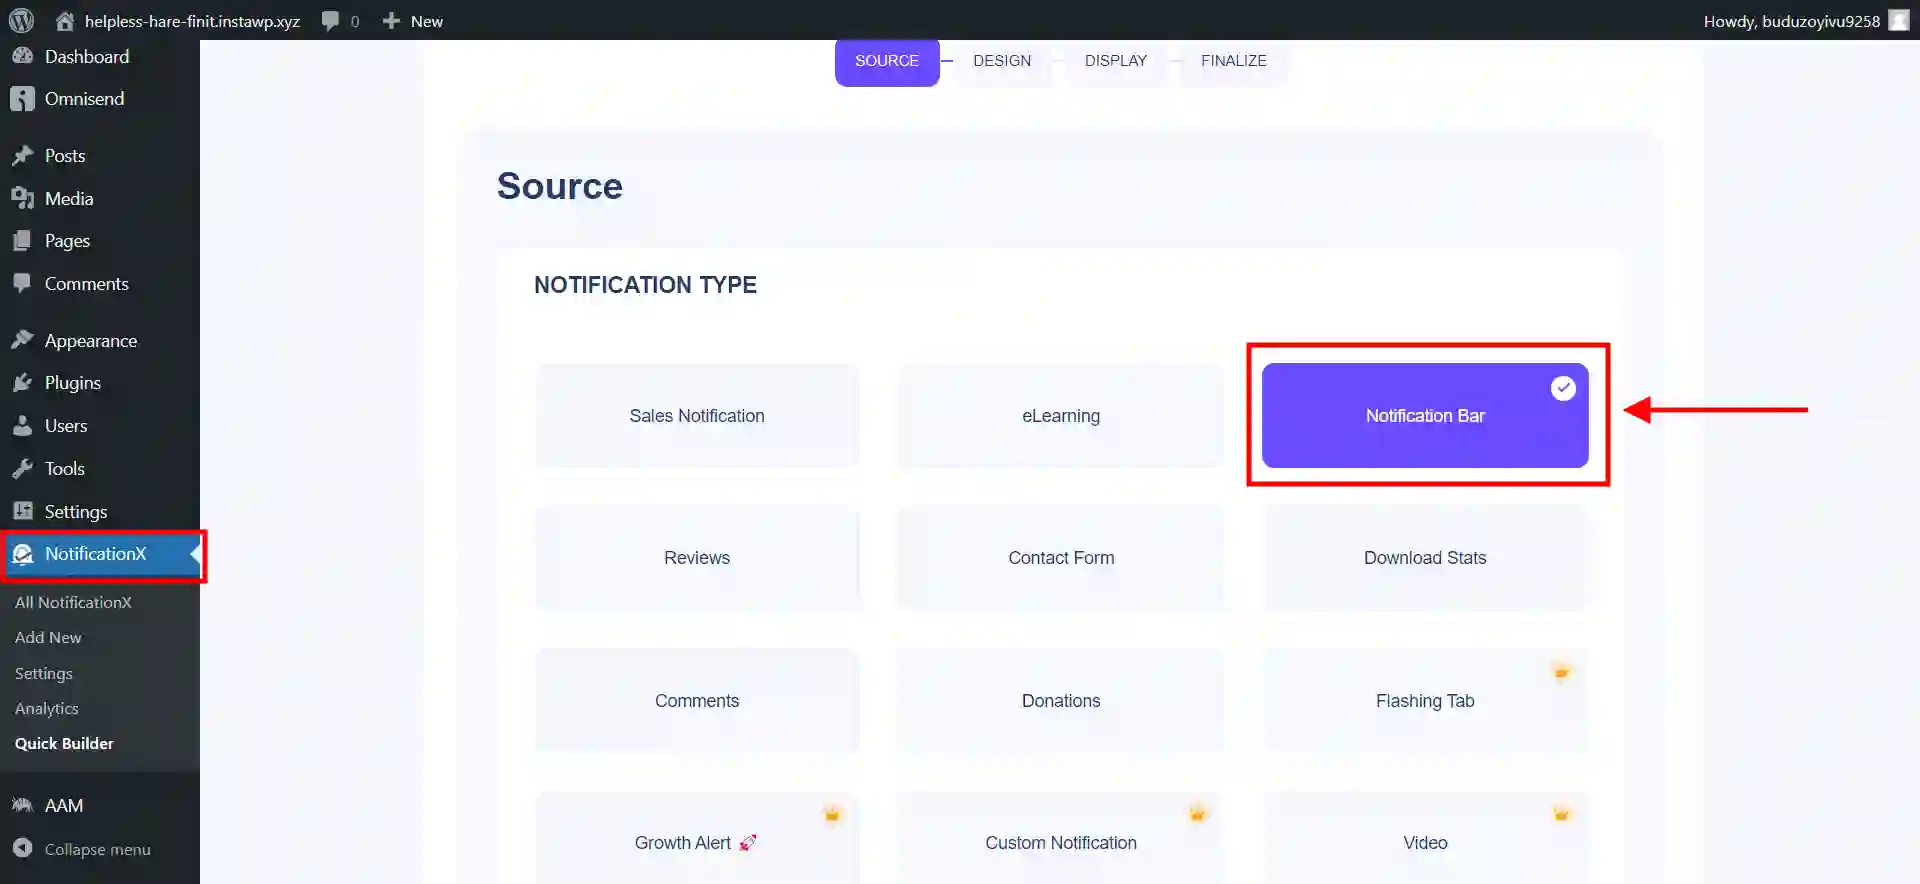
- Once you have activated the NotificationX plugin, go to “NotificationX” on your WordPress dashboard.
- To create a new notification bar, click “Add New”.
Step 3: Customize the Notification Bar
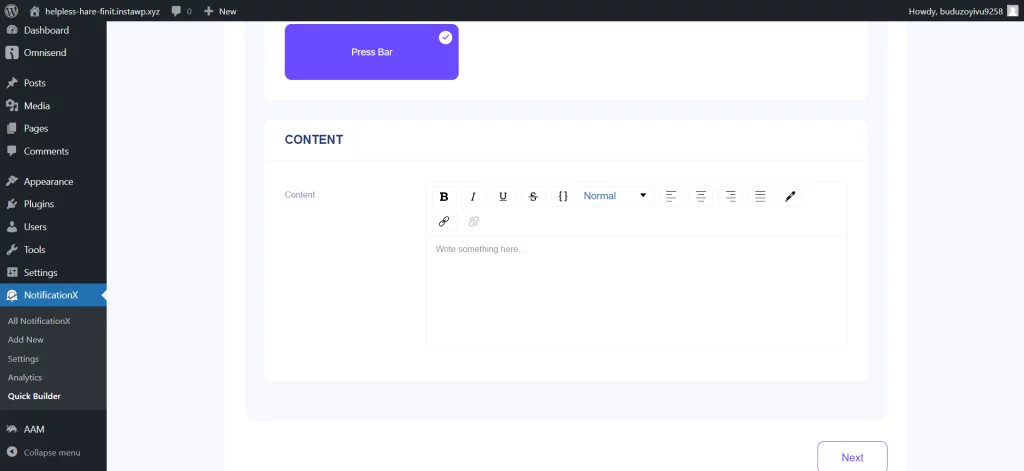
- Fill in the details, including the title and content of your sales notification bar.
- Select which of these options you want the notification bar to appear in, top or bottom.
- Change the appearance and behavior settings concerning your choice of colors, animation, and duration of visibilities.
Step 4: Add Sales Information
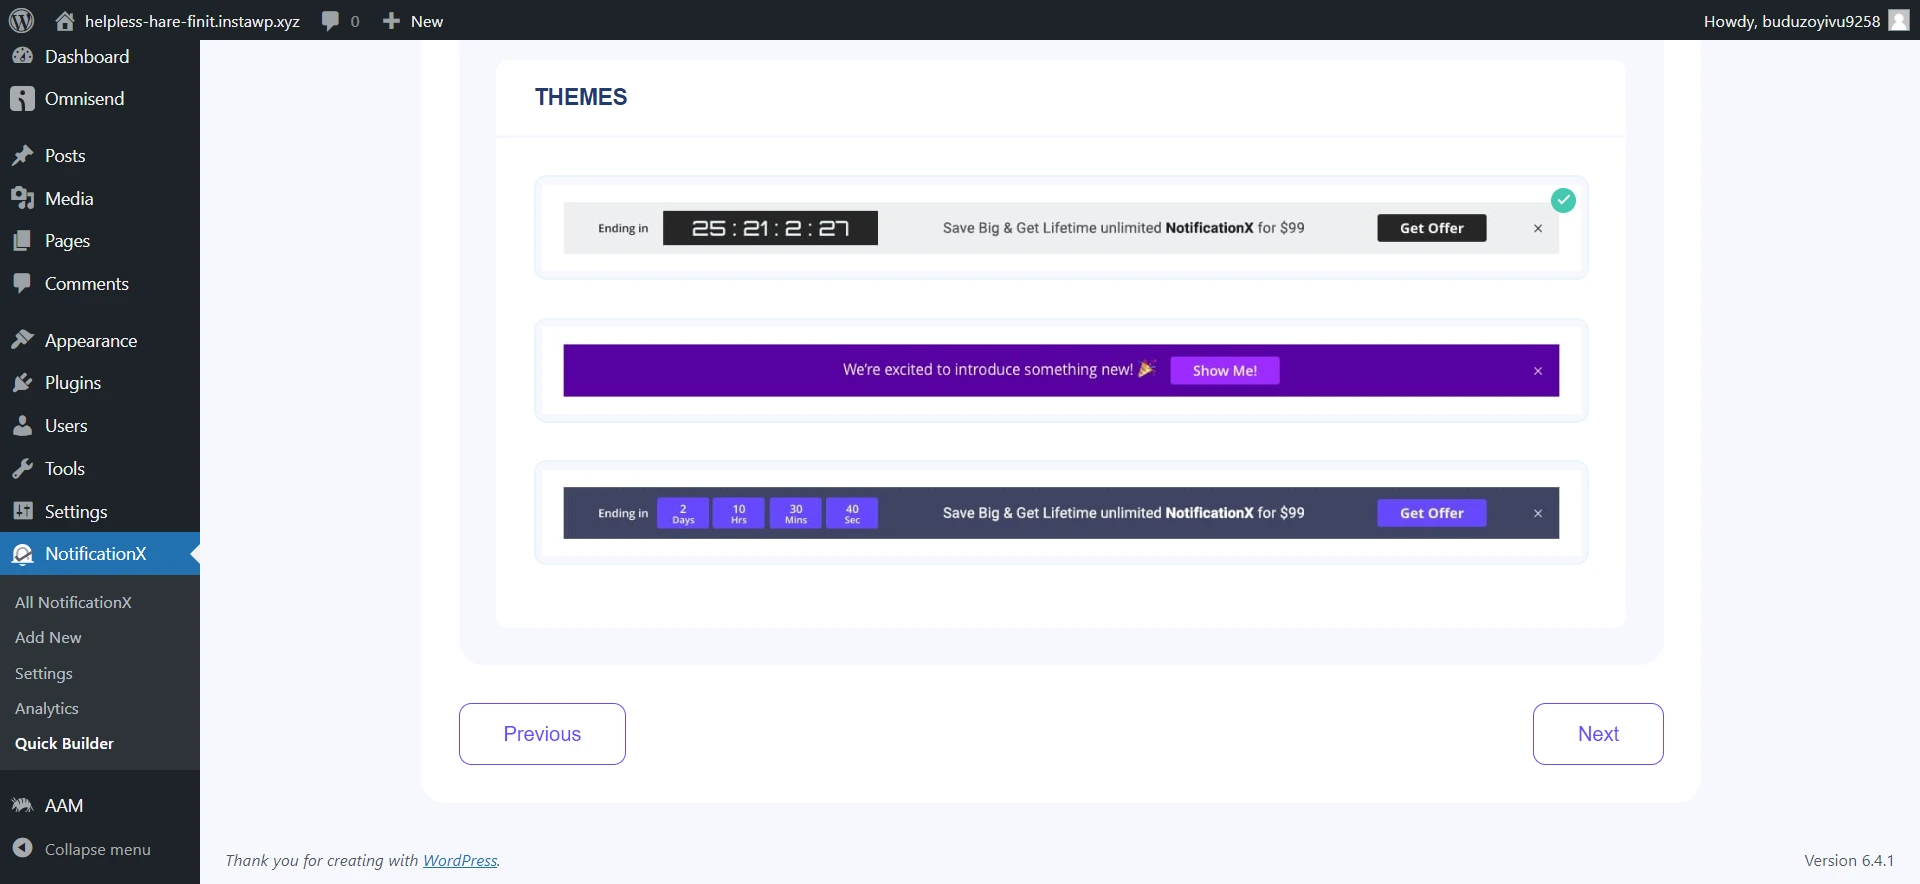
The subject field of the notification bar should also contain all necessary details relating to your sale like discounts, promotions within a short period, etc.
Step 5: Set Display Rules
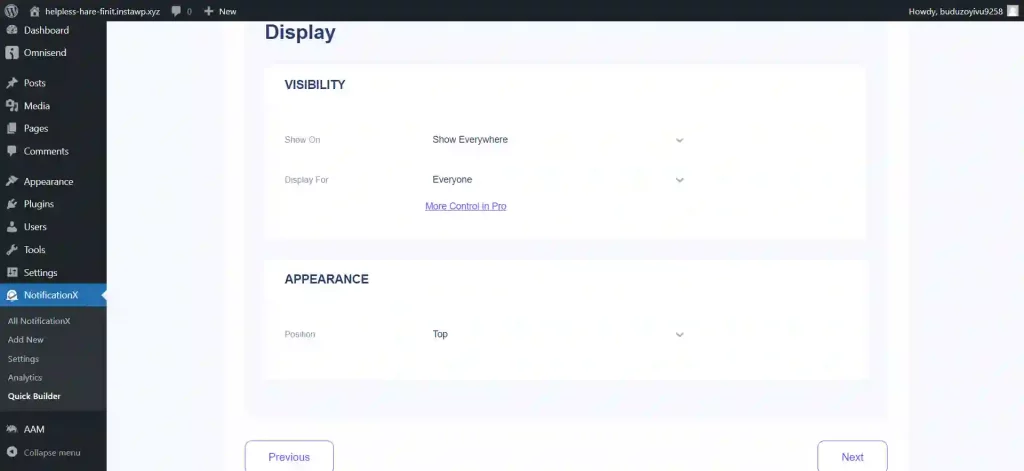
Set up options for display rules that indicate where and how frequently the sales notification bar should be shown on your site. A notification bar will appear every time you visit a certain page, post, or take a particular action on site.
Step 6: Save and Publish
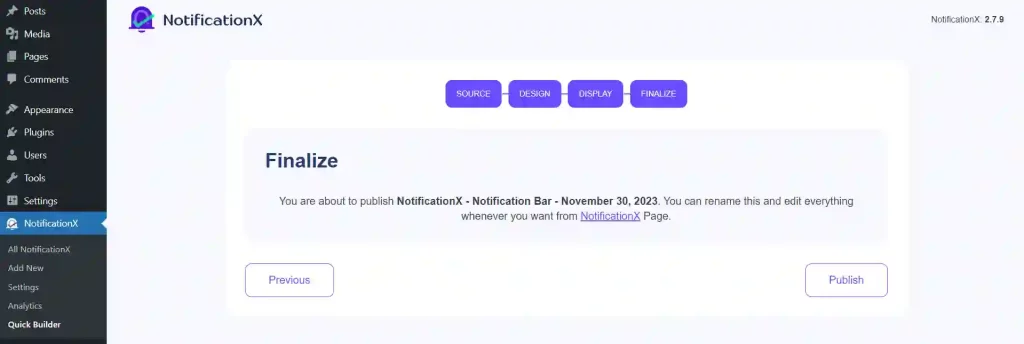
Save and publish after you’ve personalized the WordPress sales notification bar.
Follow this guide and incorporate a sales notifying bar on your WordPress site using the Notification X app to advertise your promotions as well as direct personalized notices to visitors.
In Summary
The sale notification banner is a handy tool you can use to give your WordPress website a facelift and new functionalities. Therefore, make the most of this powerful yet straightforward feature and boost your WordPress website’s engagement and conversion rate. Impress your crowd by kicking off the ad with an eye-catching banner followed by an apt and appealing call to action.
If you like reading this blog, also read our step-by-step guide on How to Change the Login URL of WordPress for Added Security? (3 Easy Steps) and How to Create a WordPress Maintenance Plan? (3 Easy Steps).
Stuck Somewhere?
Connect With JustHyre
Hire WordPress Engineers for custom jobs like Website Customization, SEO Optimization, Clearing a Hacked Website, Installation & Configuration & more.
Connnect with JustHyre


0 Comments